To be fair, I have about 80% less sway since I put 40’ of perforated drainage pipe in each tank. But I still get excessive body lean going around long, sweeping corners.
That’s definitely on my to do list. I either haul 100 gallons or 350. Anywhere in between gets us sea sick.
Why dont you put a air ride on the truck that way you can balance truck I got the bolt on kit for under 300 still building truck but the theory is sound
I installed a firestone kit at the same time we were installing the flatbed.
https://www.amazon.com/gp/aw/d/B001FEOSJY/ref=ppx_yo_mob_b_inactive_ship_o0_img?ie=UTF8&psc=1
I would have a ridiculous amount of sag on this truck without it.
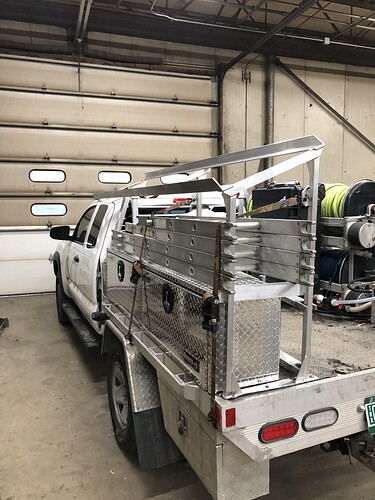
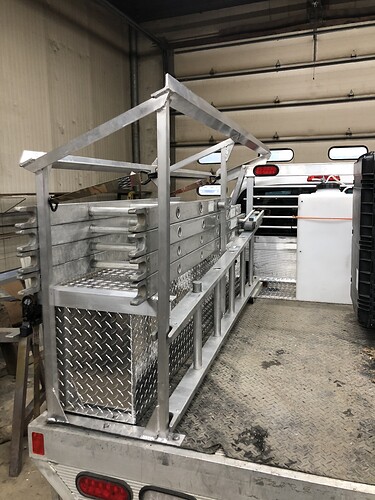
I like how you angled the ladder rack. Will make removing the ladder much easier. I made a couple that are similar to the type that go on one side of a truck bed but used them on my trailer. I haven’t decided if I’m going to make a complete ladder rack or just continue using the two “T” racks or whatever you want to call them. If I do I’m definitely going to angle them a bit like yours.
Thanks! It works out to be a very comfortable height, as well. It should be even easier to use than the ladder rack on my Scion.
Contemplating getting some ladder tie downs like these. Thinking they could mount on the underside of the angle aluminum? I’ve never used this type before.
Edit: think I found some I like better
I have them on my truck they work good
I use electrical wire to tie down my ladders on my trailer. It’s quick and you can tie down at multiple points.
I didn’t get what you meant at first with dropping the tanks. I see now! Neat!
Yeah, the plumbing for those is going to be fun.
They’ve got a guy there at the shop that does plastic welding. He’s going to take out the bulkhead fittings that are there and weld the holes shut (there’ll be no room for those fittings protruding from the sides of the tanks). When they fab the pan that’s going under the tanks, they’re going to die-cut two 4” holes so that I can install bulkheads on the bottoms for dump valves.
Everything else will be plumbed above the bed. My current plan is to use 1” x 1’ PVC nipples on the inside of the bulkheads to create draw tubes that reach the bottoms of the tanks. I’ll use a heat gun to bend the nipples into a smooth arc. (I am open to suggestions for other solutions for making the down-tubes)
The two tanks (buffer and pure water) are going to be plumbed together with ball valves between them, so that I have additional flexibility:
- Close buffer tank and open pure water: run pure water through the pressure washer for spot free rinse
- Open both valves, for either:
A. 110 gallons of buffer capacity for poorer water supplies (and no window cleaning anticipated)
B. (After thoroughly rinsing buffer tank) 110 gallons of pure water supply for larger window cleaning projects
Got the truck back today. I’d say I’m about 85% happy with how everything came out.
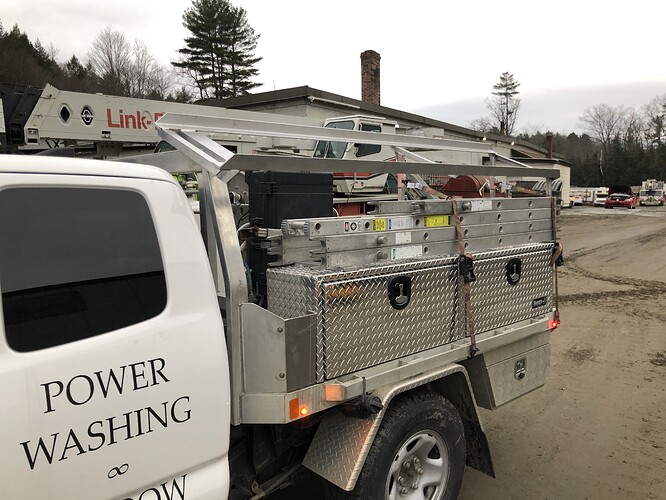
A couple pics:
I forgot to snap a pic of the pan for the tanks. That was the one part I’m kinda disappointed with. There were a couple different guys working on the truck, and whoever was responsible for the pan didn’t quite get the full picture, I think.
It’s only recessed about 5” instead of the full 8” that were available. It’s entirely suspended on three sides by about 1” of overlap on the bed. There’s an ample support structure of angle steel below the pan that was left un-utilized. There are two small welds at the front outside edges of the pan that are going to be supporting a lot of weight. I asked the lead guy a couple of times during the process and while I was looking it over today, “So this should be good for 900 lbs of water weight, right?” He seemed confident. I guess time will tell.
But overall, much better fab work than the monkeys who built the bed at the Aluma factory.
Oh, almost forgot to post the figures. Haven’t gotten the invoice yet, but his quick calculation on the labor portion came to $1,800 and some change ![]()
Do you change tires/wheels for winter ?
Yeah. Those steelies were an awesome Craigslist find. $100 for the set. Got the snows last winter.
A truck washers eye candy. shiny,polished, Aluminum boxes. looking very dapper Mr @Infinity .
Now just to fill them 
And for the sharp-eyed window cleaners among us: the only reason the base section of that sectional isn’t riding on top of the box with the rest of the ladder, is because I had to pick up my snowblower from the repair shop and the leveler leg would’ve gotten in the way.
The big black pelican-style box will be coming off for the winter, and will get replaced with something much more sleek in the spring.
Btw, @SchertzServicesLLC or anyone else know of a vertical, kinda flat weather resistant box that could hold two 12v pumps and some circuitry (PWM controllers and a fuse block)?
The pressure washer will also be going into winter storage in the next week or two.
This was the first Schertz box prototype. @Racer said he could have mounted a trolling motor too it and gone fishing.
Dying ![]()
Installed my Orange Virus Tune last night. Only took a 5 minute test drive with it, but the difference is night and day.
The one area of complaint that many Tacoma owners have about these trucks is the transmission behavior, throttle response, and power band. The behavior gets even worse when you start loading the truck down the way I’m doing. OVTune fixes all of that. It’s not cheap, but it’s the only real option out there.
Juicy technical info:
https://www.ovtuned.com/blogs/news/2gr-fks-toyota-tacoma-bringing-new-life-to-the-tacoma-platform
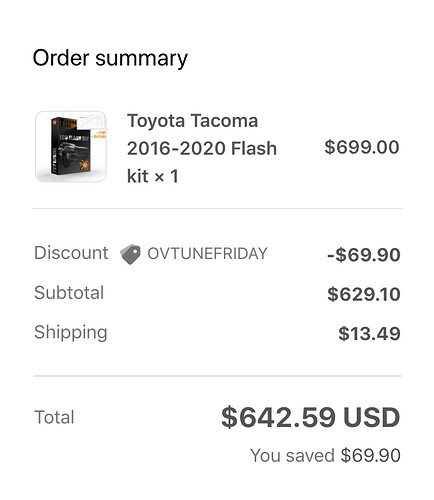
On sale (10% off for Black Friday) the total came to $642.59 with shipping.
(I’m starting to regret my offer of full transparency on all the costs associated with this build ![]()
![]() )
)
A small ‘upside’ to the cost aspect: apparently, if you have a friend who has the kit already, you can contact the company and just purchase a software license for around $325. That’s what Ruben is looking into right now for his Tacoma.
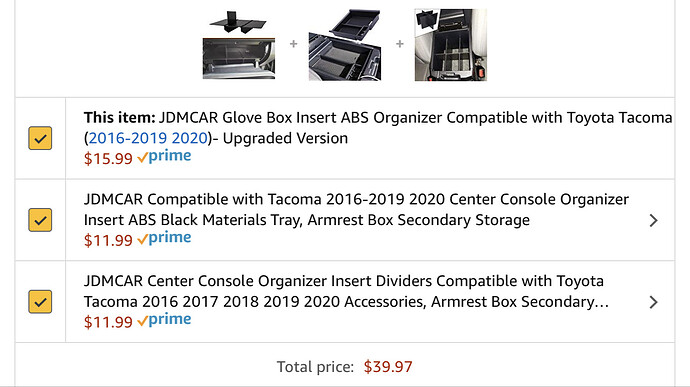
Also installed the JDMcar organizers for the glovebox and center console. Truck should’ve come with these already, tbh.
