I also put a 3 way valve ahead of mine so I can flush it out after every job. Do that for sure
Joe
1 Like
I have been thinking about getting two solenoid valves, one N/O, the other N/C.
Have the normally open one on my fresh water line, and the normally closed going to my soap tank. Then plumb them into a tee going to my injector.
Wire the two solenoids on the same remote, so when the soap valve closes, the water valve opens. Voila! Rinse out the injector every time you cut off the soap.
1 Like
That is an interesting idea. The old remote I had actually had two channels and “a” and a “b” so you could do one at a time with the same remote
You wouldn’t even need the two channels. Wire the two solenoids in parallel, and when voltage is applied, one will be open, and the other closed. When voltage is removed, the opposite will be true.
That wouldn’t allow you to rinse the soap solenoid though would it? That also needs to be rinsed, unless you pull the soap line to fresh water at the end. Mine is plumbed to the soap tank permanently
1 Like
unless I am picturing it wrong
Oooh, good point. Had not thought of that.
You could plumb in a 3 way valve before the soap solenoid, so you could rinse that out at the end of the day.
But, yeah, I guess it’s just complicating things, without actually saving you any time or thinking, really.
Your fresh water solenoid is likely to last a lot longer than the bleach one, so for an extra $10, doesn’t seem like it would hurt to have them plumbed together this way… 
Yea I thought this set up would be really troublesome and prone to break down. But mine has really lasted well. It saves me so much back and forth and it is nice when you just need soap for a few seconds to hit a spot again. For the small cost I really like it. I like to tinker and try new things so I have to resist the urge to keep building new ideas. We have been WFP a big commercial job the last week and I set up a 100gal tank in the back of my truck with a 2gpm pump and DI tank so I could run around and clean windows. That was fun too. I am already working on improvements lol
3 Likes
What we need, is a cheap to buy, but bulletproof chemical solenoid. Full PVC internals & Kalrez seals. Then we wouldn’t need to rinse it out 
1 Like
We sell these at traxtor supply. If you lived close i could get ya 15% off😉
3 Likes
Anyone have an idea why these two products are not working together. The wireless remote works on my garage door, and the solenoid works when hooked up directly to 12v but they wont work together. I’m not an electrician or anything close so any suggestions? thanks
I helped a fella with this months ago. It’s likely you don’t have it wired right.
I’m interested to see the grills you make.
I’m thinking it’s not pulling enough amps. I ordered one with a higher rating. I hooked up my garage door with the same configuration and it worked fine.
12v battery - to - port
12v battery + to + port
Solenoid to to com
Solenoid to no(tried nc as well)
I also tried an alternative wiring bc I seen a YouTube video of a guy wiring his like this.
12v battery + to + port
12v battery + to com port
12v battery - to - port
Solenoid to com port
Solenoid to no/nc
Just based off of having the garage door successfully remote controlled I concluded it wasn’t compatible for another reason.
If you have any advice I’d greatly appreciate it. If you can’t follow my wiring talk I can send pictures or videos if that helps.

So I assume you have to run a jumper wire from the hot side of your box to each jump in your controller?
I bought a 1ch plug and play for simplicity purposes. Here is the one I have.
https://www.amazon.com/gp/product/B0771KYV1F/ref=oh_aui_detailpage_o00_s00?ie=UTF8&psc=1
I can’t see why a garage door with two wires, and same scheme works while the solenoid doesn’t. Complete circuit = open, and vice versa
1 Like
Yes, that’s the second setup I described where I spliced the positive coming from the battery. One to power the board, and the other in com channel 1. It’s only one channel. No/com/nc
Ok ground on valve to ground on battery
Ground on controller to ground on battery
Positive from battery to positive in controller
Jumper wire from positive to com
Wire from NC to positive side of valve.
Also try switching the ground and hot at the valve. I seem to remember mine was backwards at the valve? Too dark and rainy to go look lol
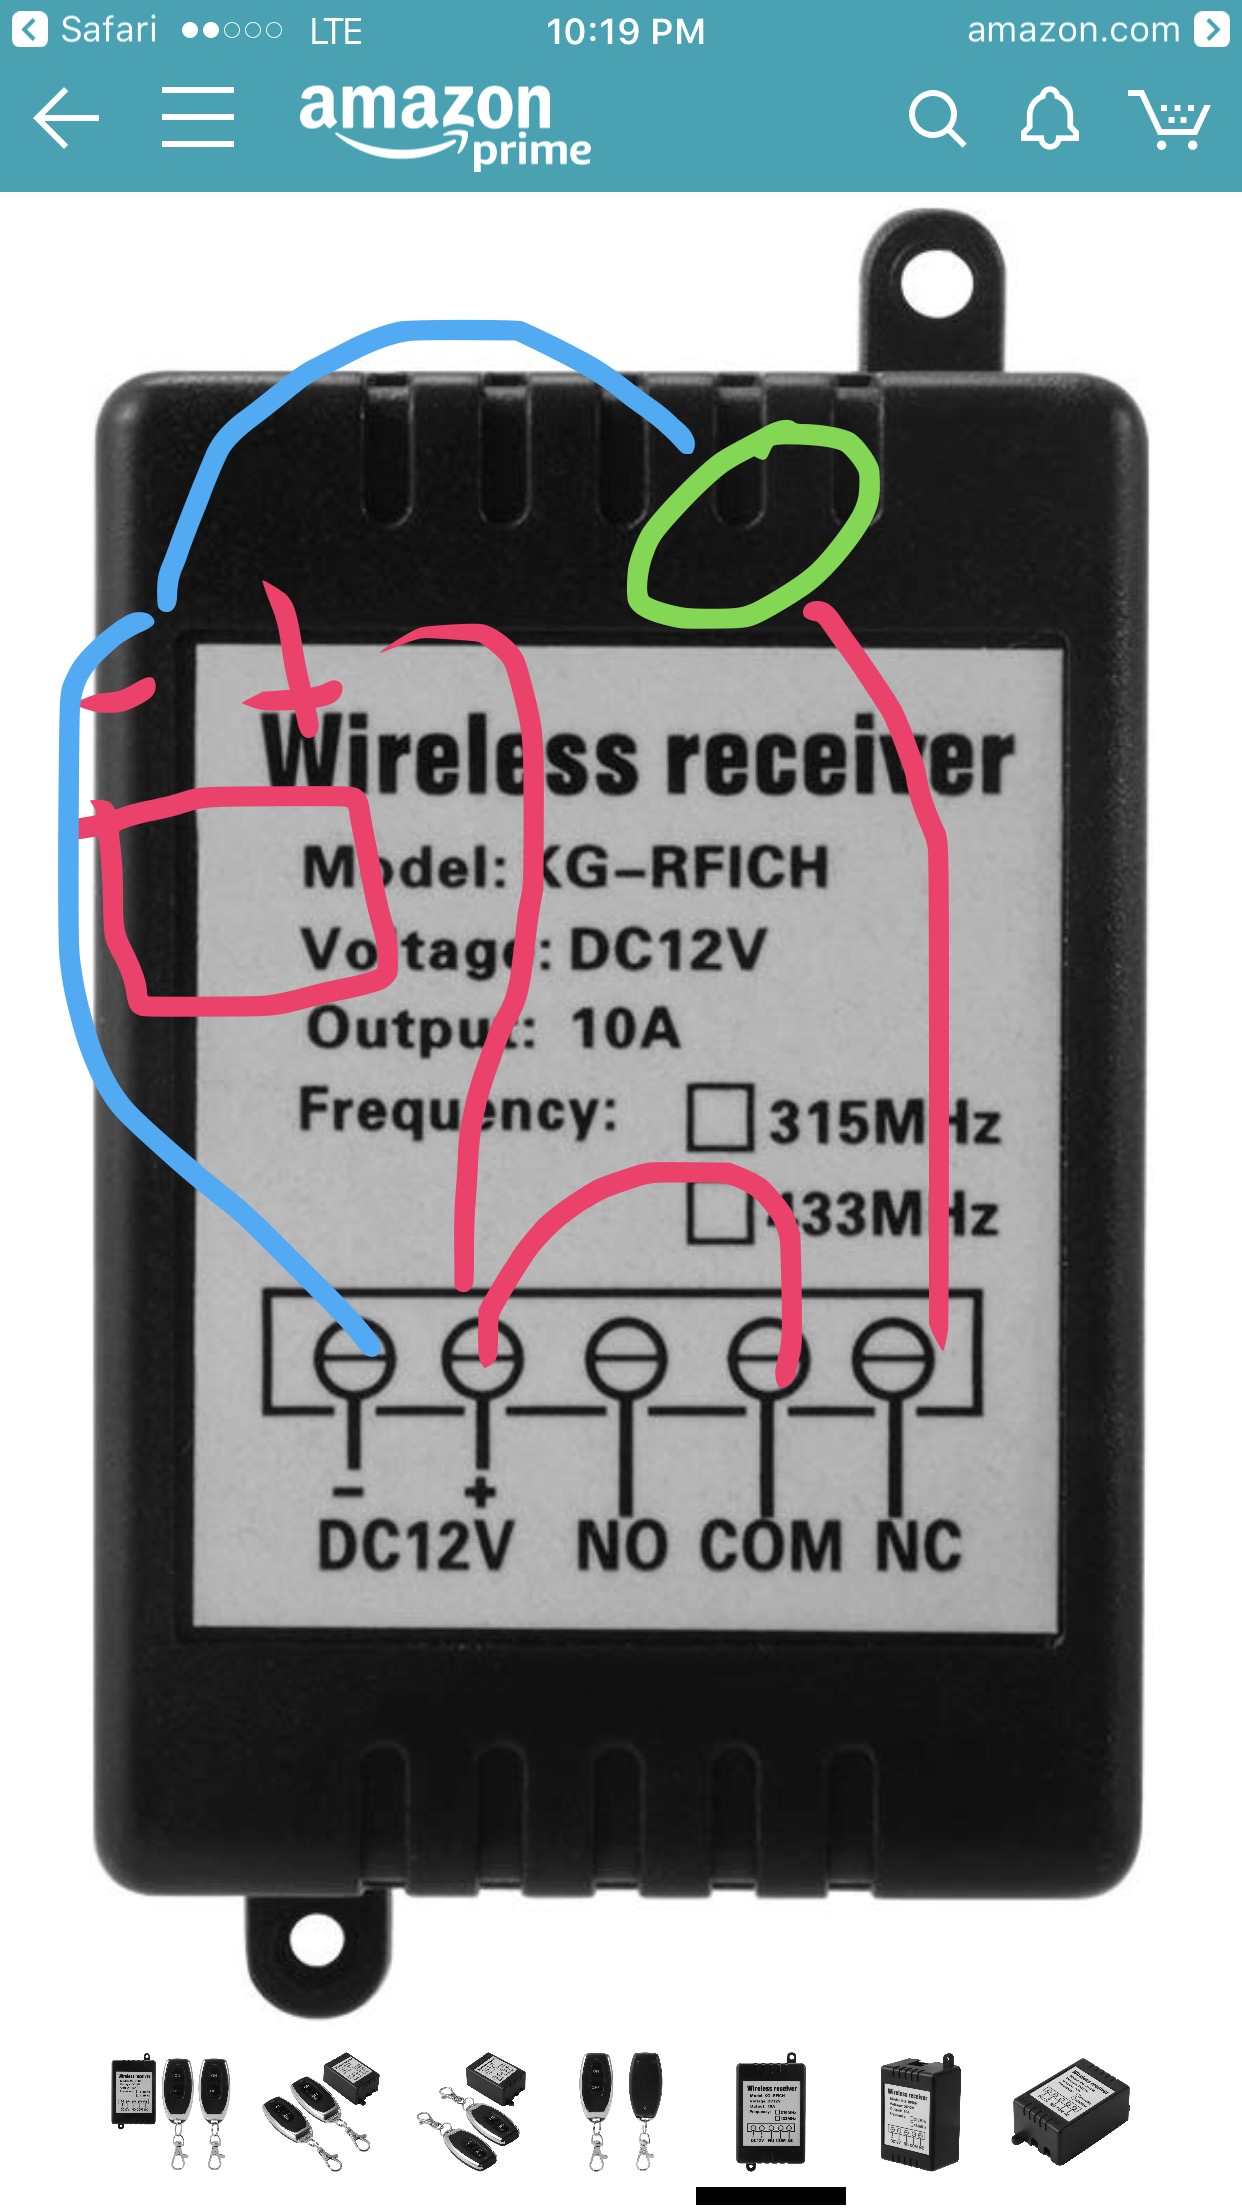
2 Likes
Red square represents battery and green circle represents solenoid valve
2 Likes