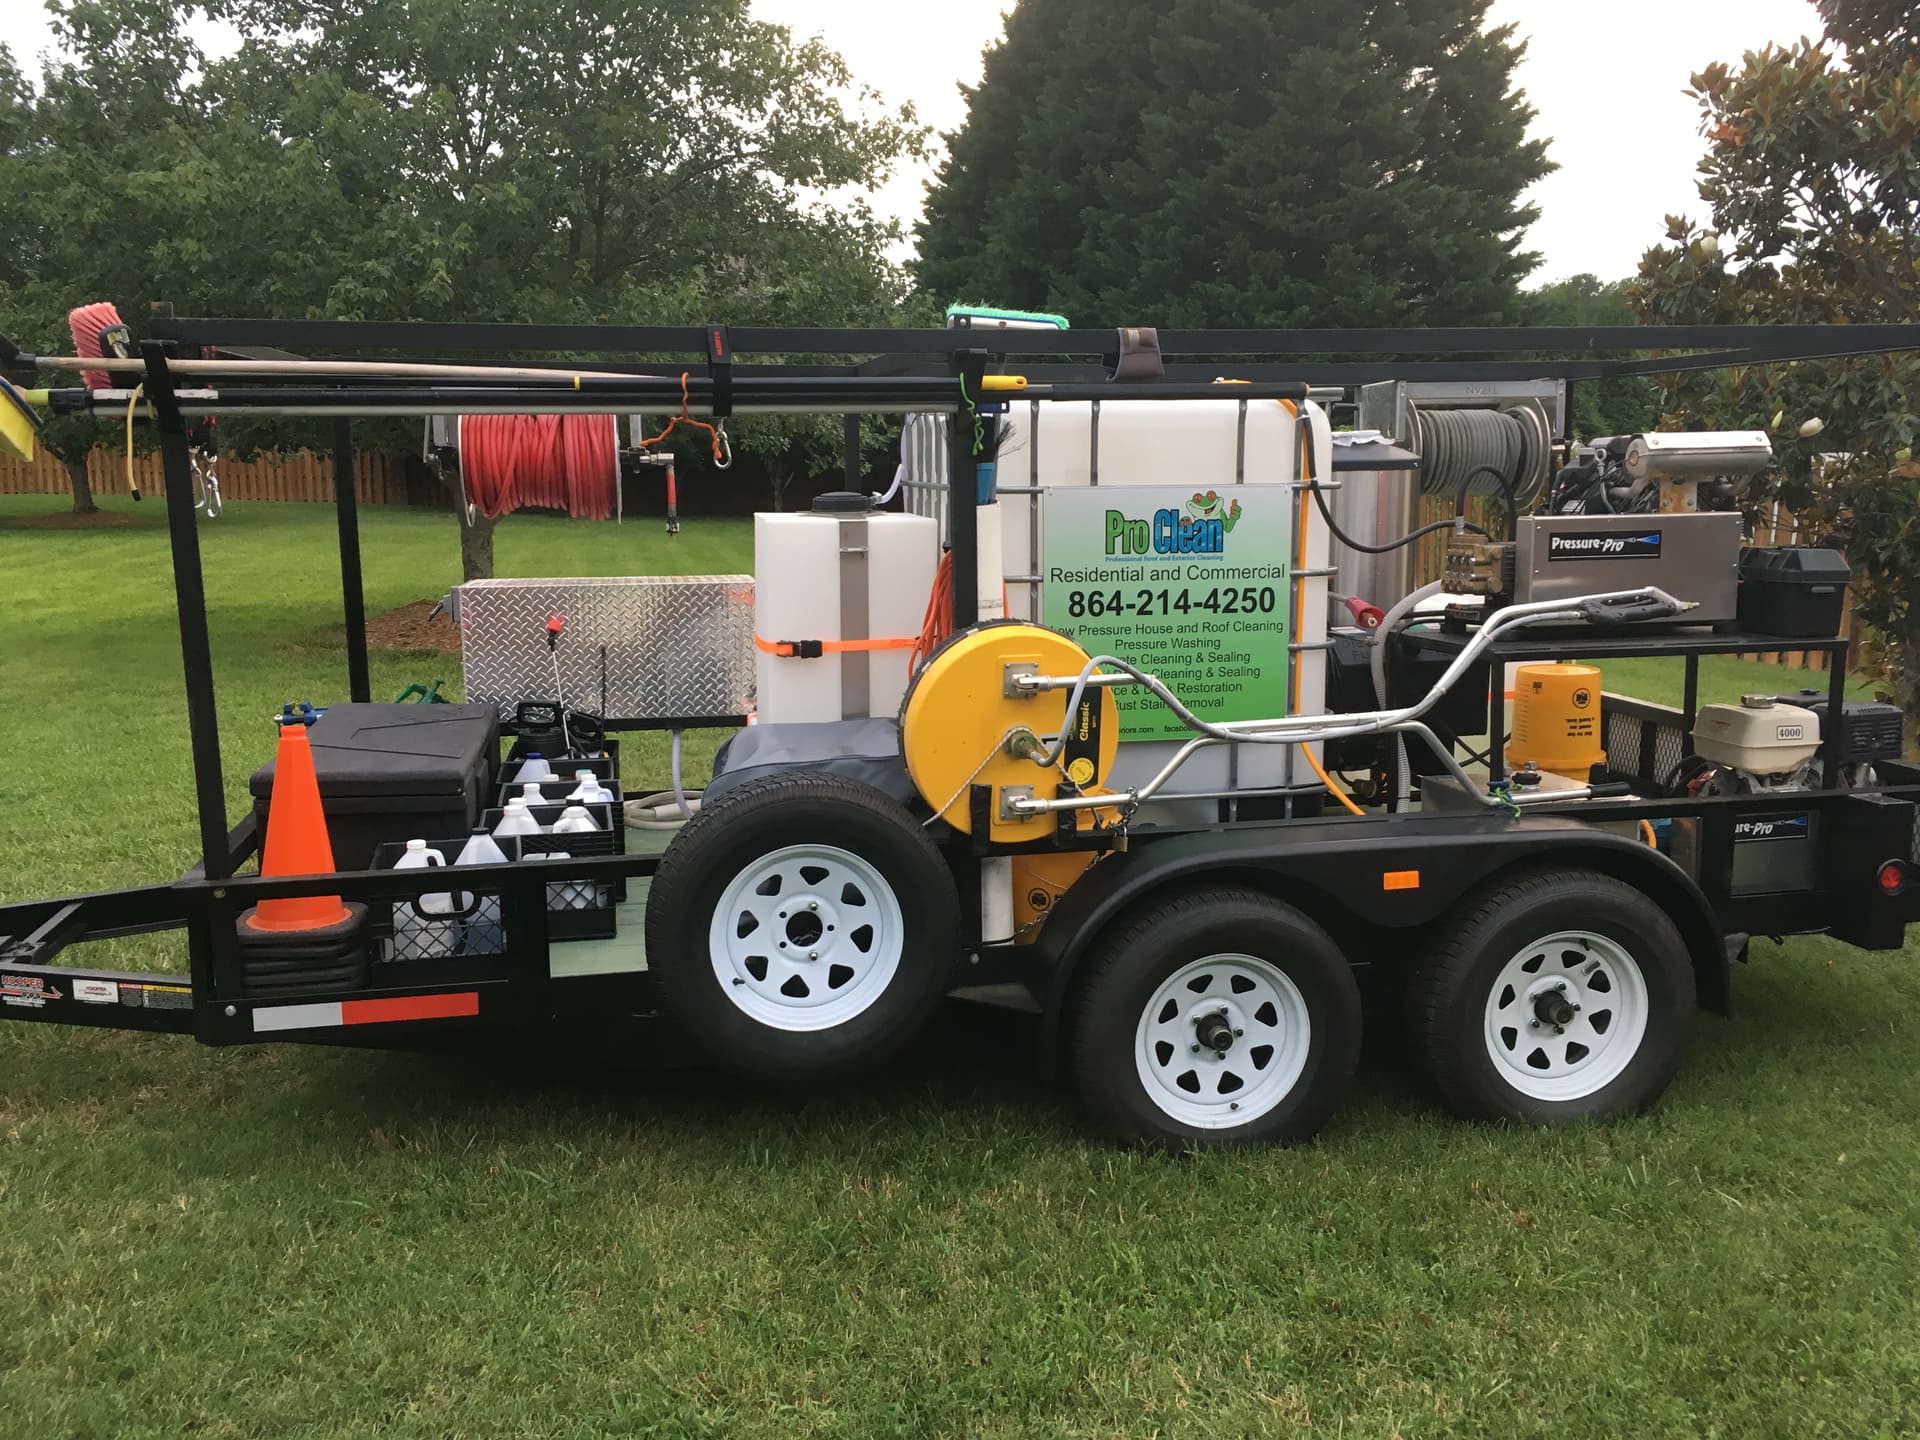
Guys, it’s been a while. I joined here in 2018/19 and learned from all of you! You gave me the foundation I needed to start a successful exterior cleaning business that finally crossed over to 6 figured last year doing this still part time due to my active military service.
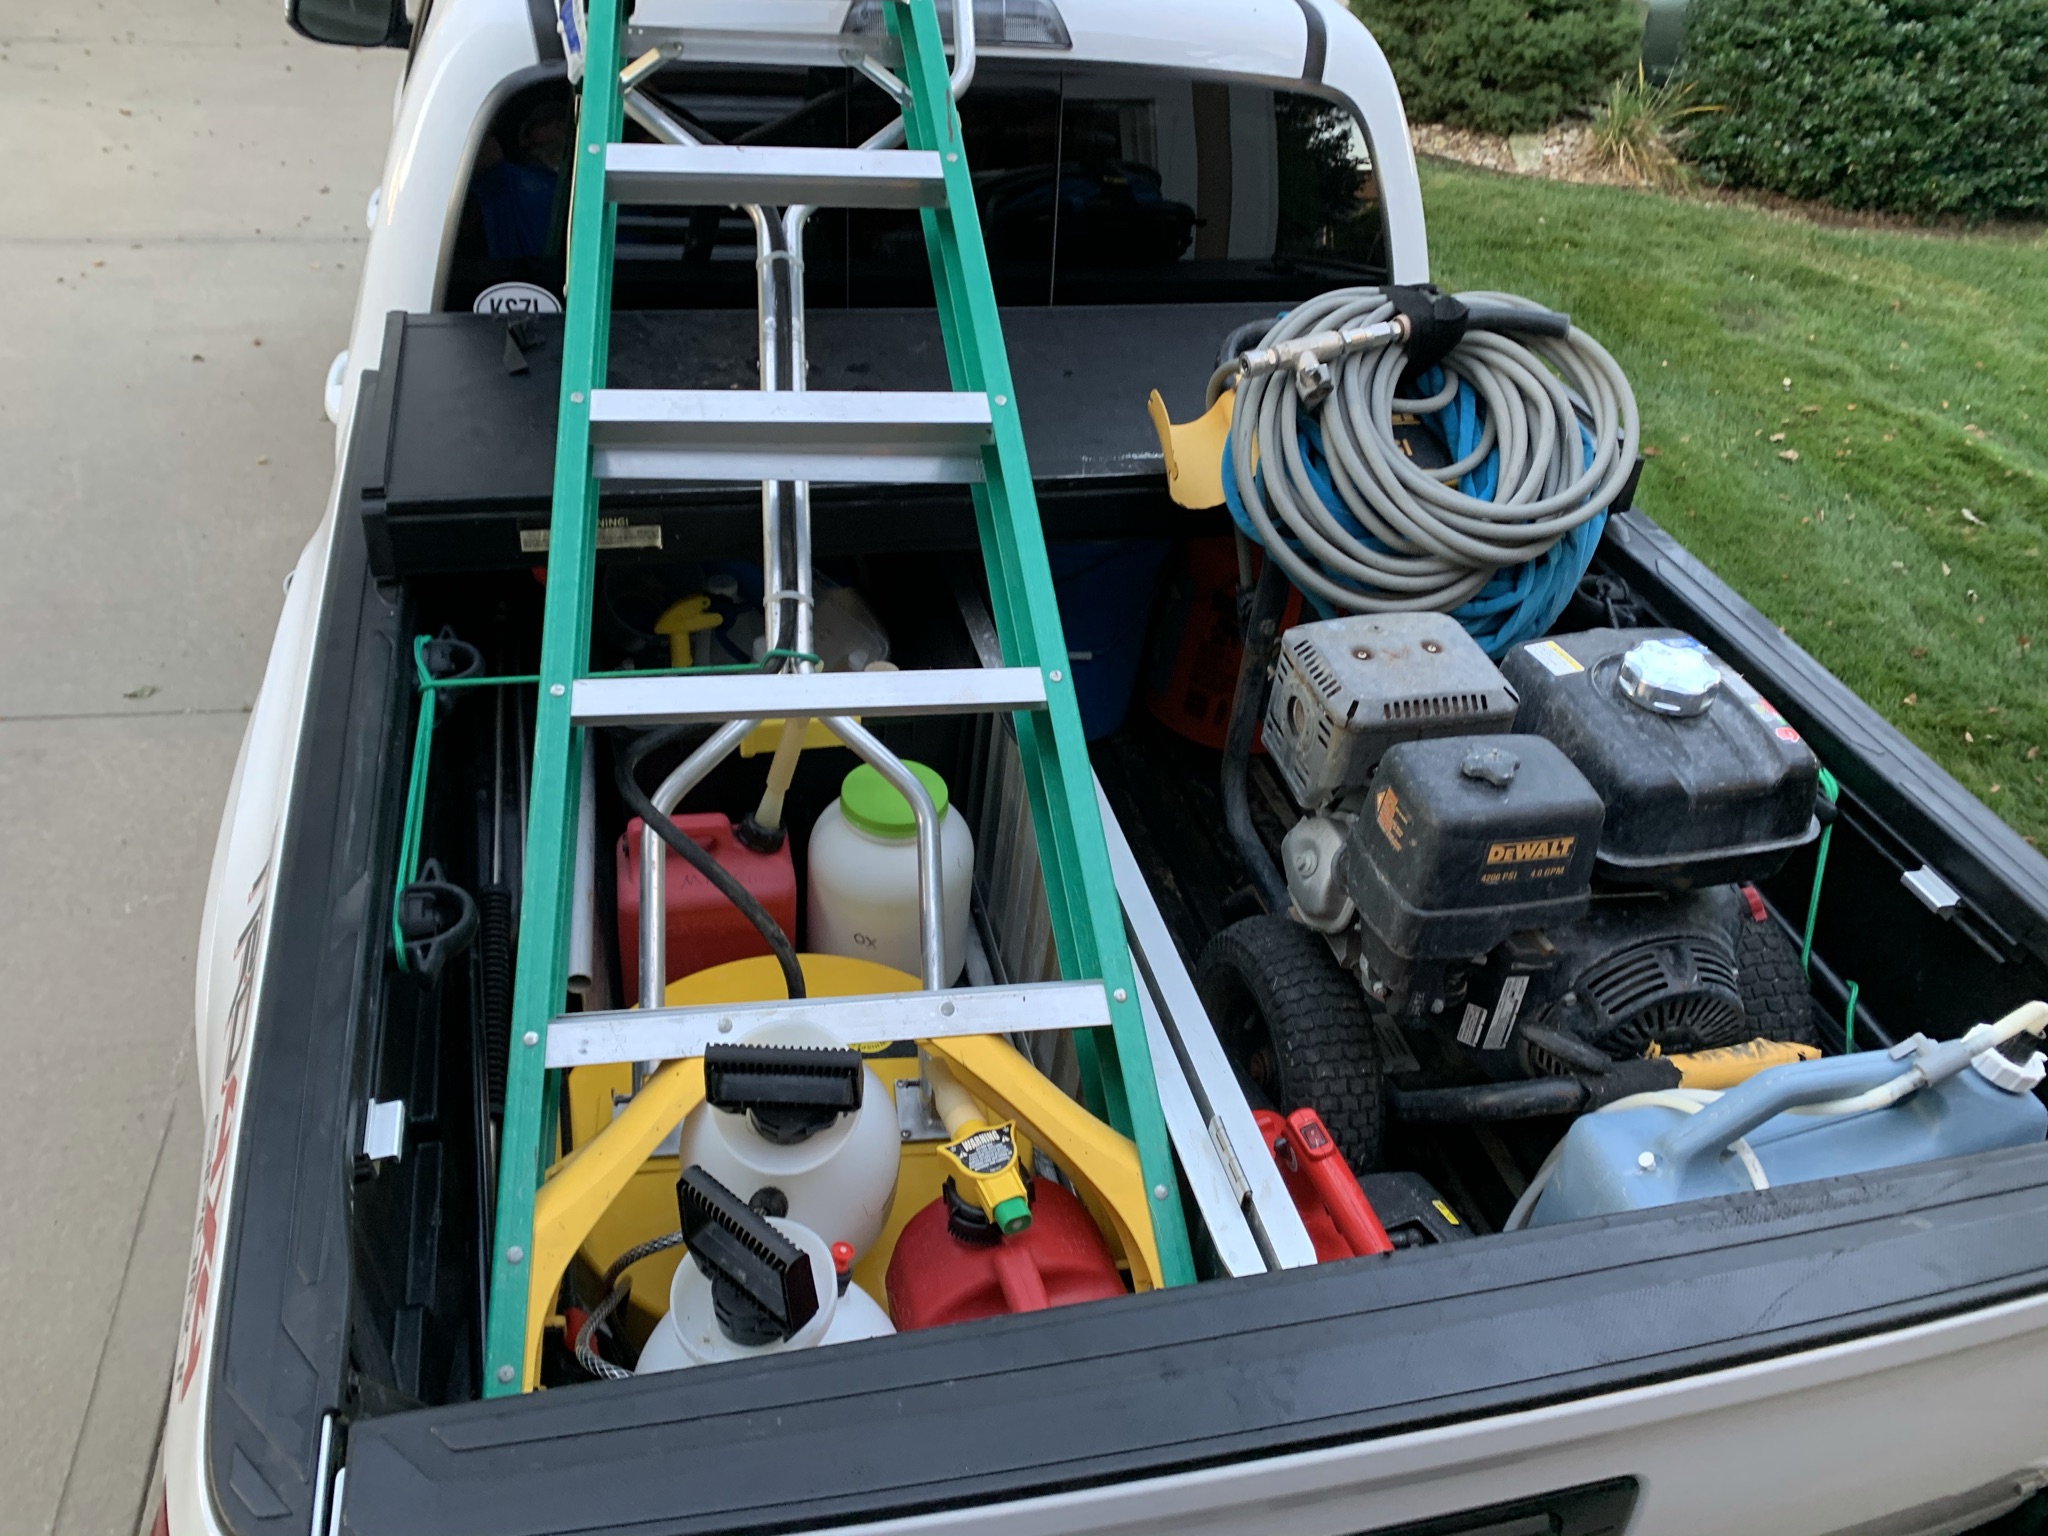
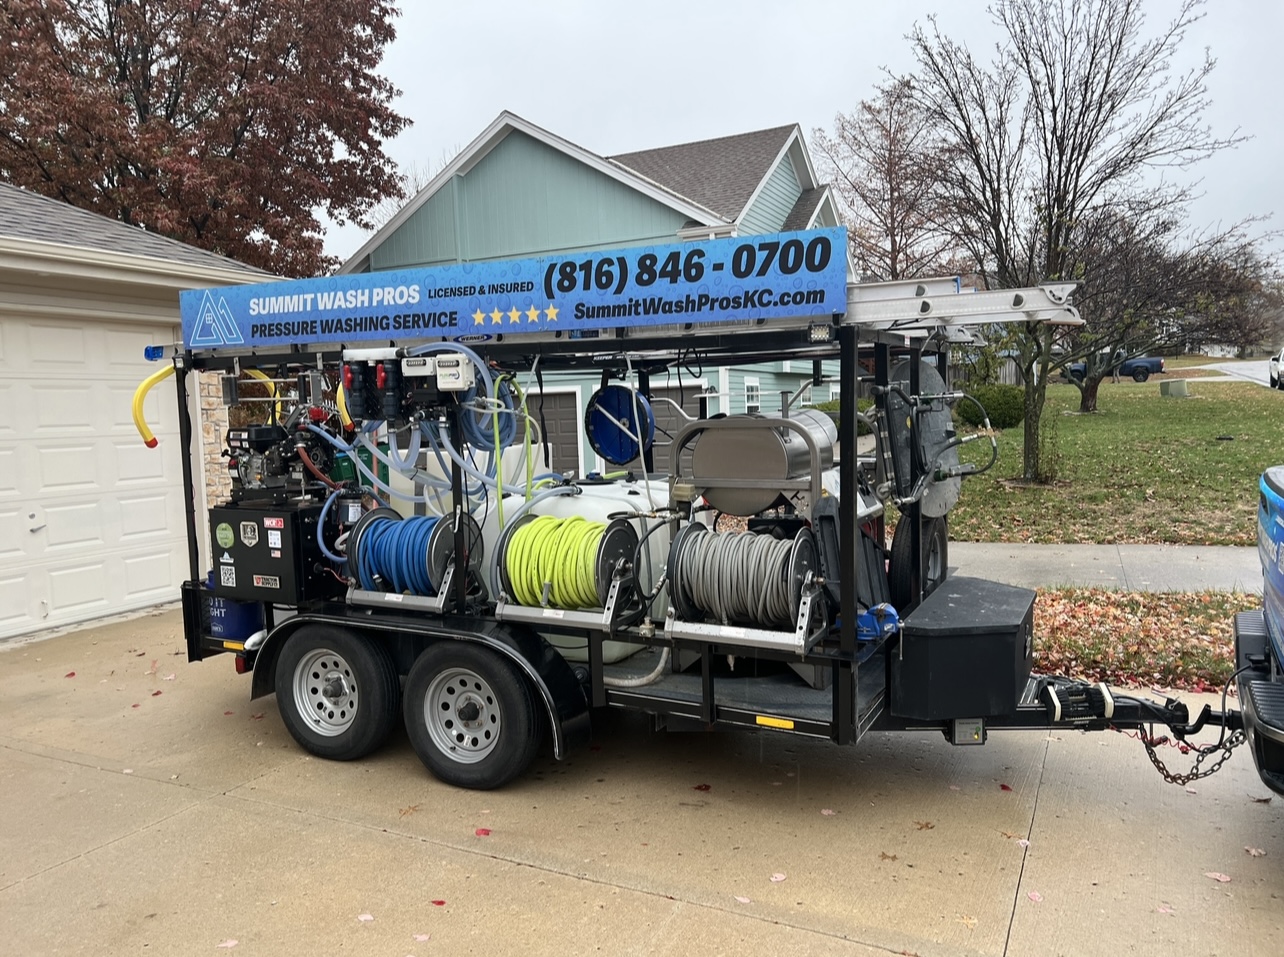
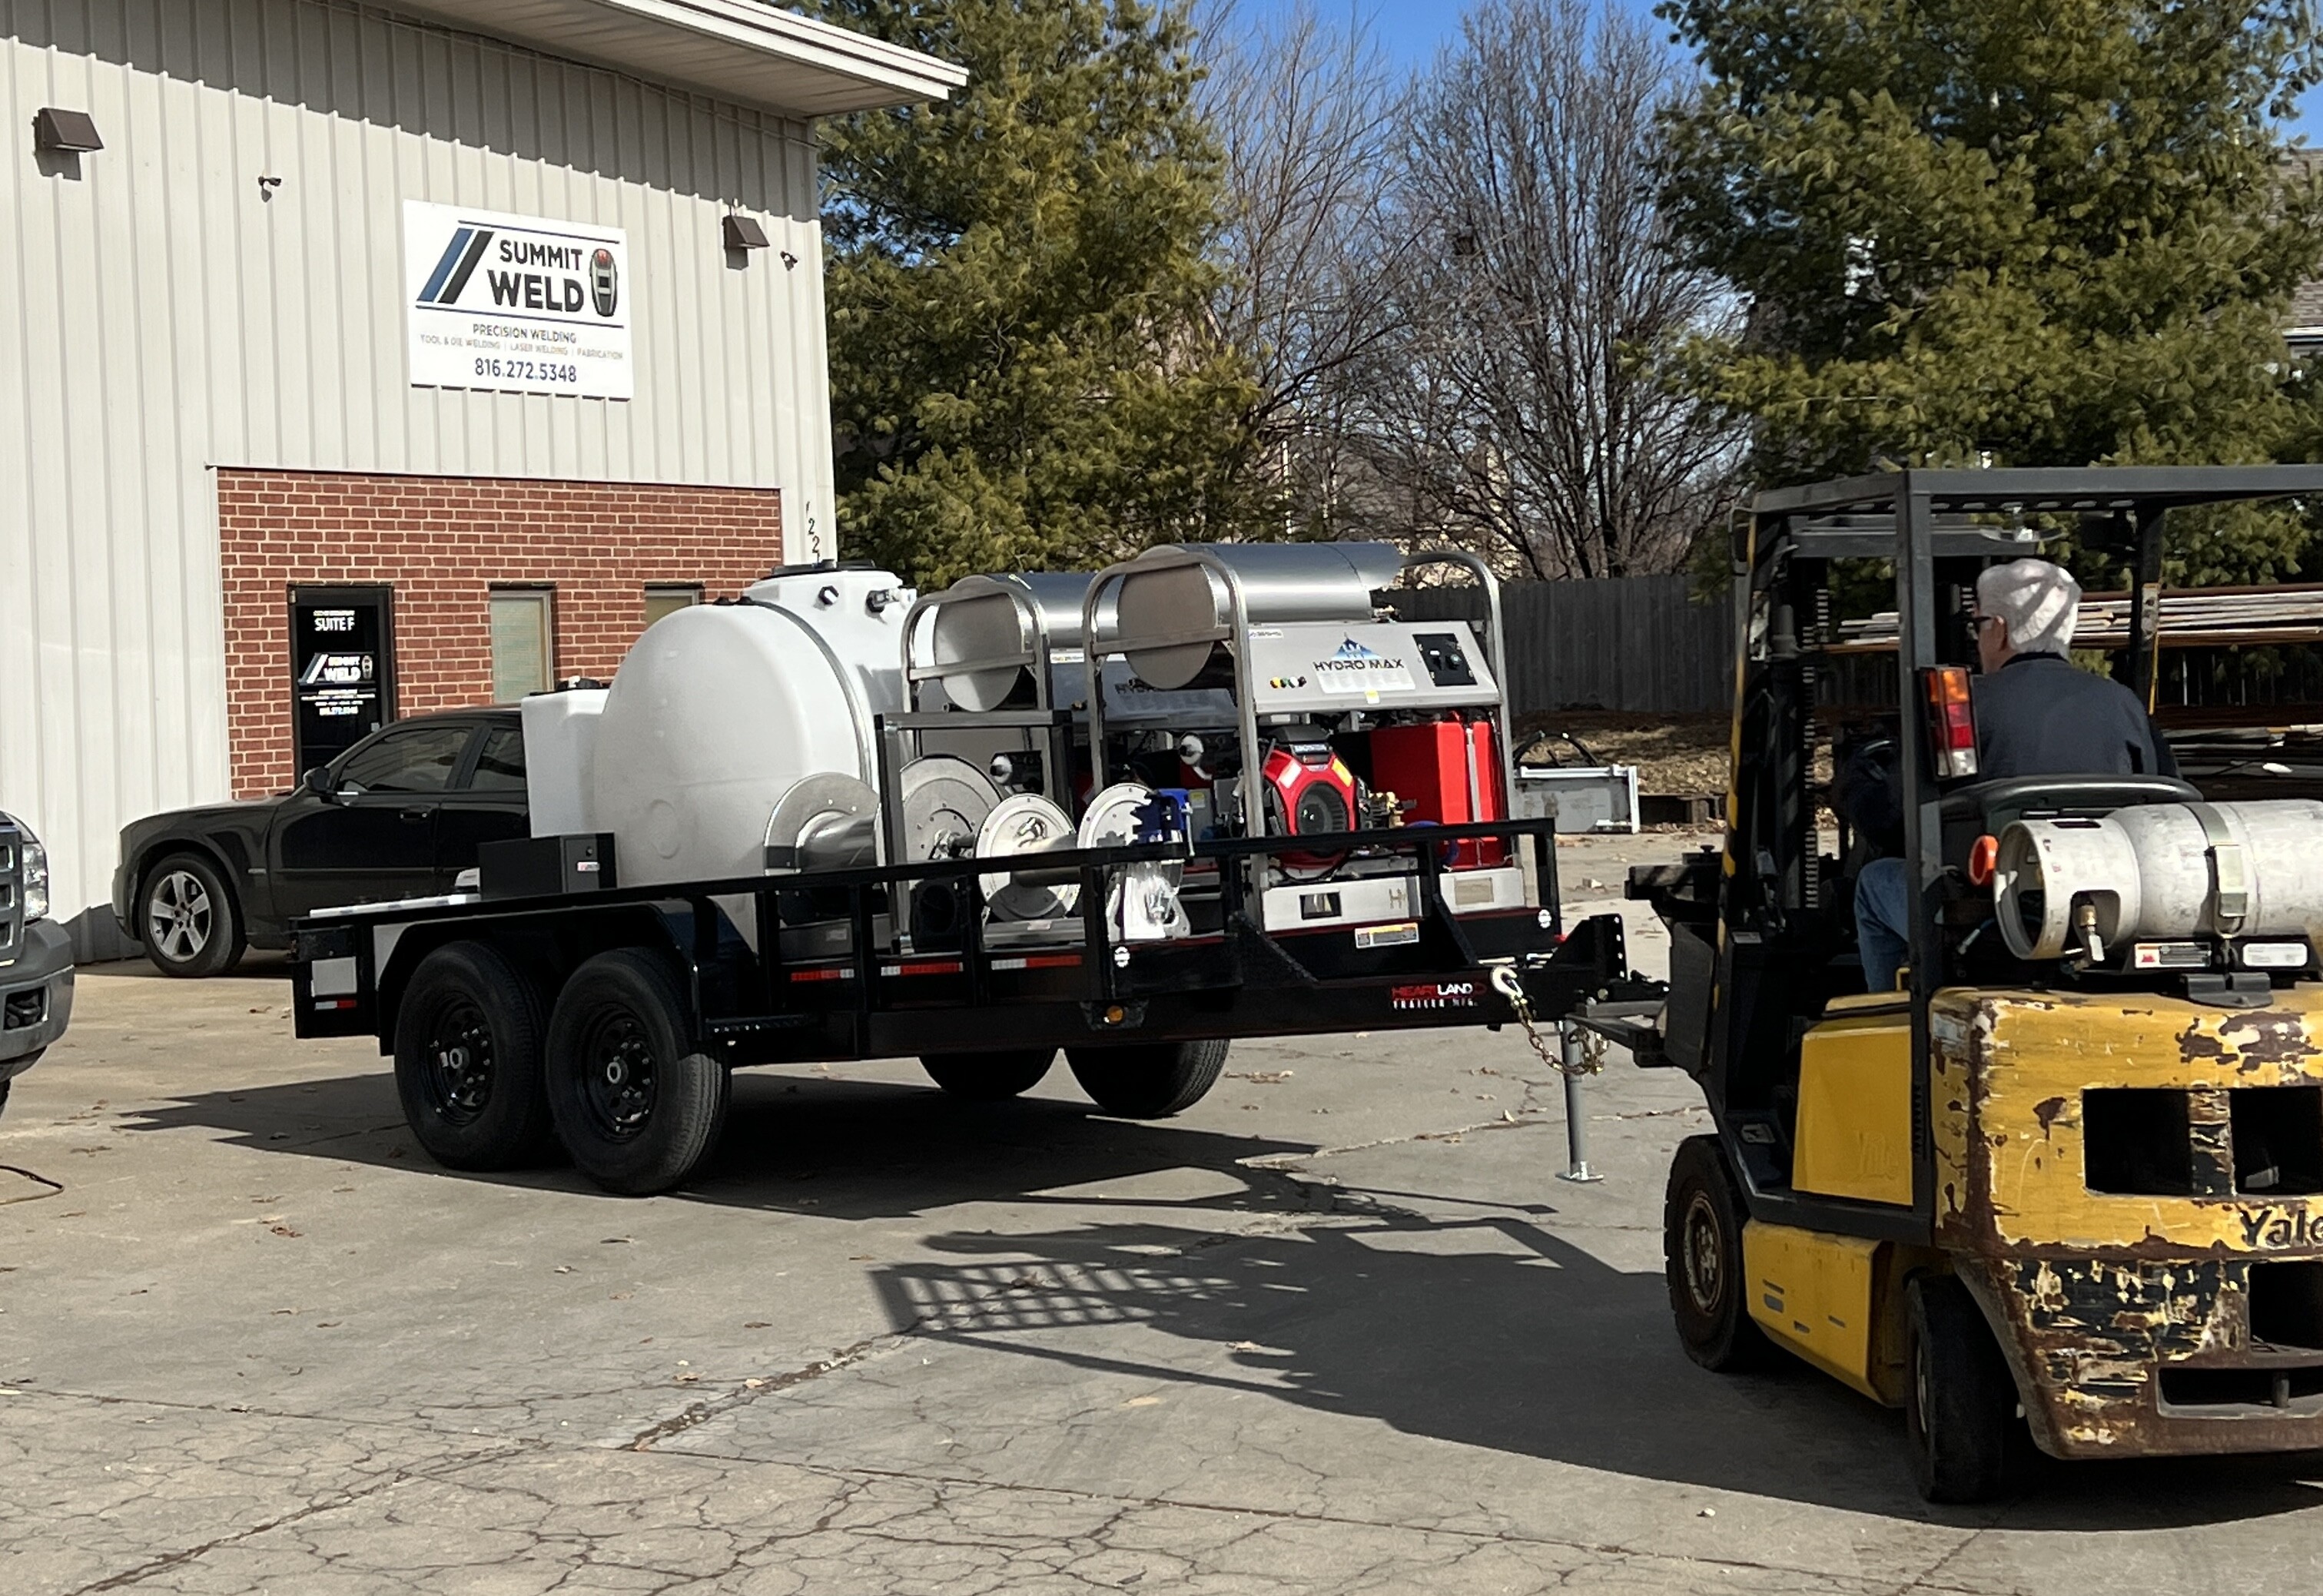
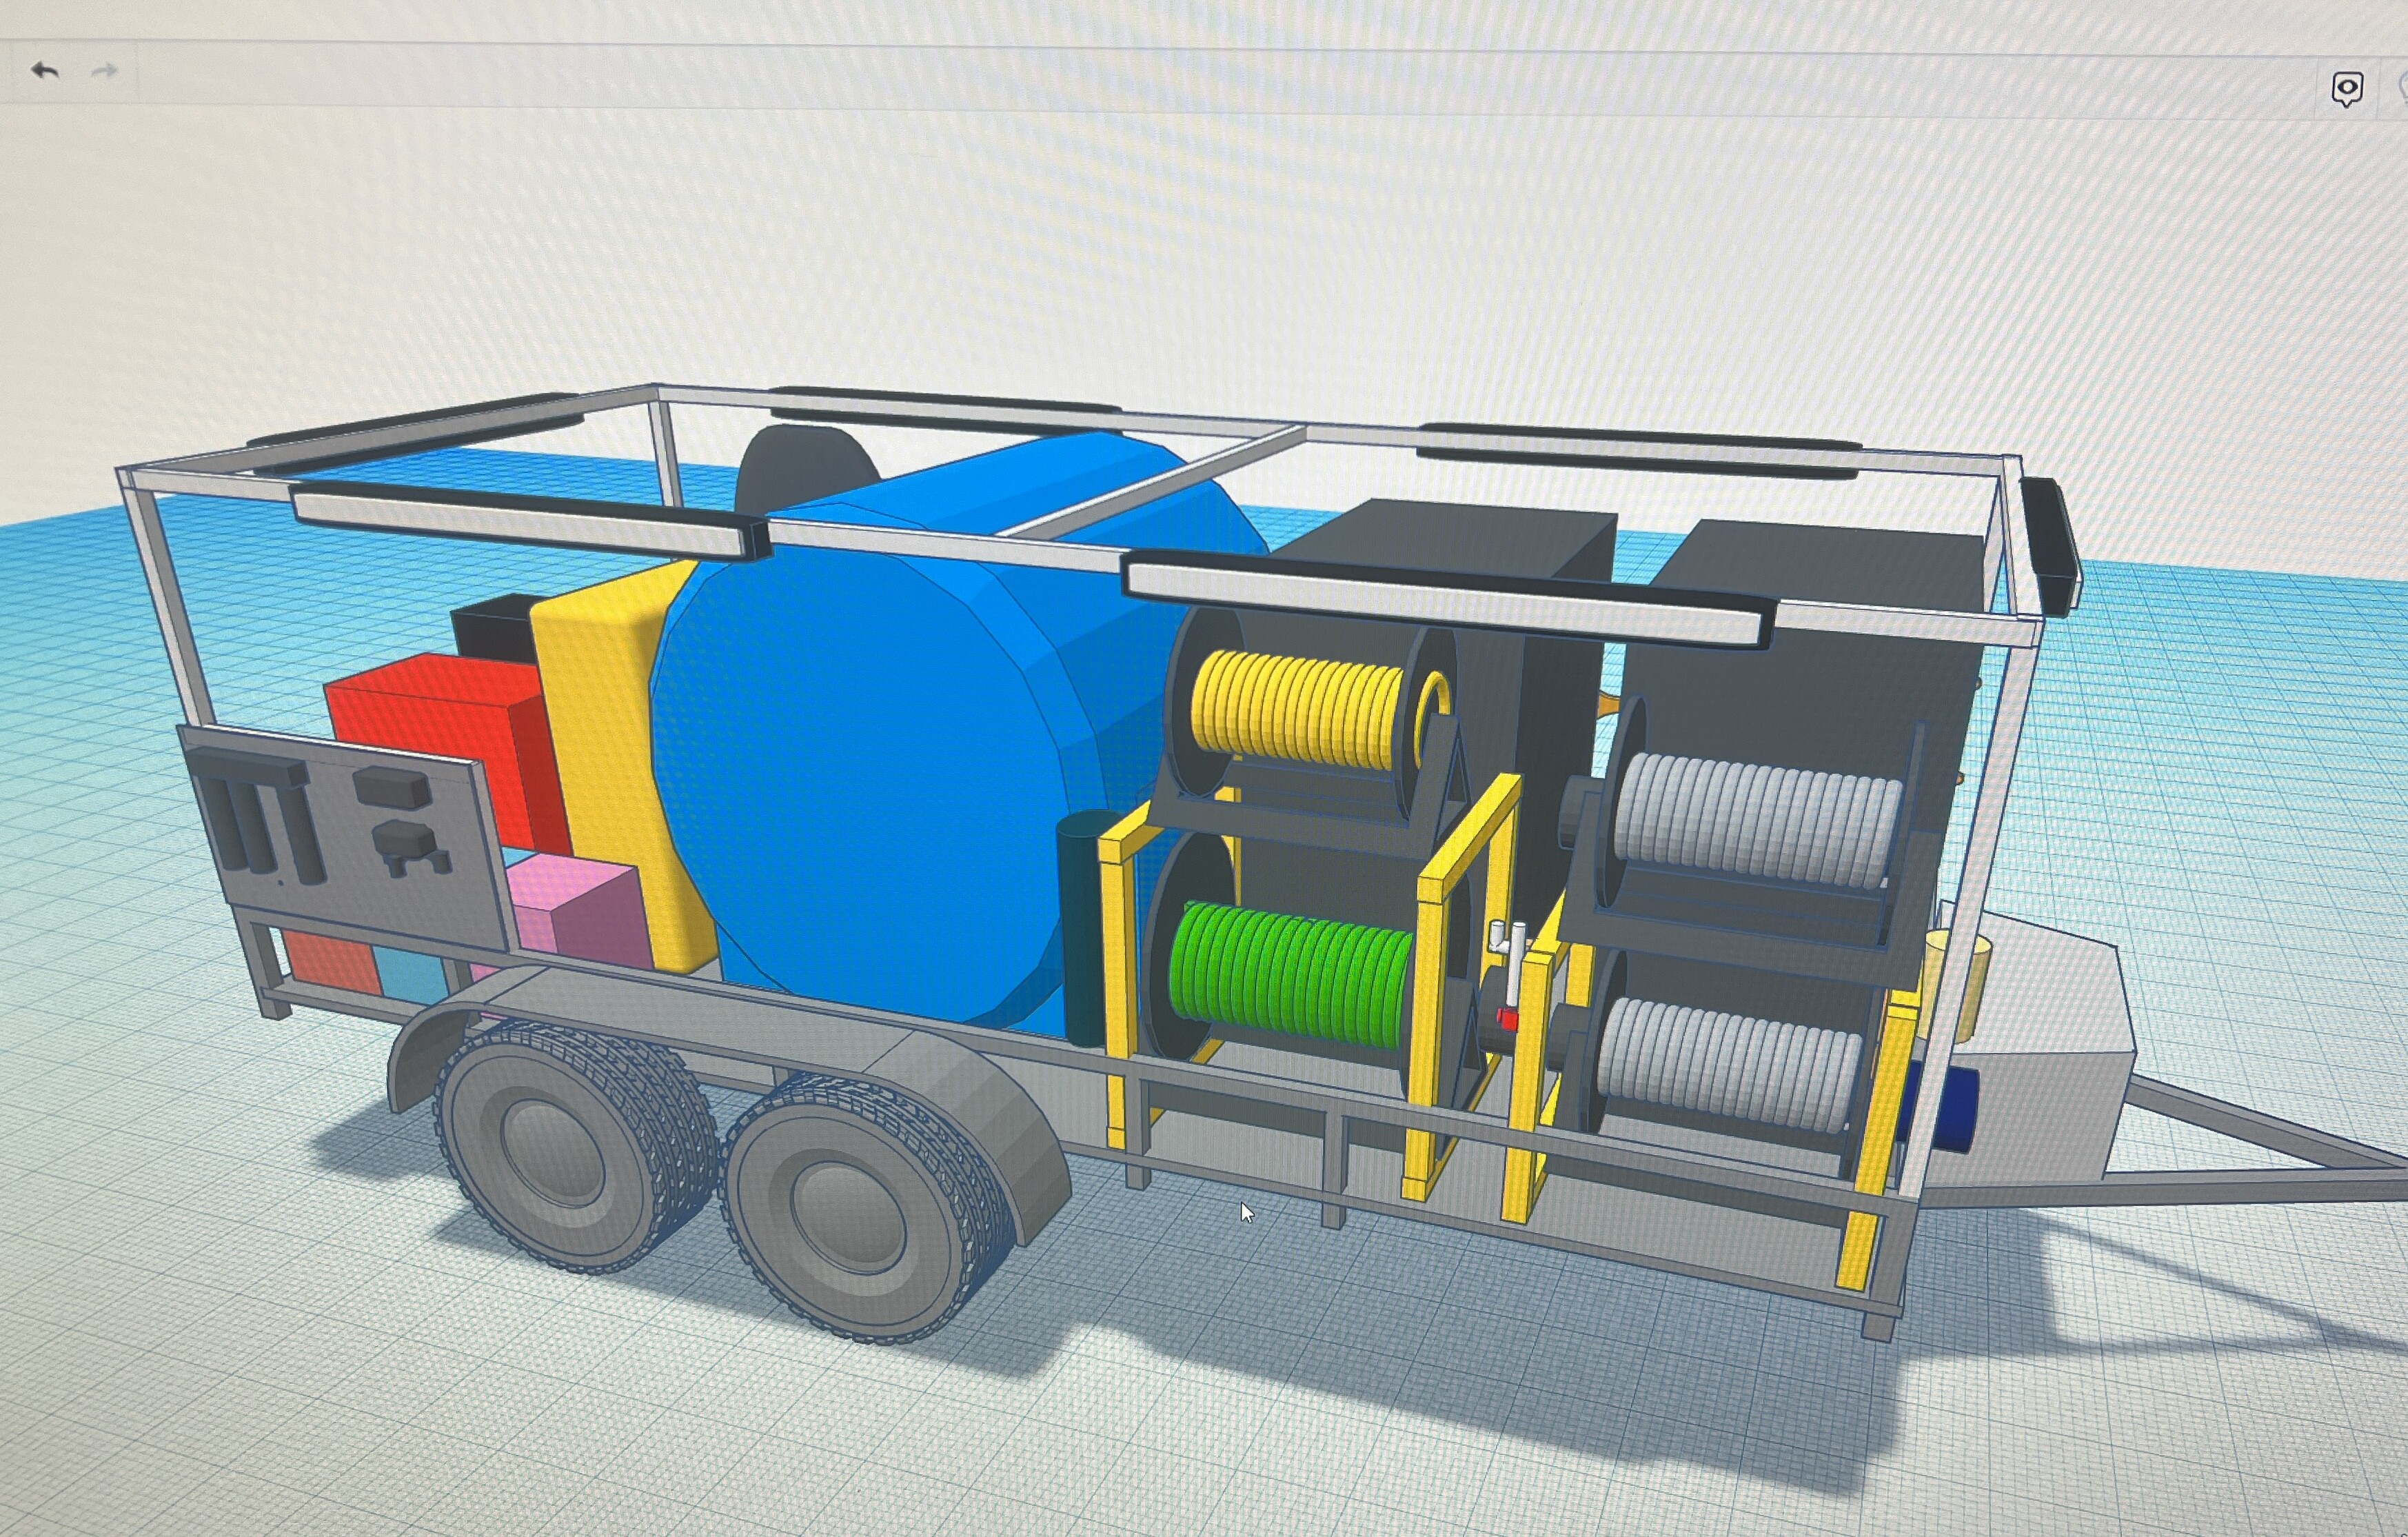
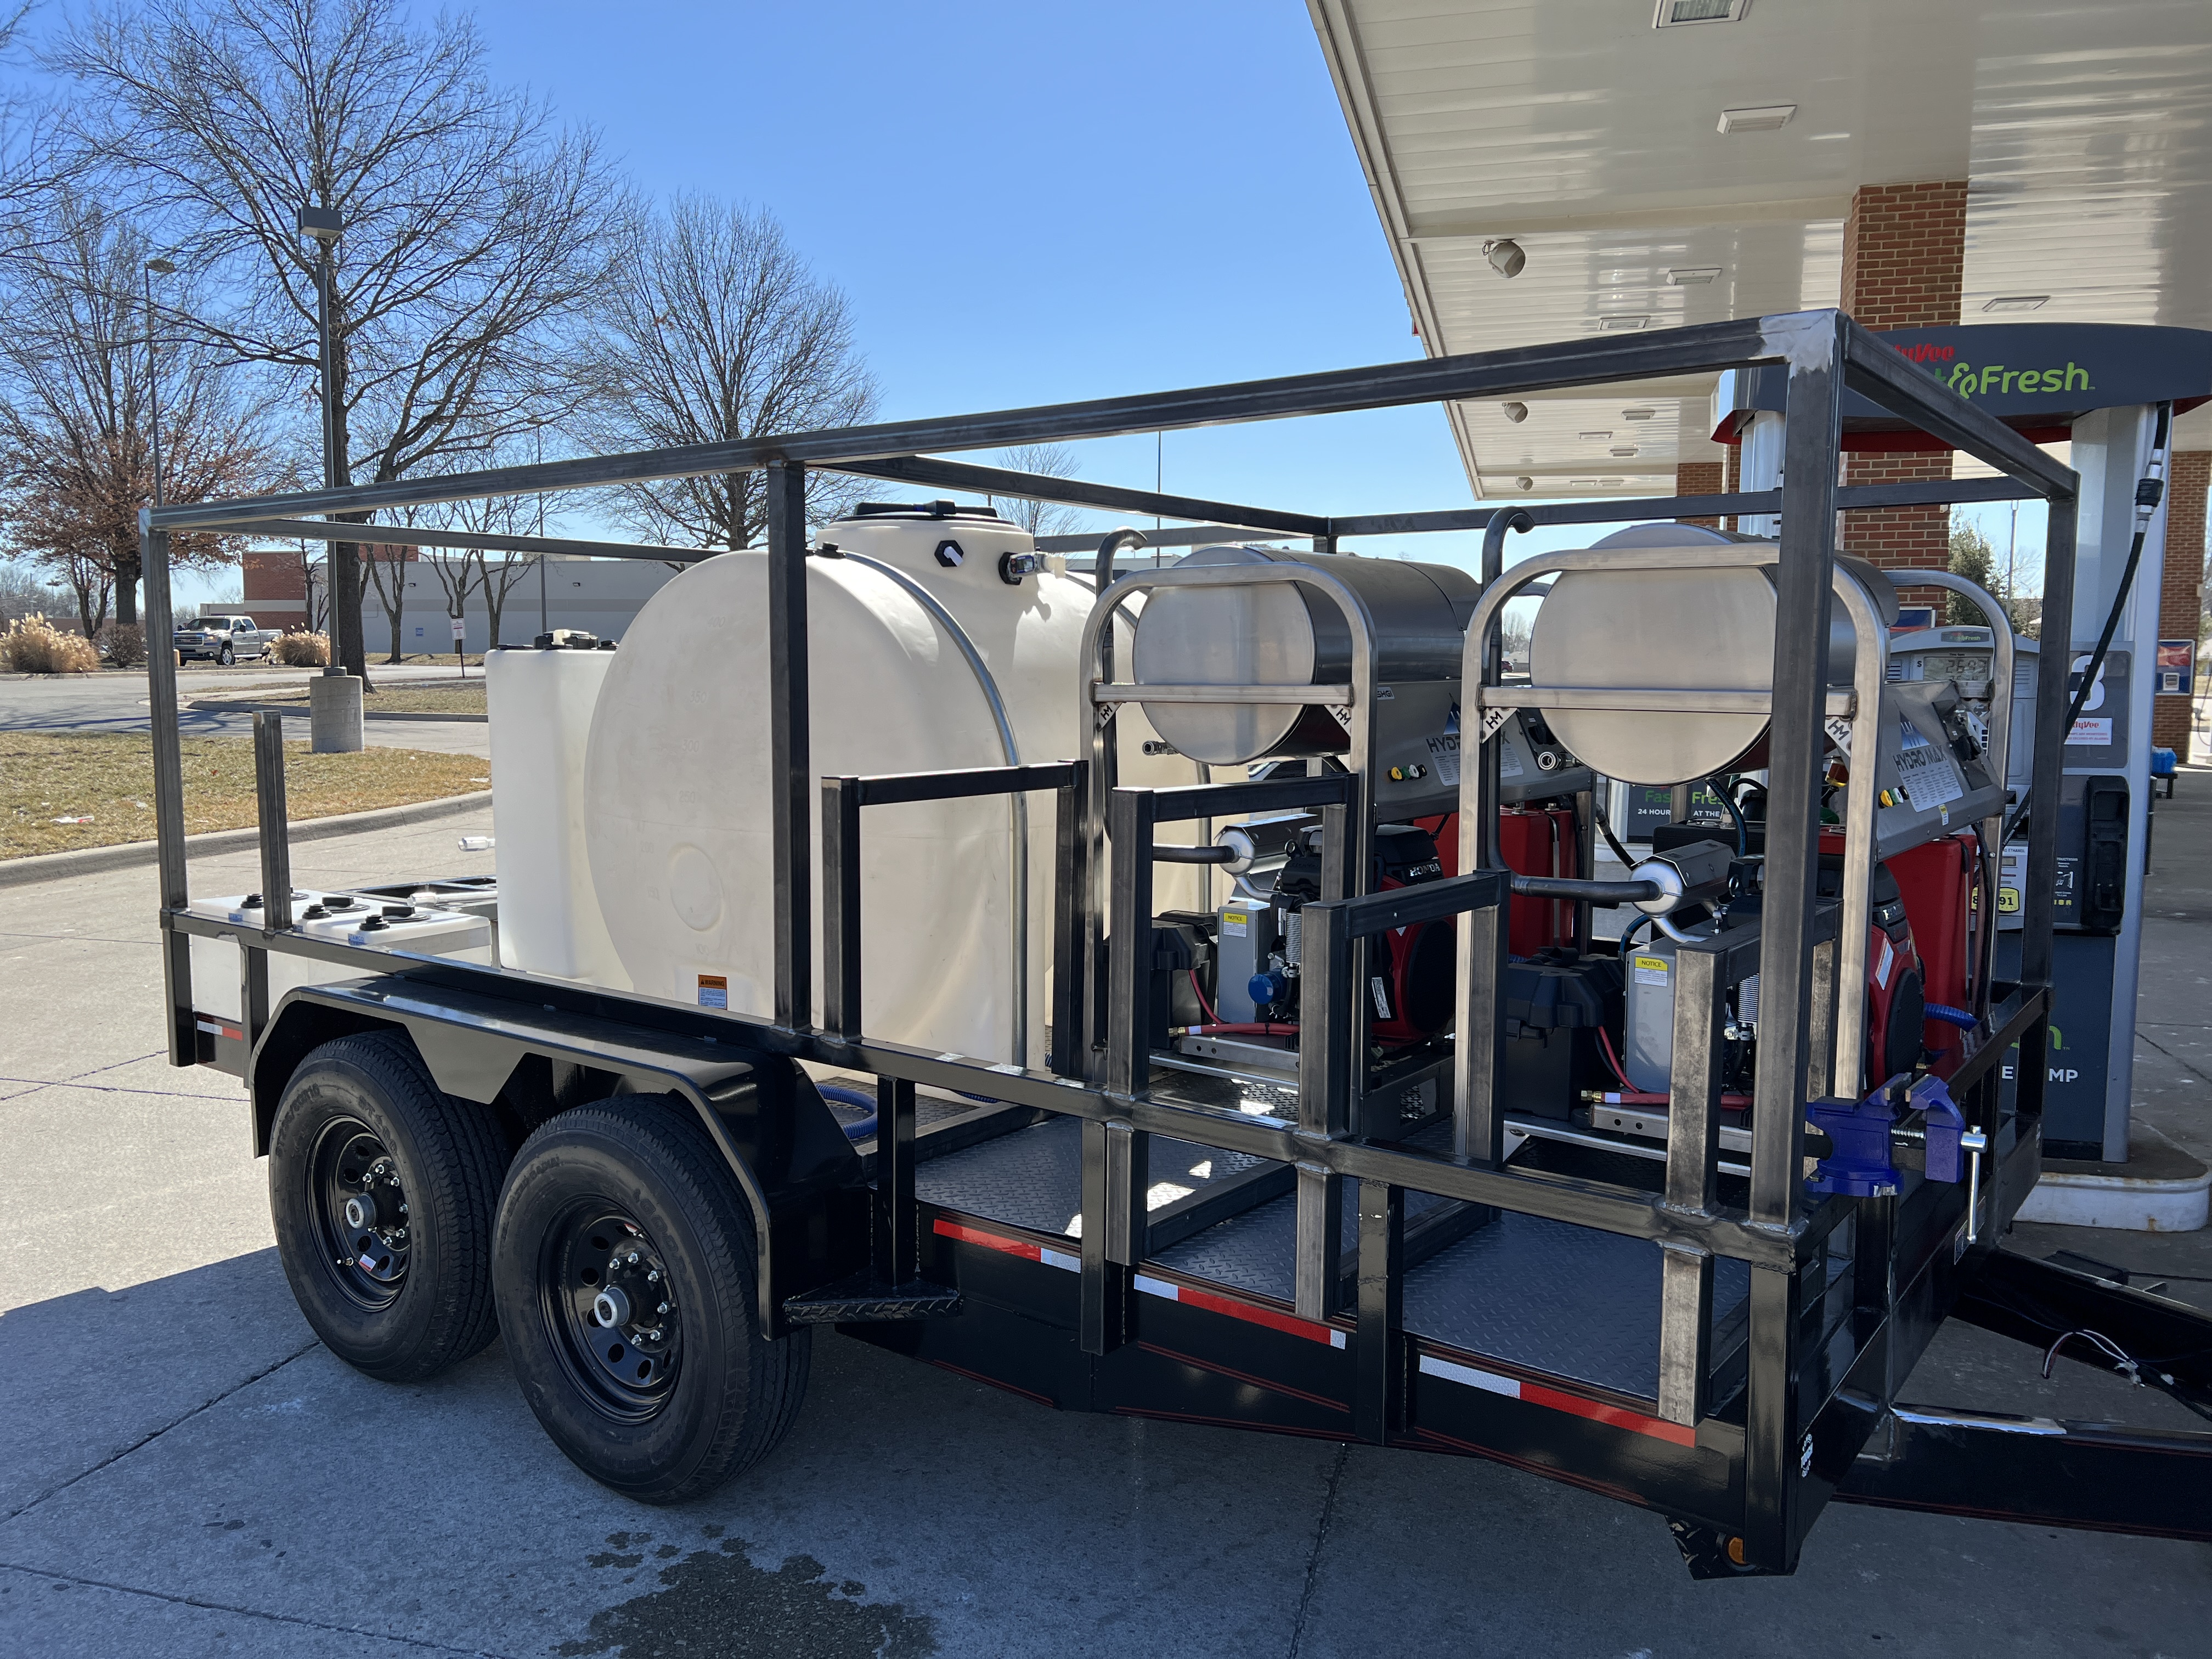
Three three photos I’ll include is my starting setup, my first build, and I am currently building my second build which is having welding work done right now (I really need to learn how to weld)… I always learn something new and am always wanting to do things the right way the first time. I really am truly thankful for all of you. I will post the finish build and the video in a few weeks
Also check out this video I made of me Washing last year!
We both got started in washing around the same time. Congrats on your progress. I am about to pull the trigger on a box truck but starting to have second thoughts after seeing your setup.
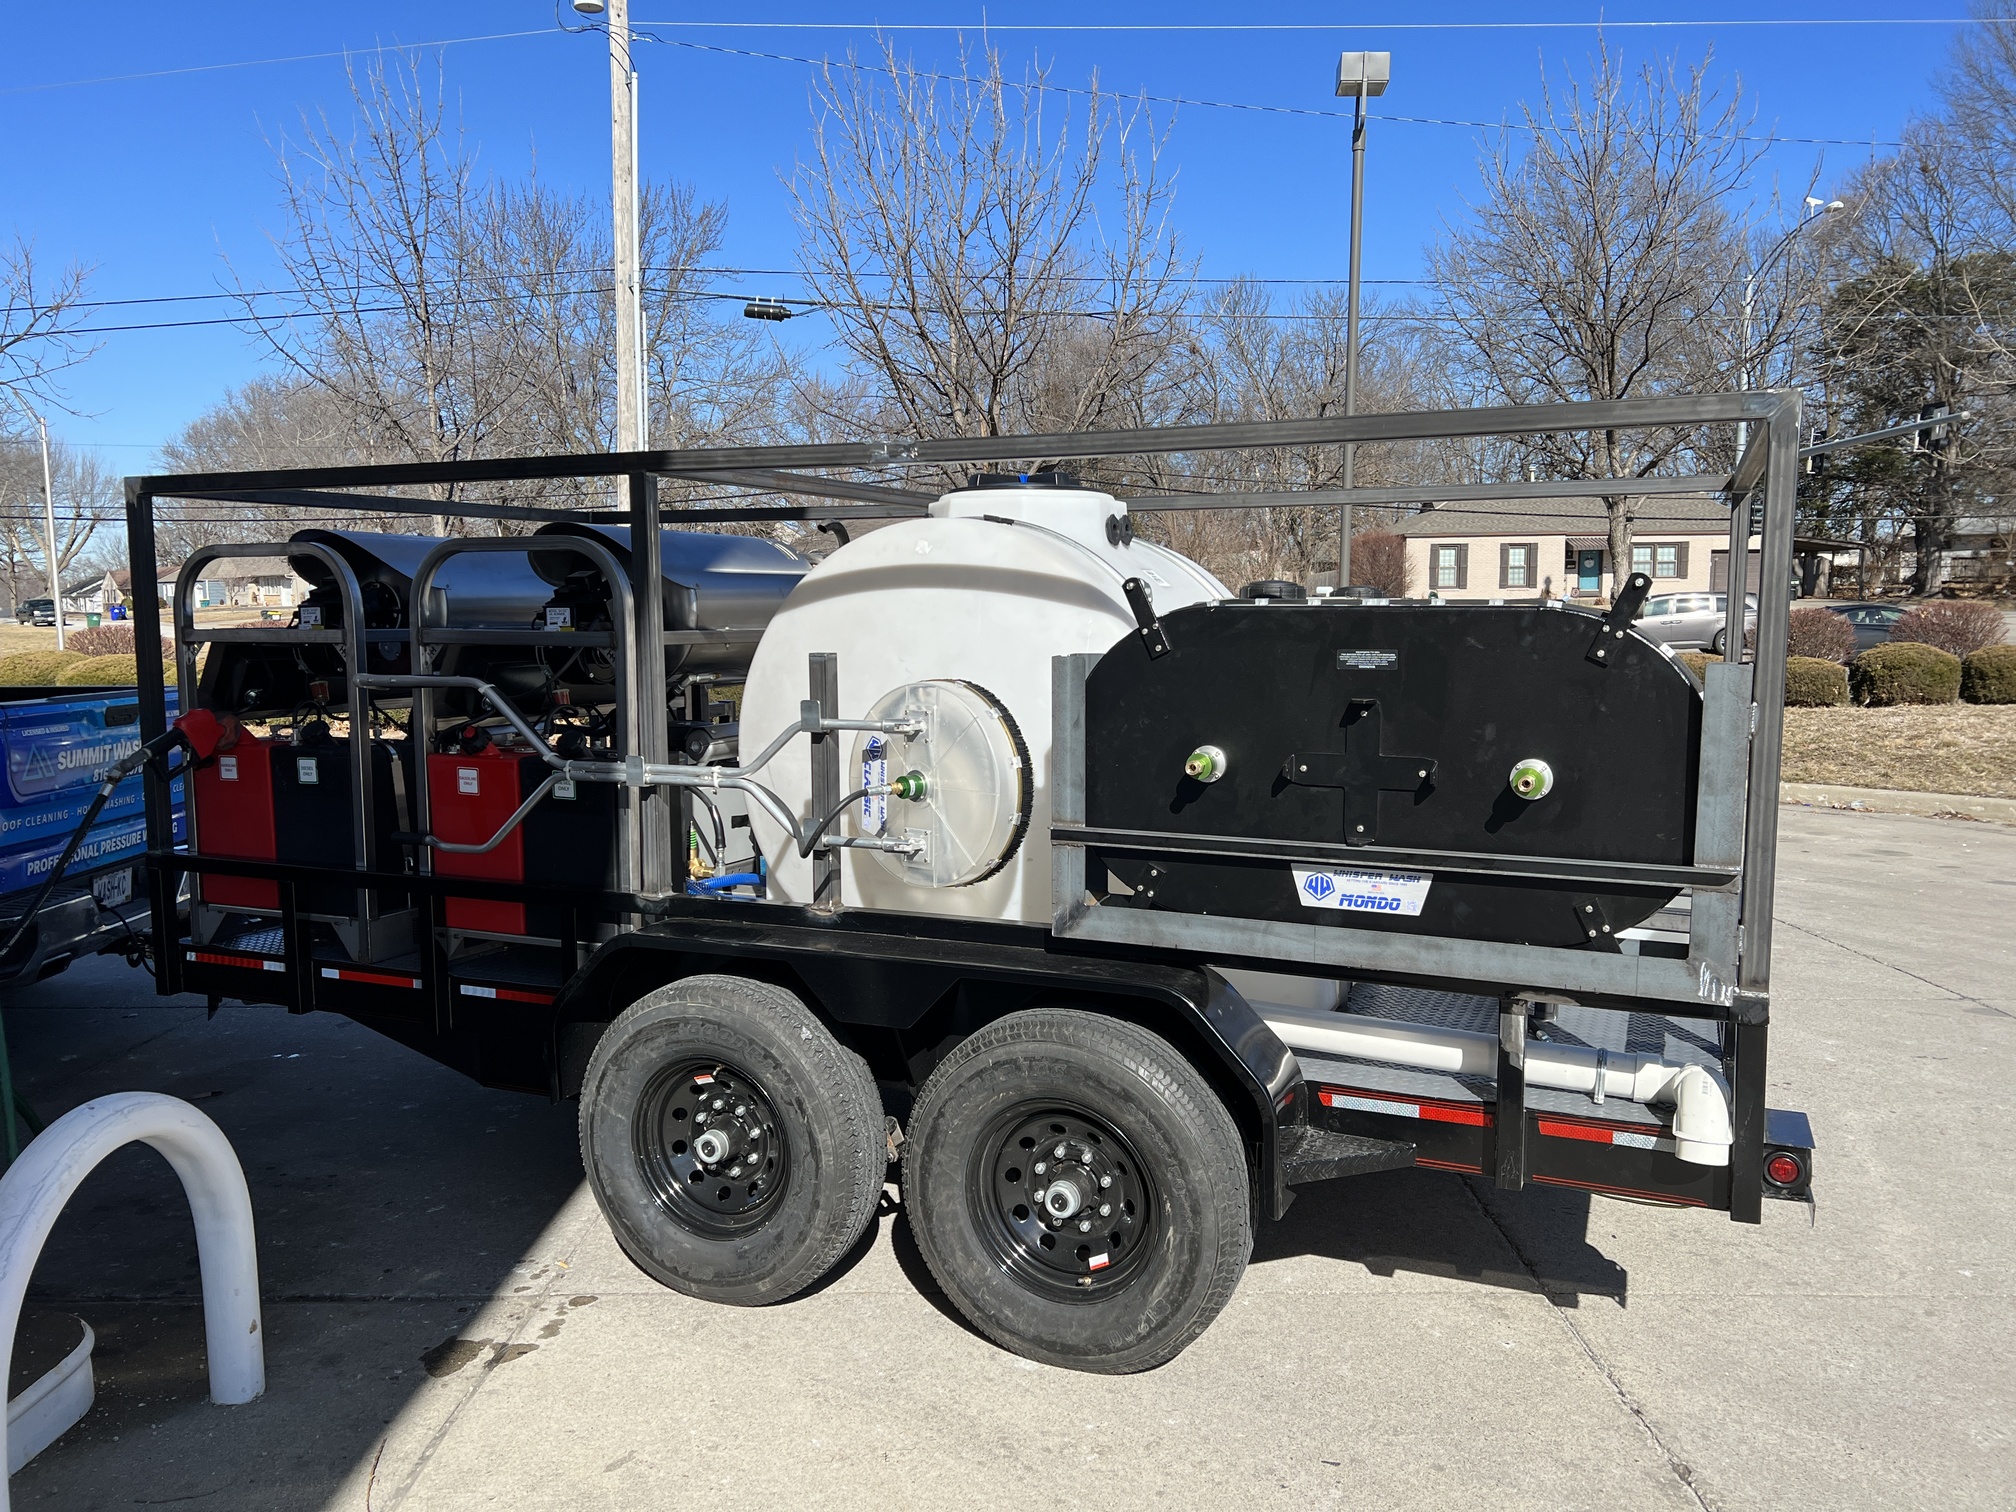
Looking good. Quick little rec before you finish welding - weld a little tab, say 2" tall where you have the uprights, drill about 1/2" hole in them towards the top. Serves a couple of purposes. keeps ladders from wanting to slide off the side even when strapped down and gives you some lashing points, with the holes in them. Also on one side, come out to the side at the top with a horizontal to the outside, then put a diagonal back down to outside of pole on a couple of them. Gives you a great place to store your poles and keep them out of the way and off the floor.
Zoom in on pic and you can see both
Ordered a new trailer myself last week, will be at least a month before it gets here. Where did you get the rubber flooring and how did you attach it, esp along edges? What did you do to prevent leaks where you drilled thru floor covering? Did you put down any gaskets or what or you just not going to worry about it?
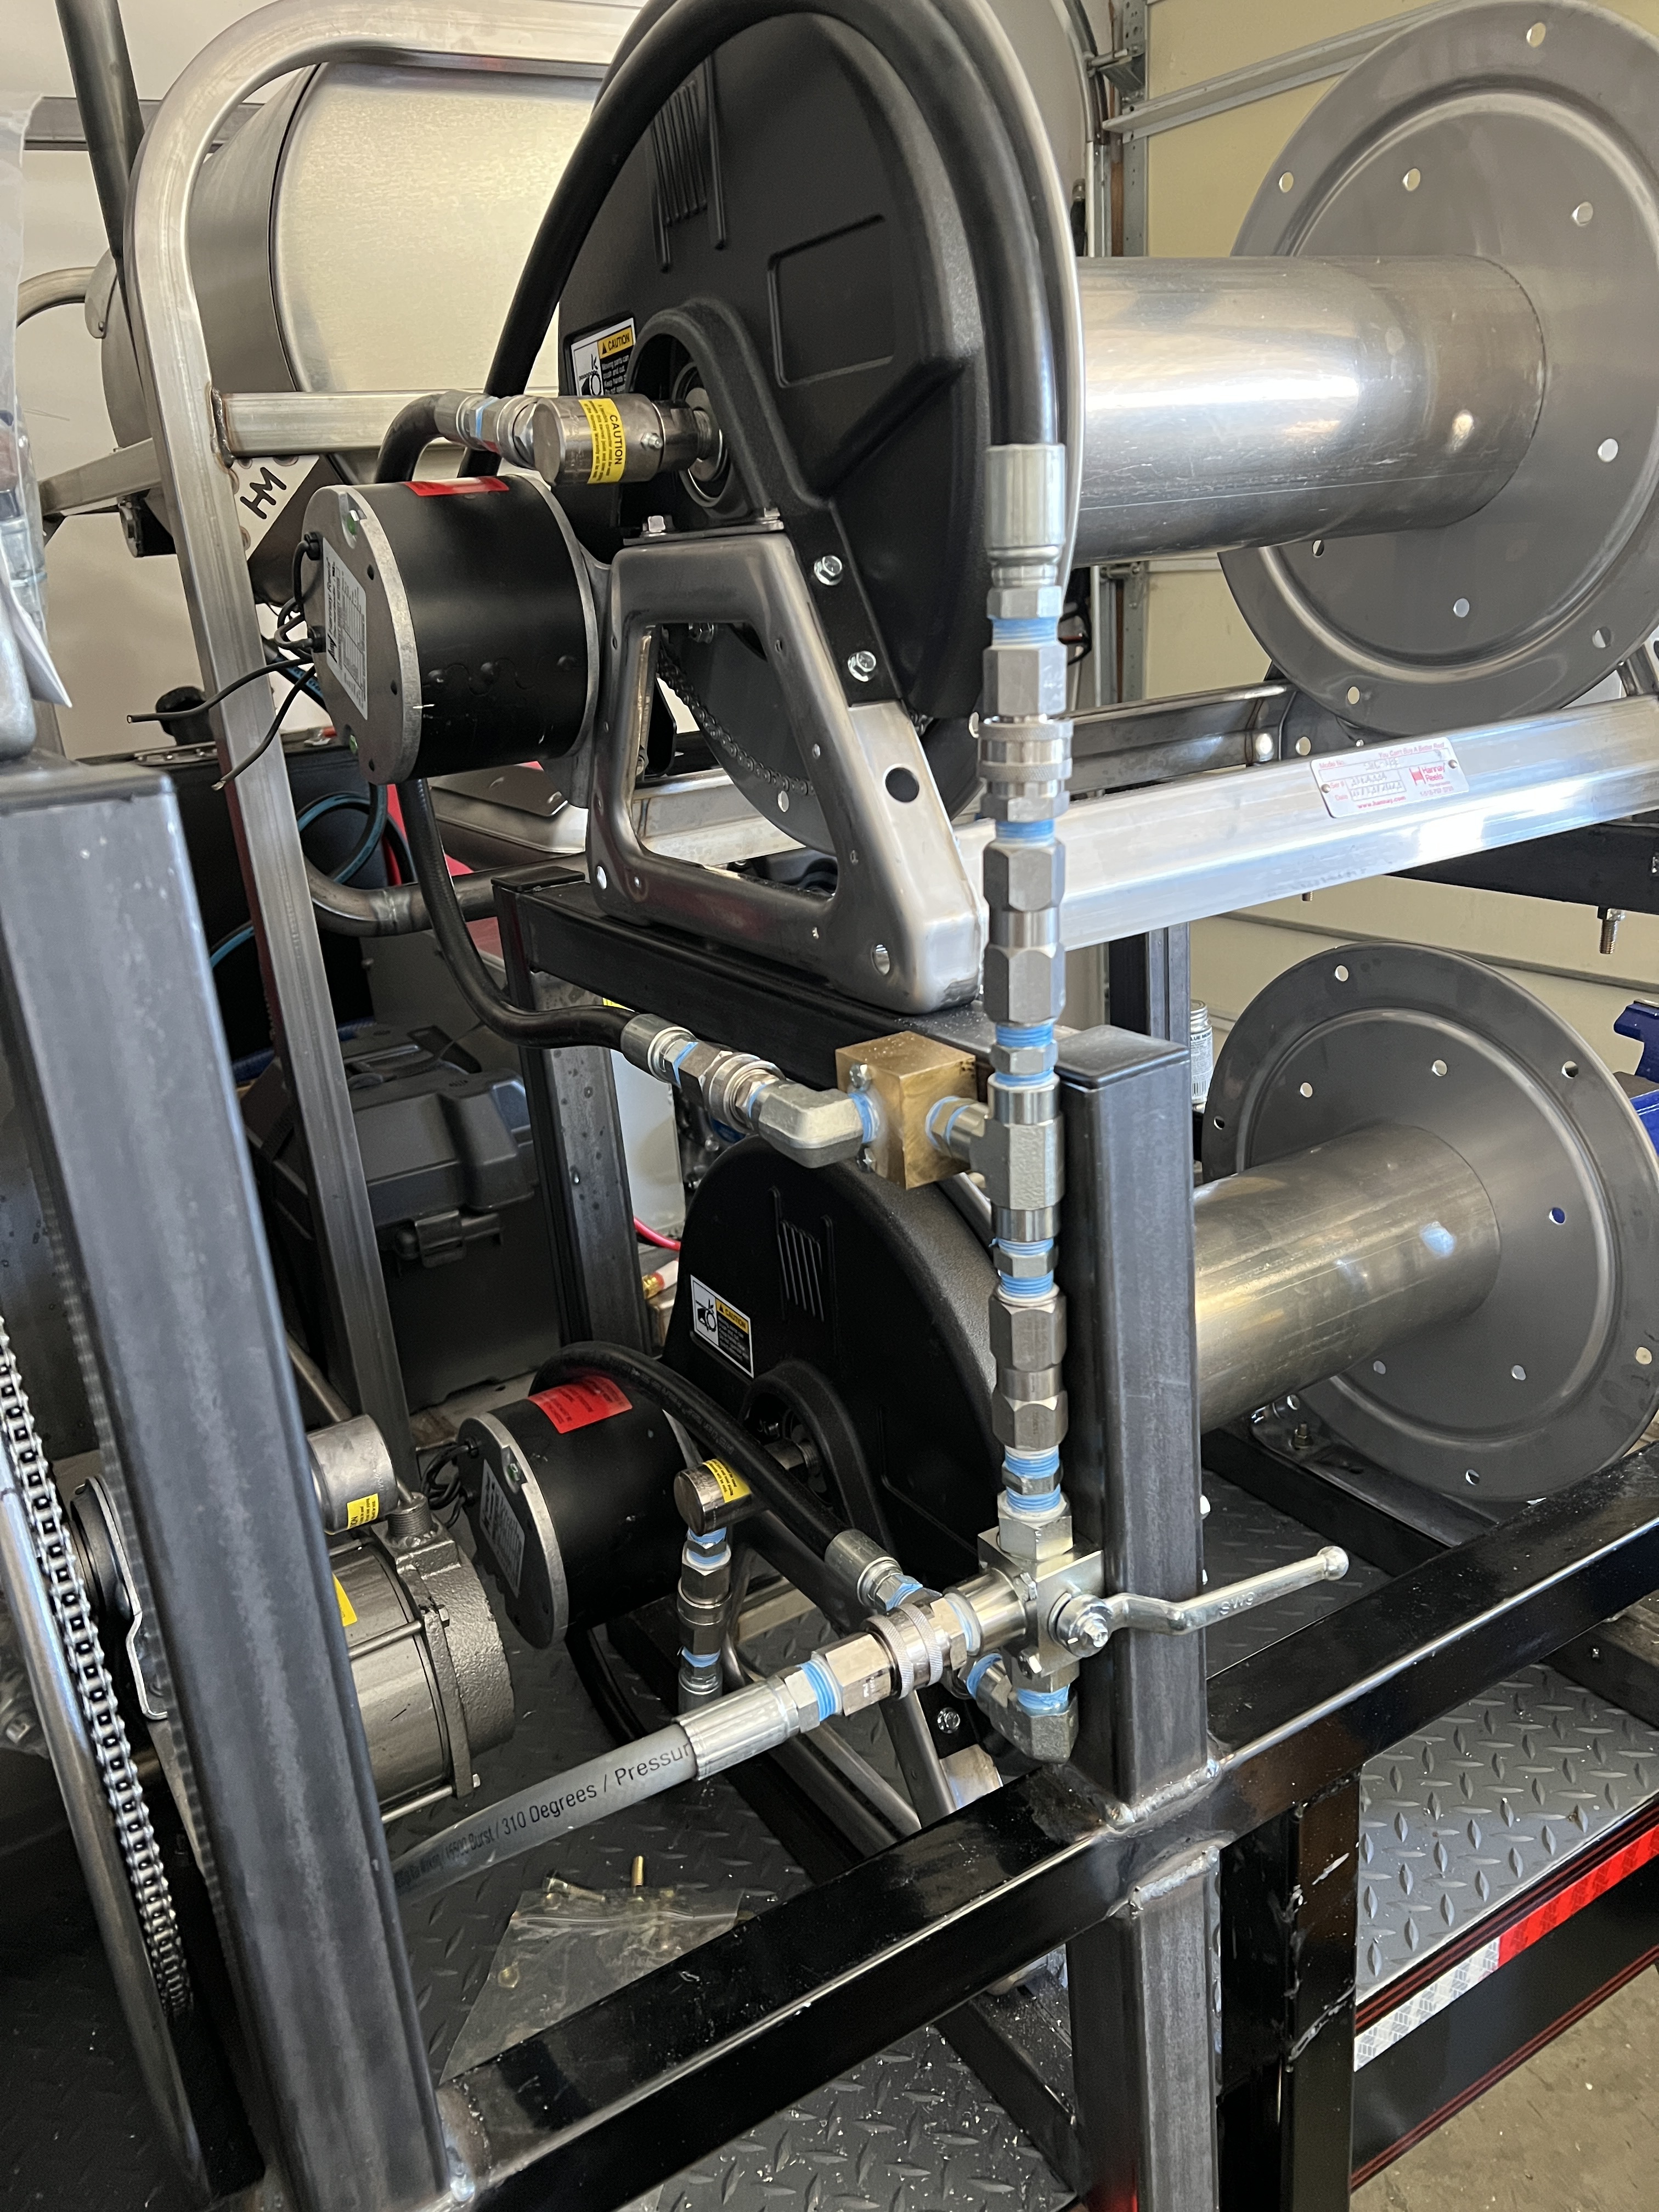
This rig is also built to fit inside parking garages 7 foot and higher. With the tank I’m at 6’8” tall.
I plan to have folding ladder rack support bars on the corners and middle that I can swivel up and lock into place with spring loaded pins so that 90% of the time I can have ladders secured but when I need the clearance for garages I can just un pin and swing down the supports to the side and take the ladders off to meet clearance.
The idea for the pole holder is great! I’m surprised the polls Don’t slide out though? I see the rubber ties holding them together. Do they hold them pretty well to the accelerating, wind, and break forces?
For the G flooring, it’s pretty heavy and lays pretty flat already. I ended up cutting to size perfectly to fit within the frames of the side railing and on the back I had room to side it under the metal bracket that holds the floor boards. On the front it meets right at the front metal support. I used coated deck screws to screw it down every 2 feet on the perimeter into the wood. With that, and the mounted equipment, it’s not going anywhere and won’t flare up on the edges. Had it on my first build and loved it.
One thing I did to this time that I didn’t do the other time and regretted it, was I made sure to heat up my garage and warm up the material before putting it down. I didn’t do this last time and after I mounted everything, the G flooring expanded and and created wrinkles on the floor. This time, no wrinkles and when it tightens up when cold, the screws and equipment hold it in place and keeps it tight so it doesn’t move!
Also, I did plan to put down black rubber caulking under the washers when bolting equipment but completely slipped my mind when mounting the equipment. But considering how the washers are already pretty tight, I’m hoping I won’t have any issues, I didn’t on the last build so we shall see
Thanks for the info Dustin. Some good tips in there.
Where did you find the best price on the g flooring? I see they have 2 thicknesses - did you go with the 65mil or 75mil?
What size is your trailer? Were you able to find a single piece large enough, so you didn’t have to piece it? What did you cut it with, just a razor or use like a skil saw? I’ve got the same size ordered as I have now, 6.5 by 14.
Y, a couple of those rubber twist ties around poles and over top creates a lot of friction. They don’t even think about sliding. The other reason for the twist tie, some of my poles aren’t long enough to reach all the way to the next post - things like your concrete brush. So that’s the reason I have them bundled in the middle.
You’re lucky you can take trailer into garages. Not allowed anywhere around here, ie reason I had to go with truck build. Our clearance on most is supposed 7’3", top of my burner cover is 7’ . With all the pipes and stuff hanging down etc, I hold my breath everything I drive thru them, lol
I purchased the G-Floor from Home Depot. Free delivery to door. 7.5’x16’. I would pay the extra for the 75 mil but its probobly not much better. If it makes it 65mil deep another 10 wont matter. It cuts pretty easy with sharp razor blade.
I have a 76 inch x 14 ft trailer with 14k axles.
The link is the perfect size for it with access. I used a razor blade/ box cutter to cut after I placed it in.
And trust me I still get nervous too going into parking garages. Those pipes do hang low!
It is extremely chemical resistant although I did have part of mine on my last build discolor a slight shade of orange the one time I had a pump up sprayer full of acid leak on it overnight.
I use eight grade 8 size 3/8 bolts (that’s a tongue twister lol) to secure mine. Oversized washers underneath to hold wood better than I coated the bolt head and bottom threads/nut with WD-40 Rust inhibitor to protect it from rust for later maintenance. It sprays wet but dries like a thicker grease.