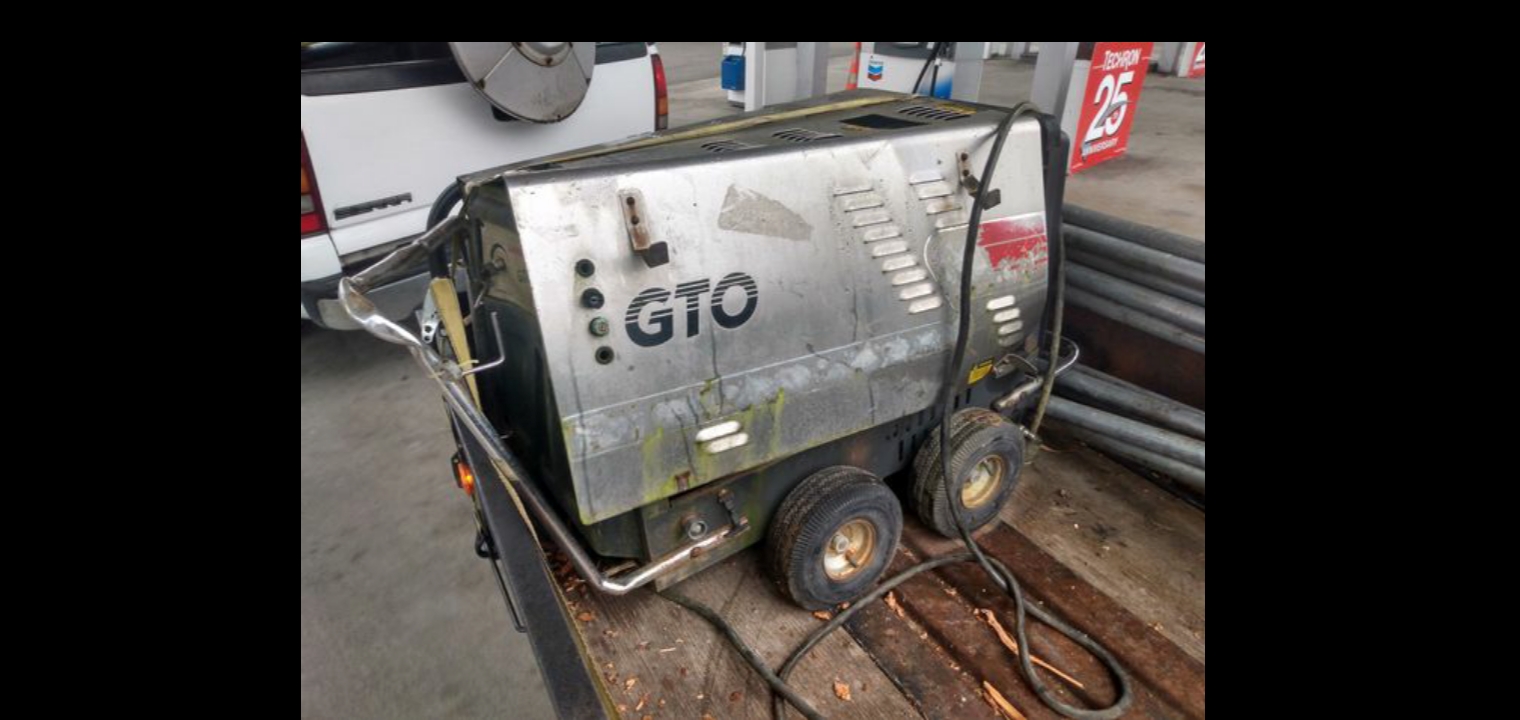
Is anyone familiar with these old Landa GTO4-2000 machines? I just picked this one up off craigslist for $160. I’m trying to get the burner running so I can use it with my CAT310 with 5hp electric motor, that’s permanently installed in my shop. It’s in pretty ruff shape, the kid said he’s a turd herder and that they had used it at his work till it started to melt the sewer pipes.
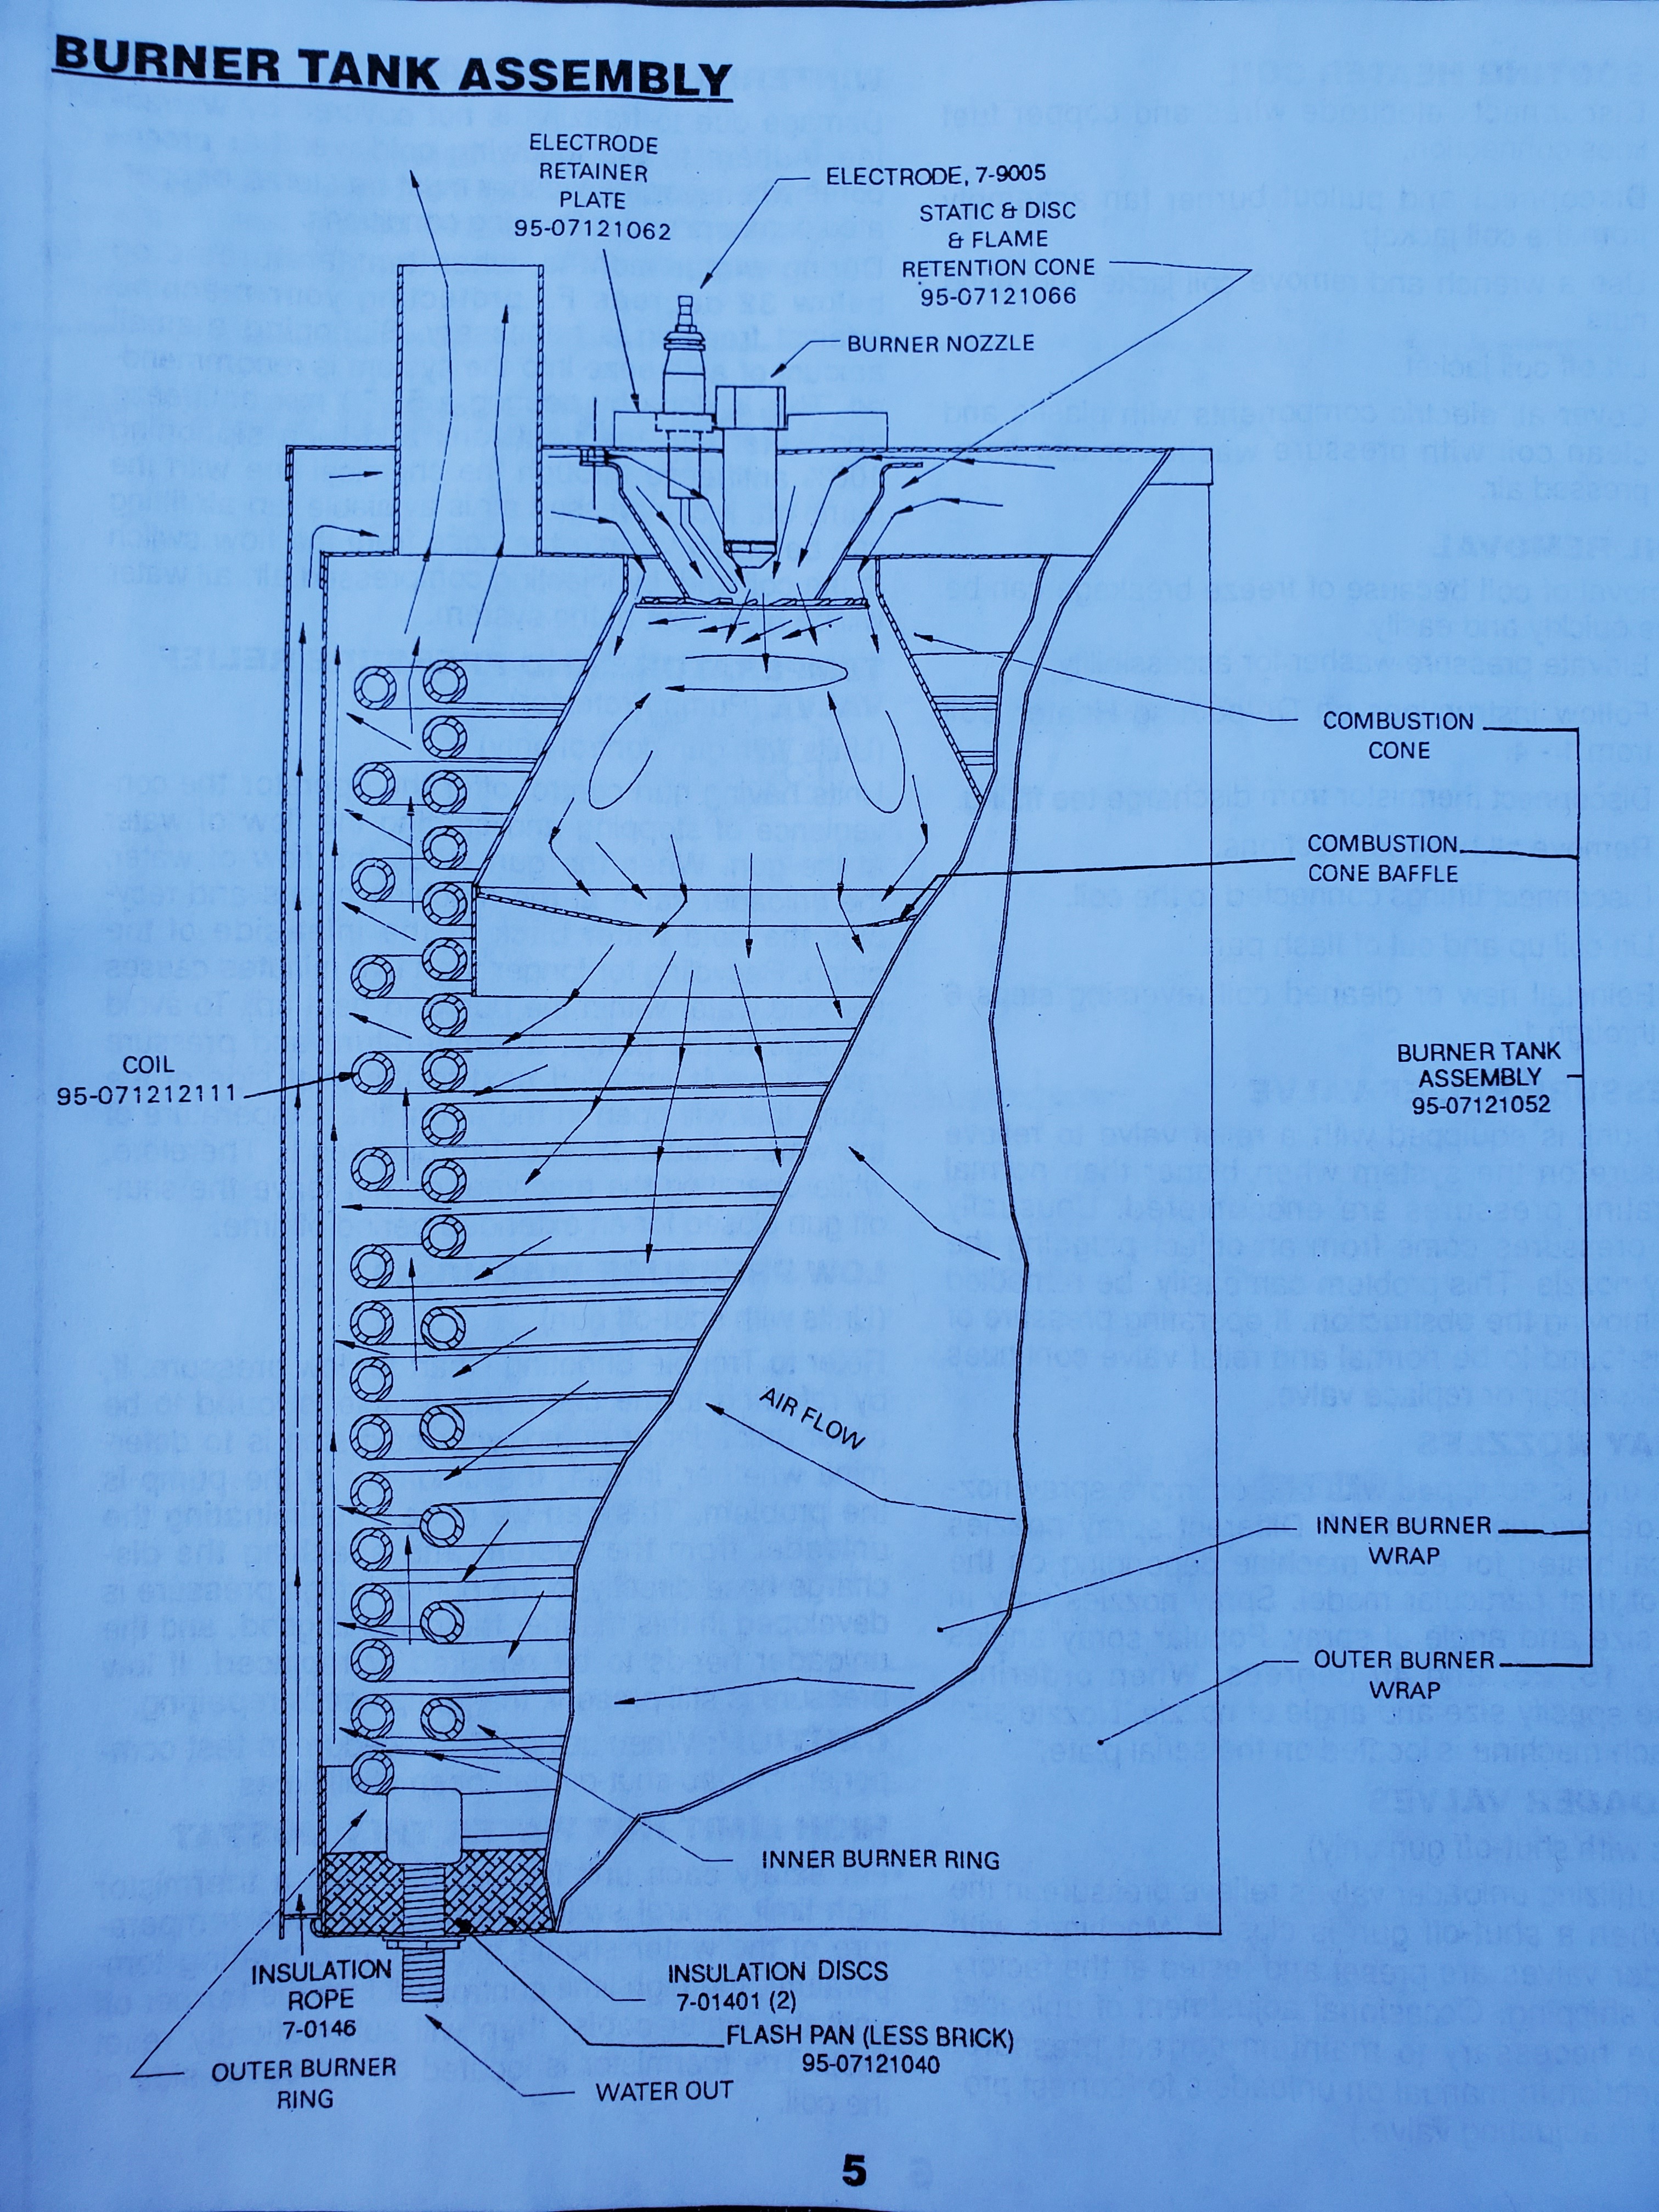
It seems to be a weird design in that the burner is fired from the top of the coil.
I can’t find any info on the Landa GTO series and Landa hasn’t responded to my request for info. The guys at Wayne took a look at the photos and wouldn’t claim it as theirs because of the weird top fired setup. I can see where there’s a block off plate on the side of the burner where the nozzle would normally go, so I’m not convinced it didnt start life as a Wayne and at some point make the transition to a Landa.
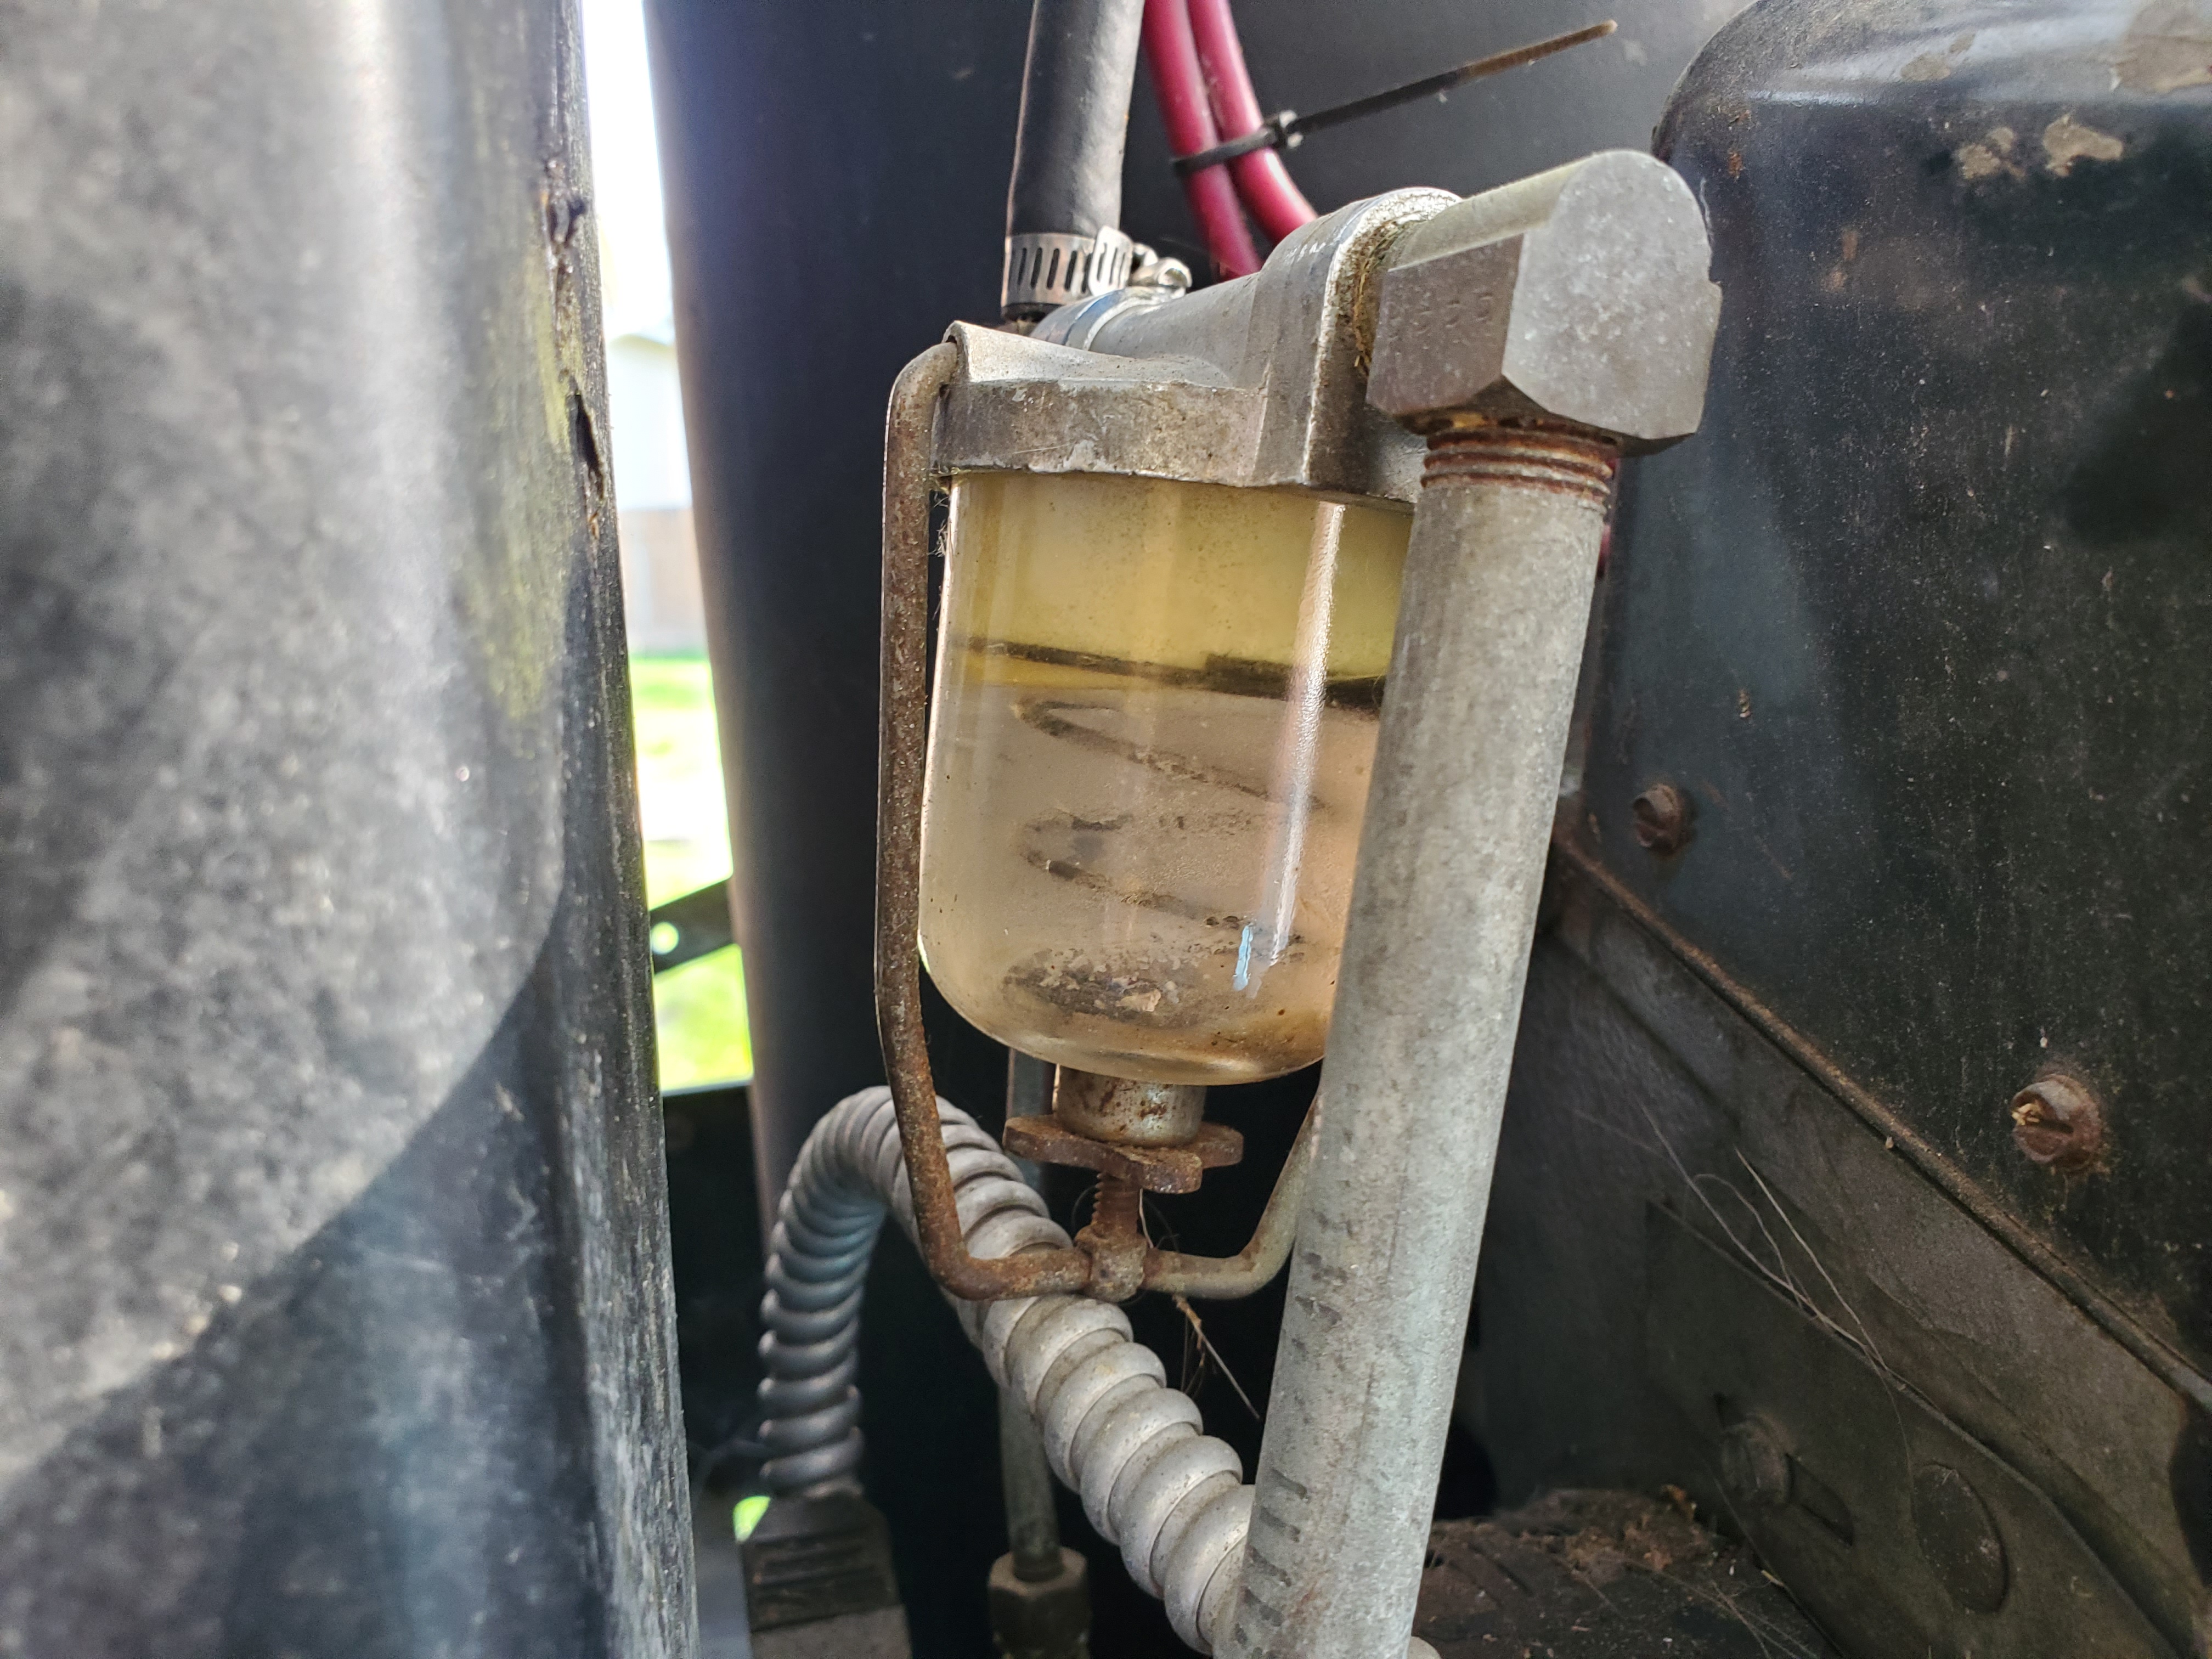
Anyways, it obviously needs some maintenance, fuel tank has at least an inch of water in the bottom and the filter looks to be totally full of water.
Then I’d like to get a new nozzle if I can figure out which one to put in there. The coil is full of rat turds so that needs to be cleaned and probably re-insulated. Who knows what else I’ll find as I dig into it.
1 Like
I have an old Karcher I don’t use anymore that fired from the top like that. I think it was a popular design 30 years ago. It’s definitely not as efficient as a the flames traveling the whole length of the coils. I had that Karcher before I got into pressure washing. My father-in-law gave it too me because he couldn’t get it working and I like messing with stuff. I tore every last nut and bolt apart on that thing and restored it. There really isn’t much to how they operate.
If they stopped using it because it was melting sewer pipes it probably just needs a new thermostat. You should get it all cleaned up and see if you can get the burner to fire. Don’t let it run long until you know everything is working right. If that burner doesn’t shutoff when it’s suppose to it can blow up.
1 Like
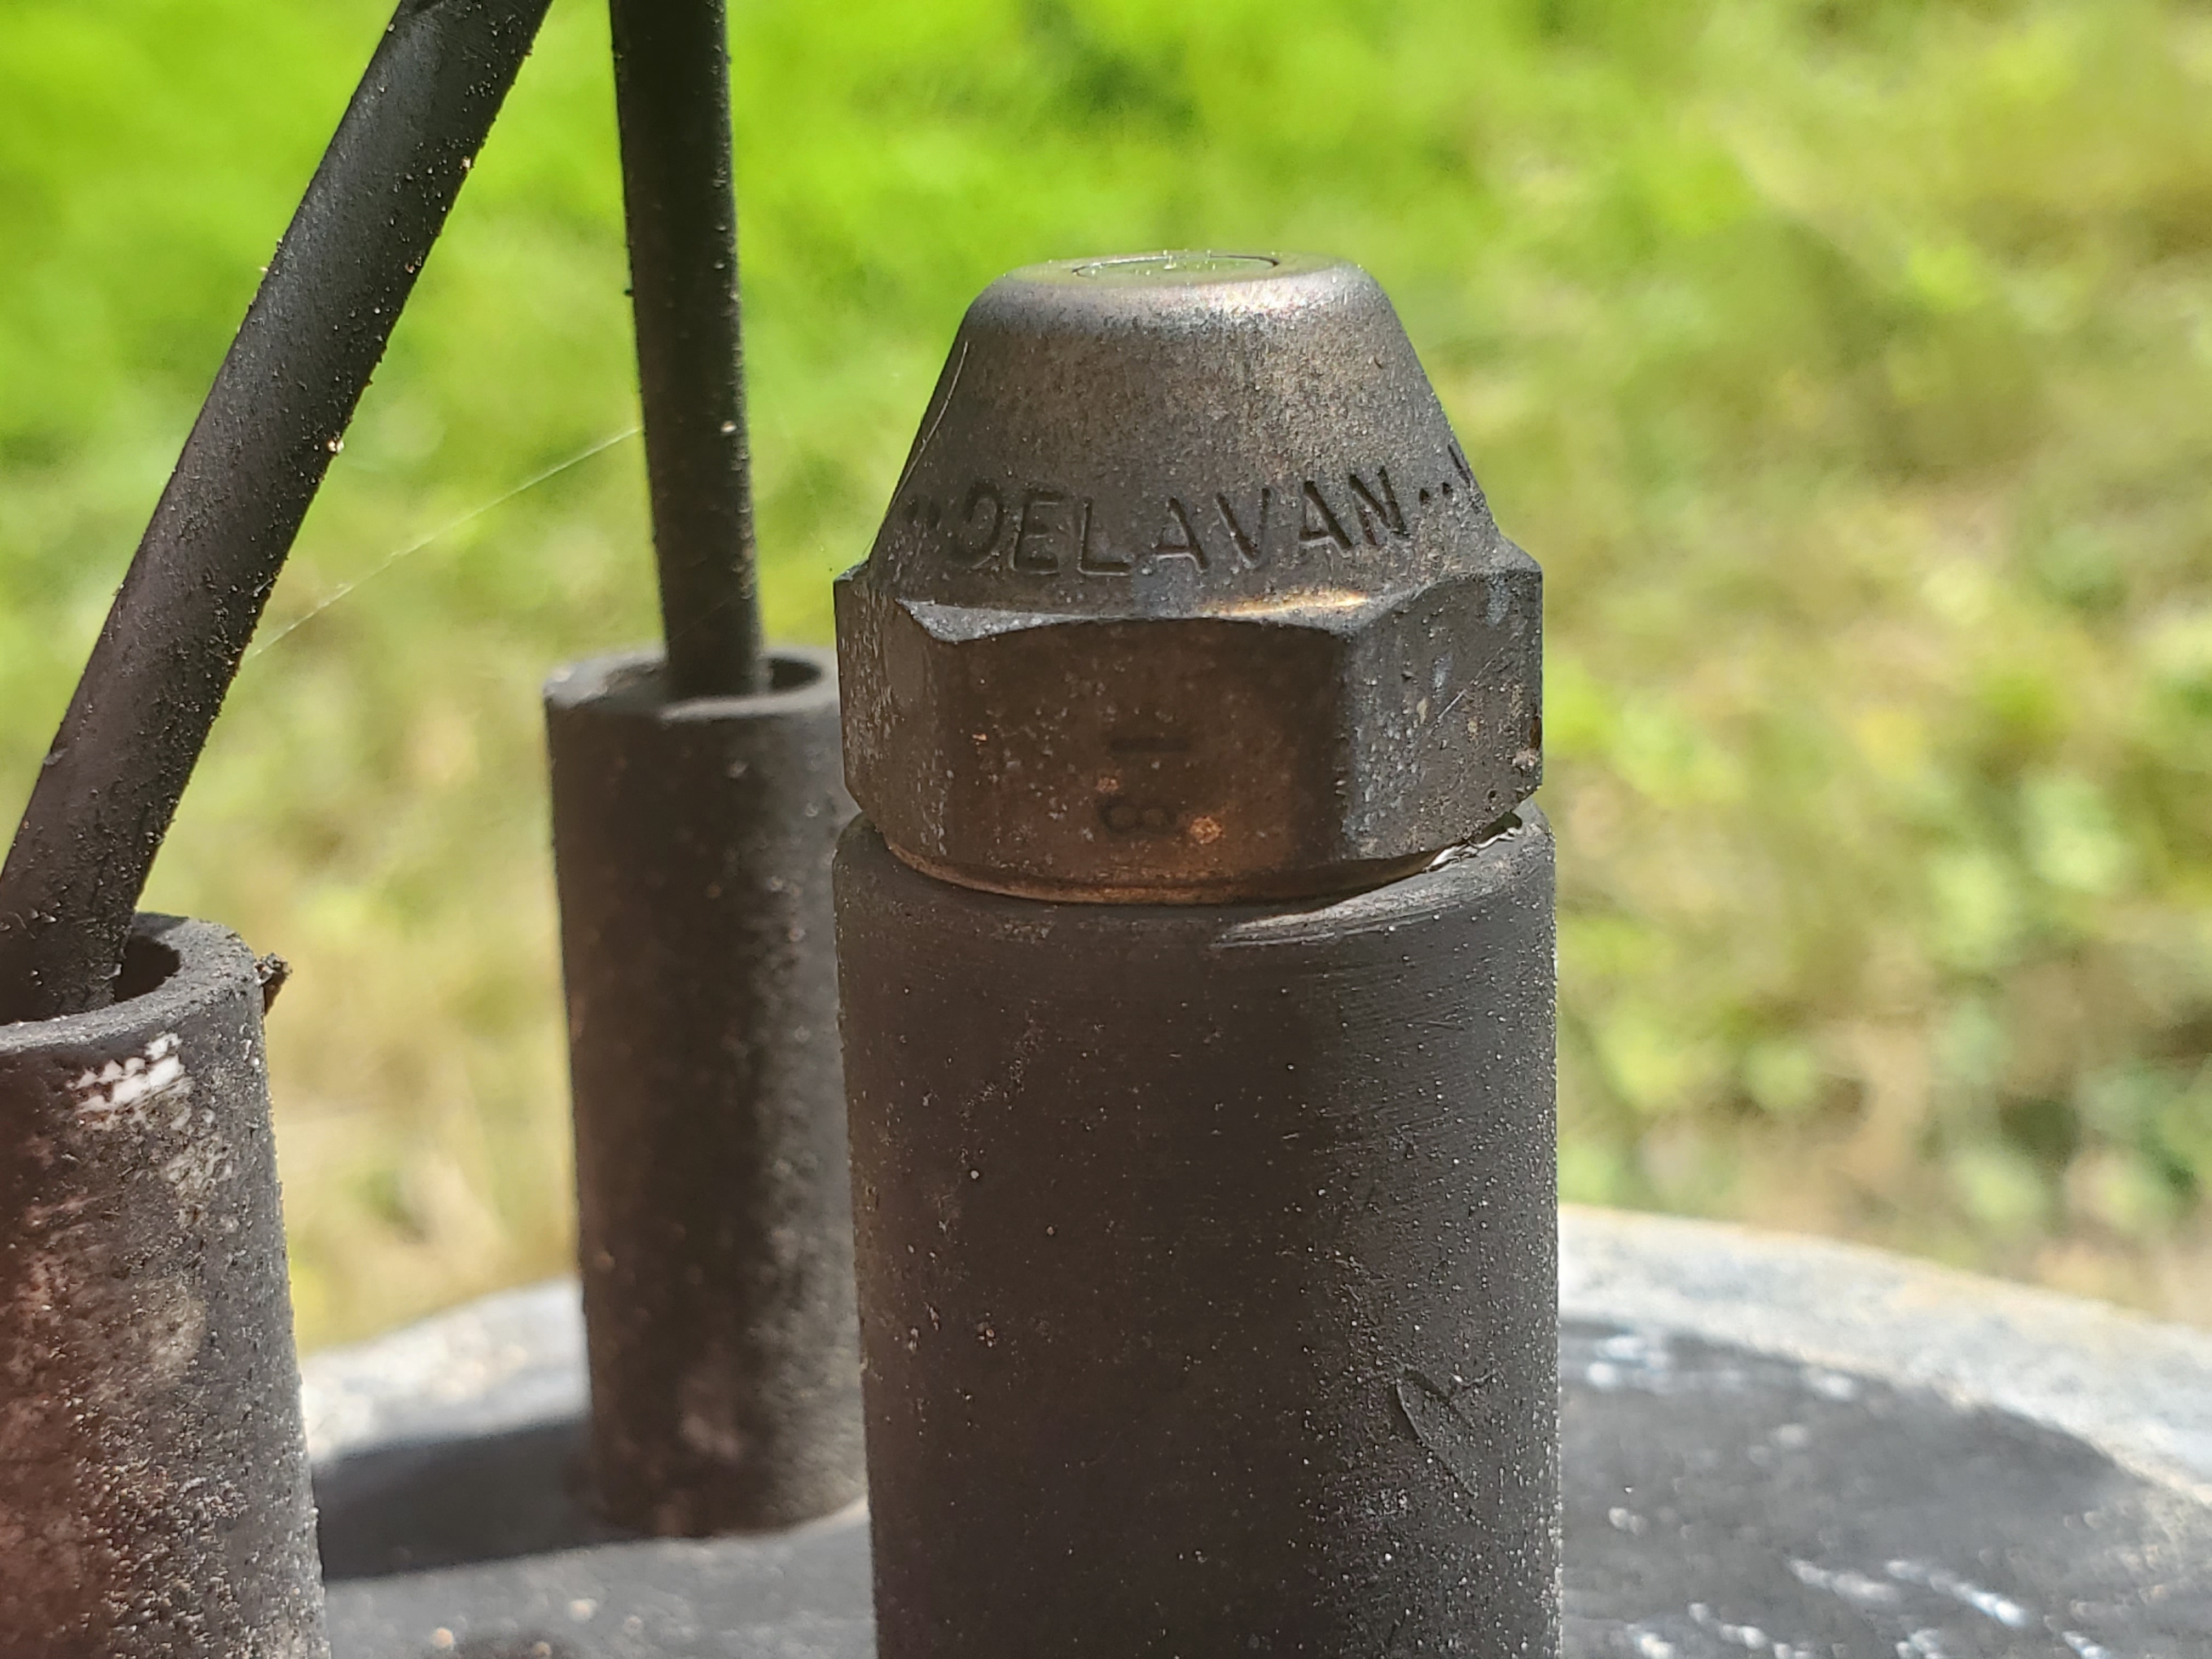
Just spoke with tech support at Landa, they said it’s called a downdraft style burner. He thought they were coming back into style and Karcher was looking into doing another one. Apparently he thought they’re MORE efficient, but i didn’t ask why he thought that. Anyways, he provided me with the service manual for my GTO. They confirmed it was likely a Wayne burner that was modified to be used in this downdraft configuration. Also got the specs on the nozzle, it’s supposed to be a 2.0gph 60deg. Opened it up yesterday and confirmed the nozzle is just your standard Delvan 2.00 60deg A.
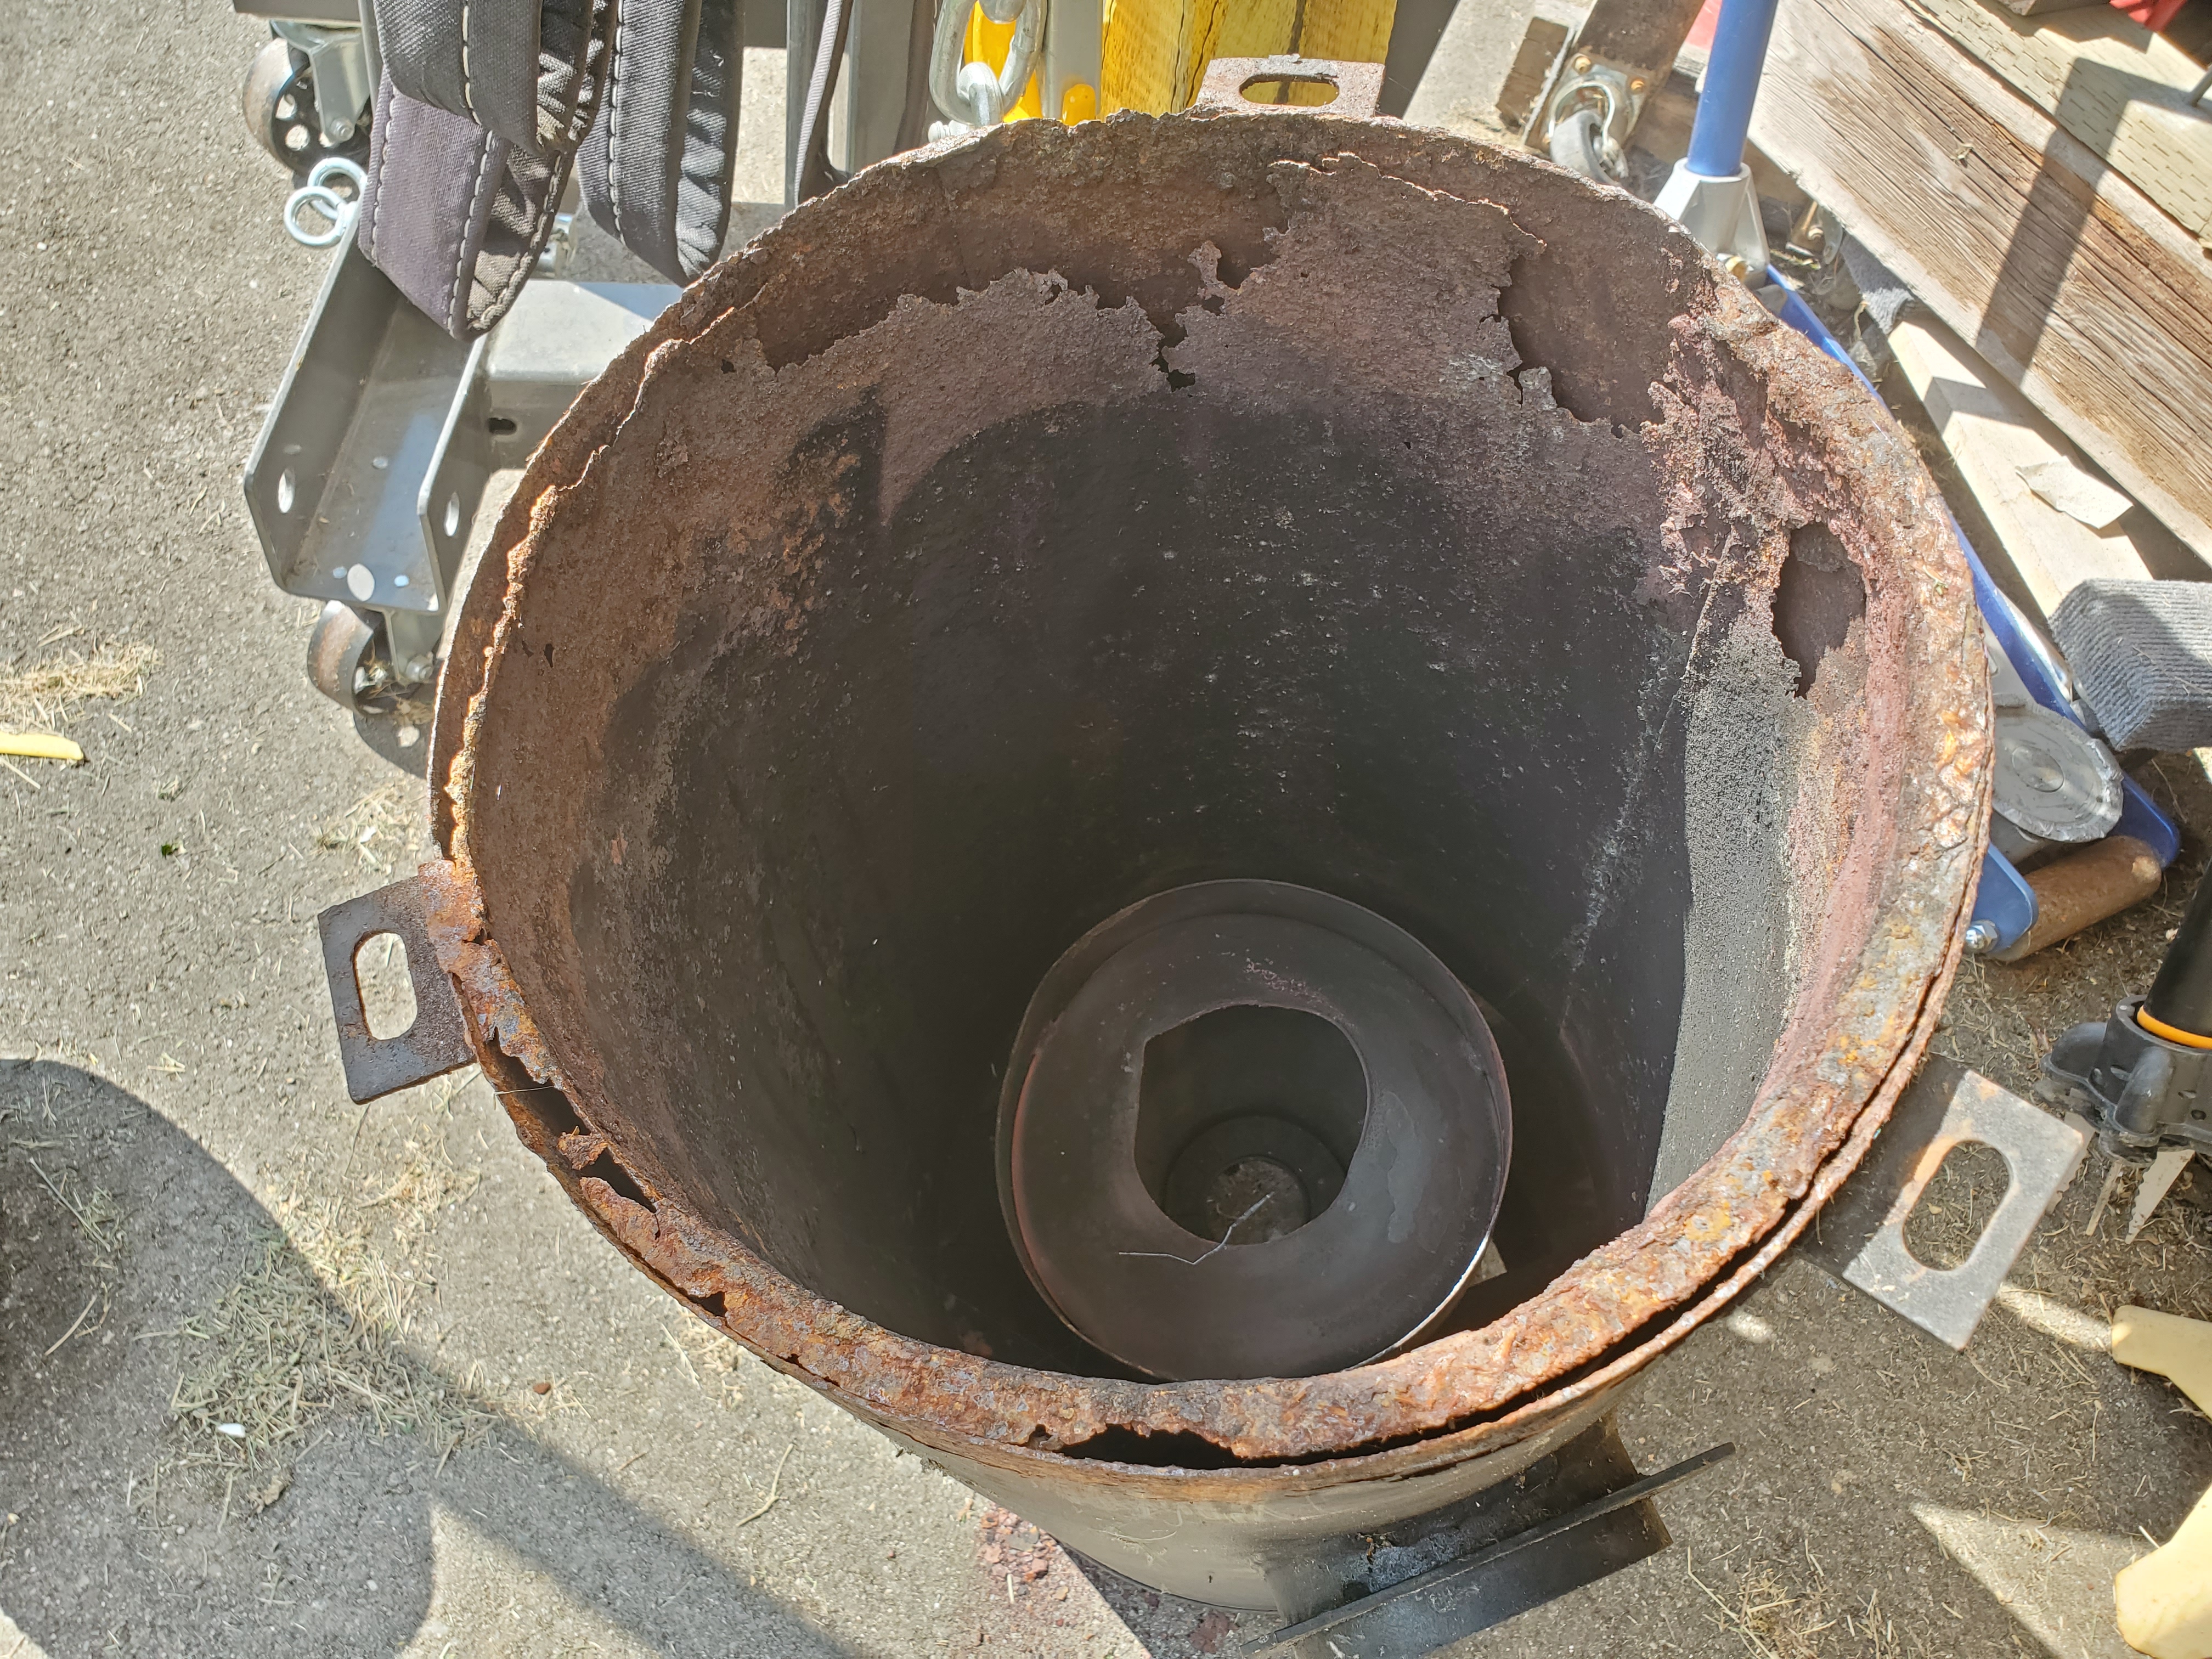
Unfortunately the inner wall on the burner tank is really rusted up and badly degraded. This won’t allow proper airflow needed to get a good burn. The air needs to be directed between the inner and outer walls to the top of the tank where it mixes with the fuel.
I got some sheet metal and steel pop rivets today so I can make a new inner wall.
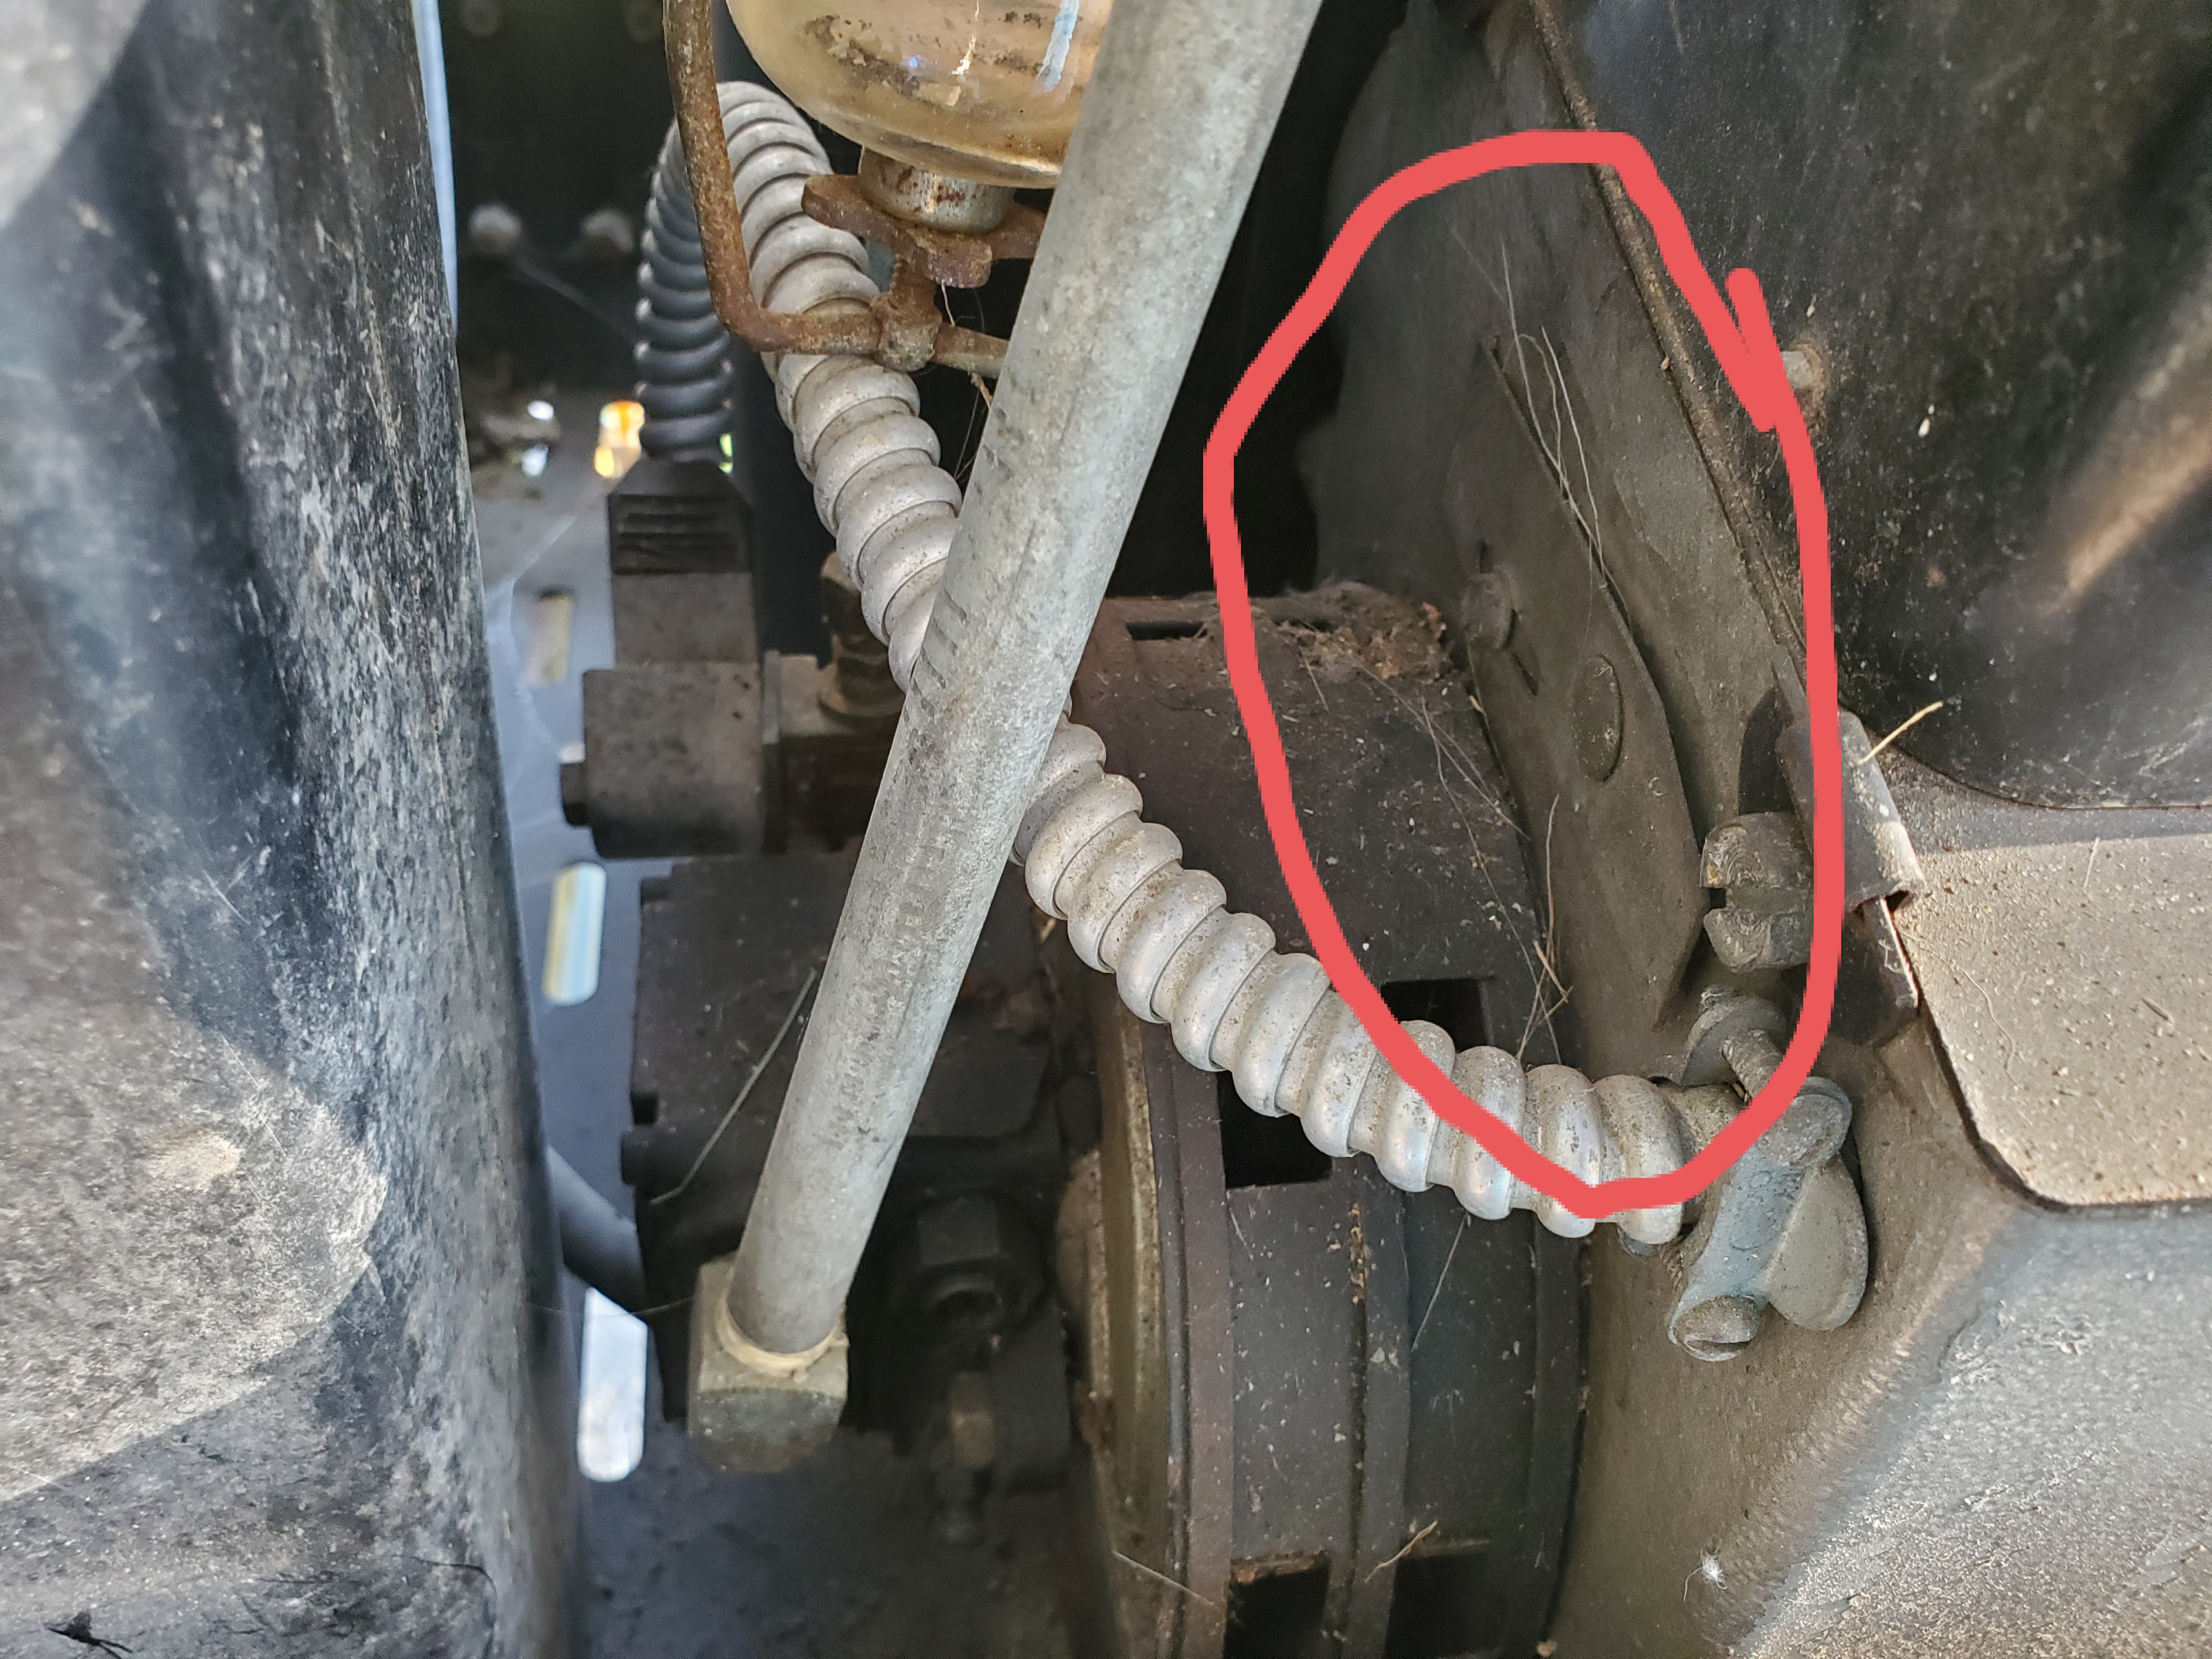
Also confirmed that the termister wires were broke off, so the thermostat had no way of regulating temperature, as suggested by marinegrunt this was likely the cause of the melting pipes for the last owner.
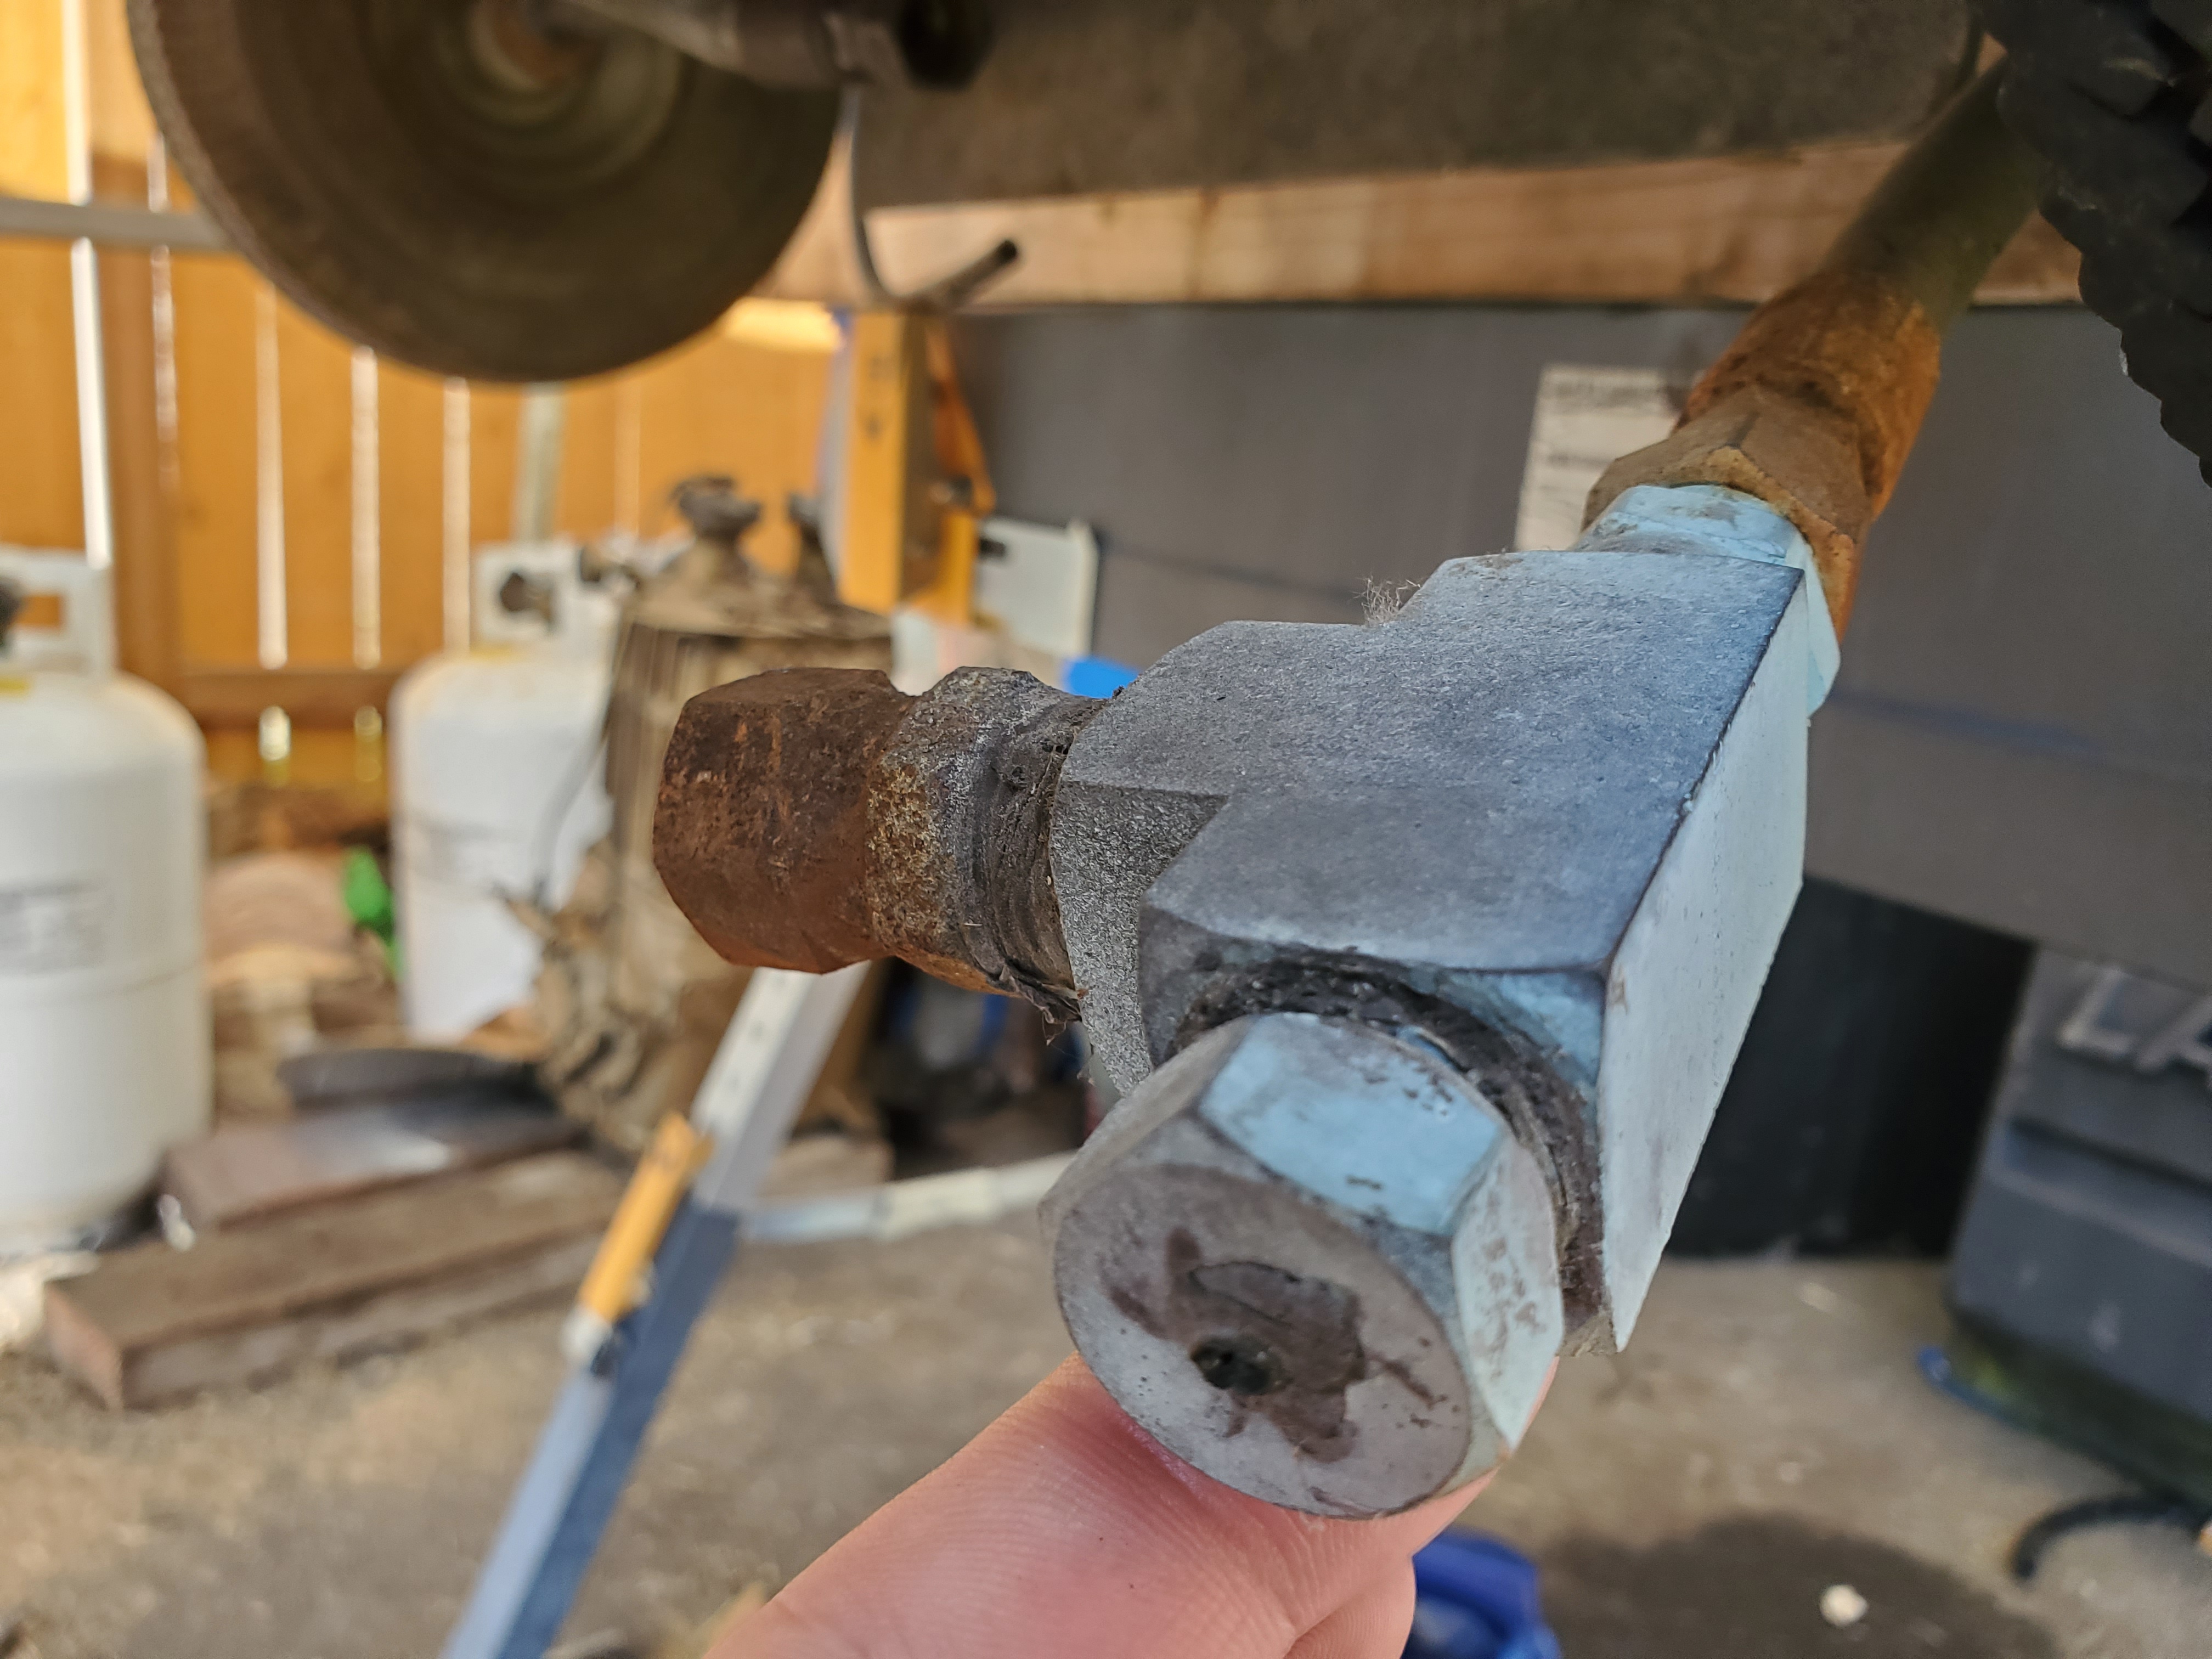
Found the termister under the machine in this tee fitting located right after coil. The wires are totally ripped out so it’ll need to be replaced.
3 Likes
Cool thread, finally something interesting!! You got your hands full.
Thanks man.
Nice! Looks like you’re making progress. Be sure to keep updating. I love fixing stuff.
The main reason I don’t think they would be as efficient is because the flames probably don’t make it all the way to the bottom. I could be wrong though. I’ll take a picture and post how the flames and airflow works on the newer horizontal style so you can see it. I’m sure they’re all a little bit different though. As long as it makes hot water who cares where the flames go…lol
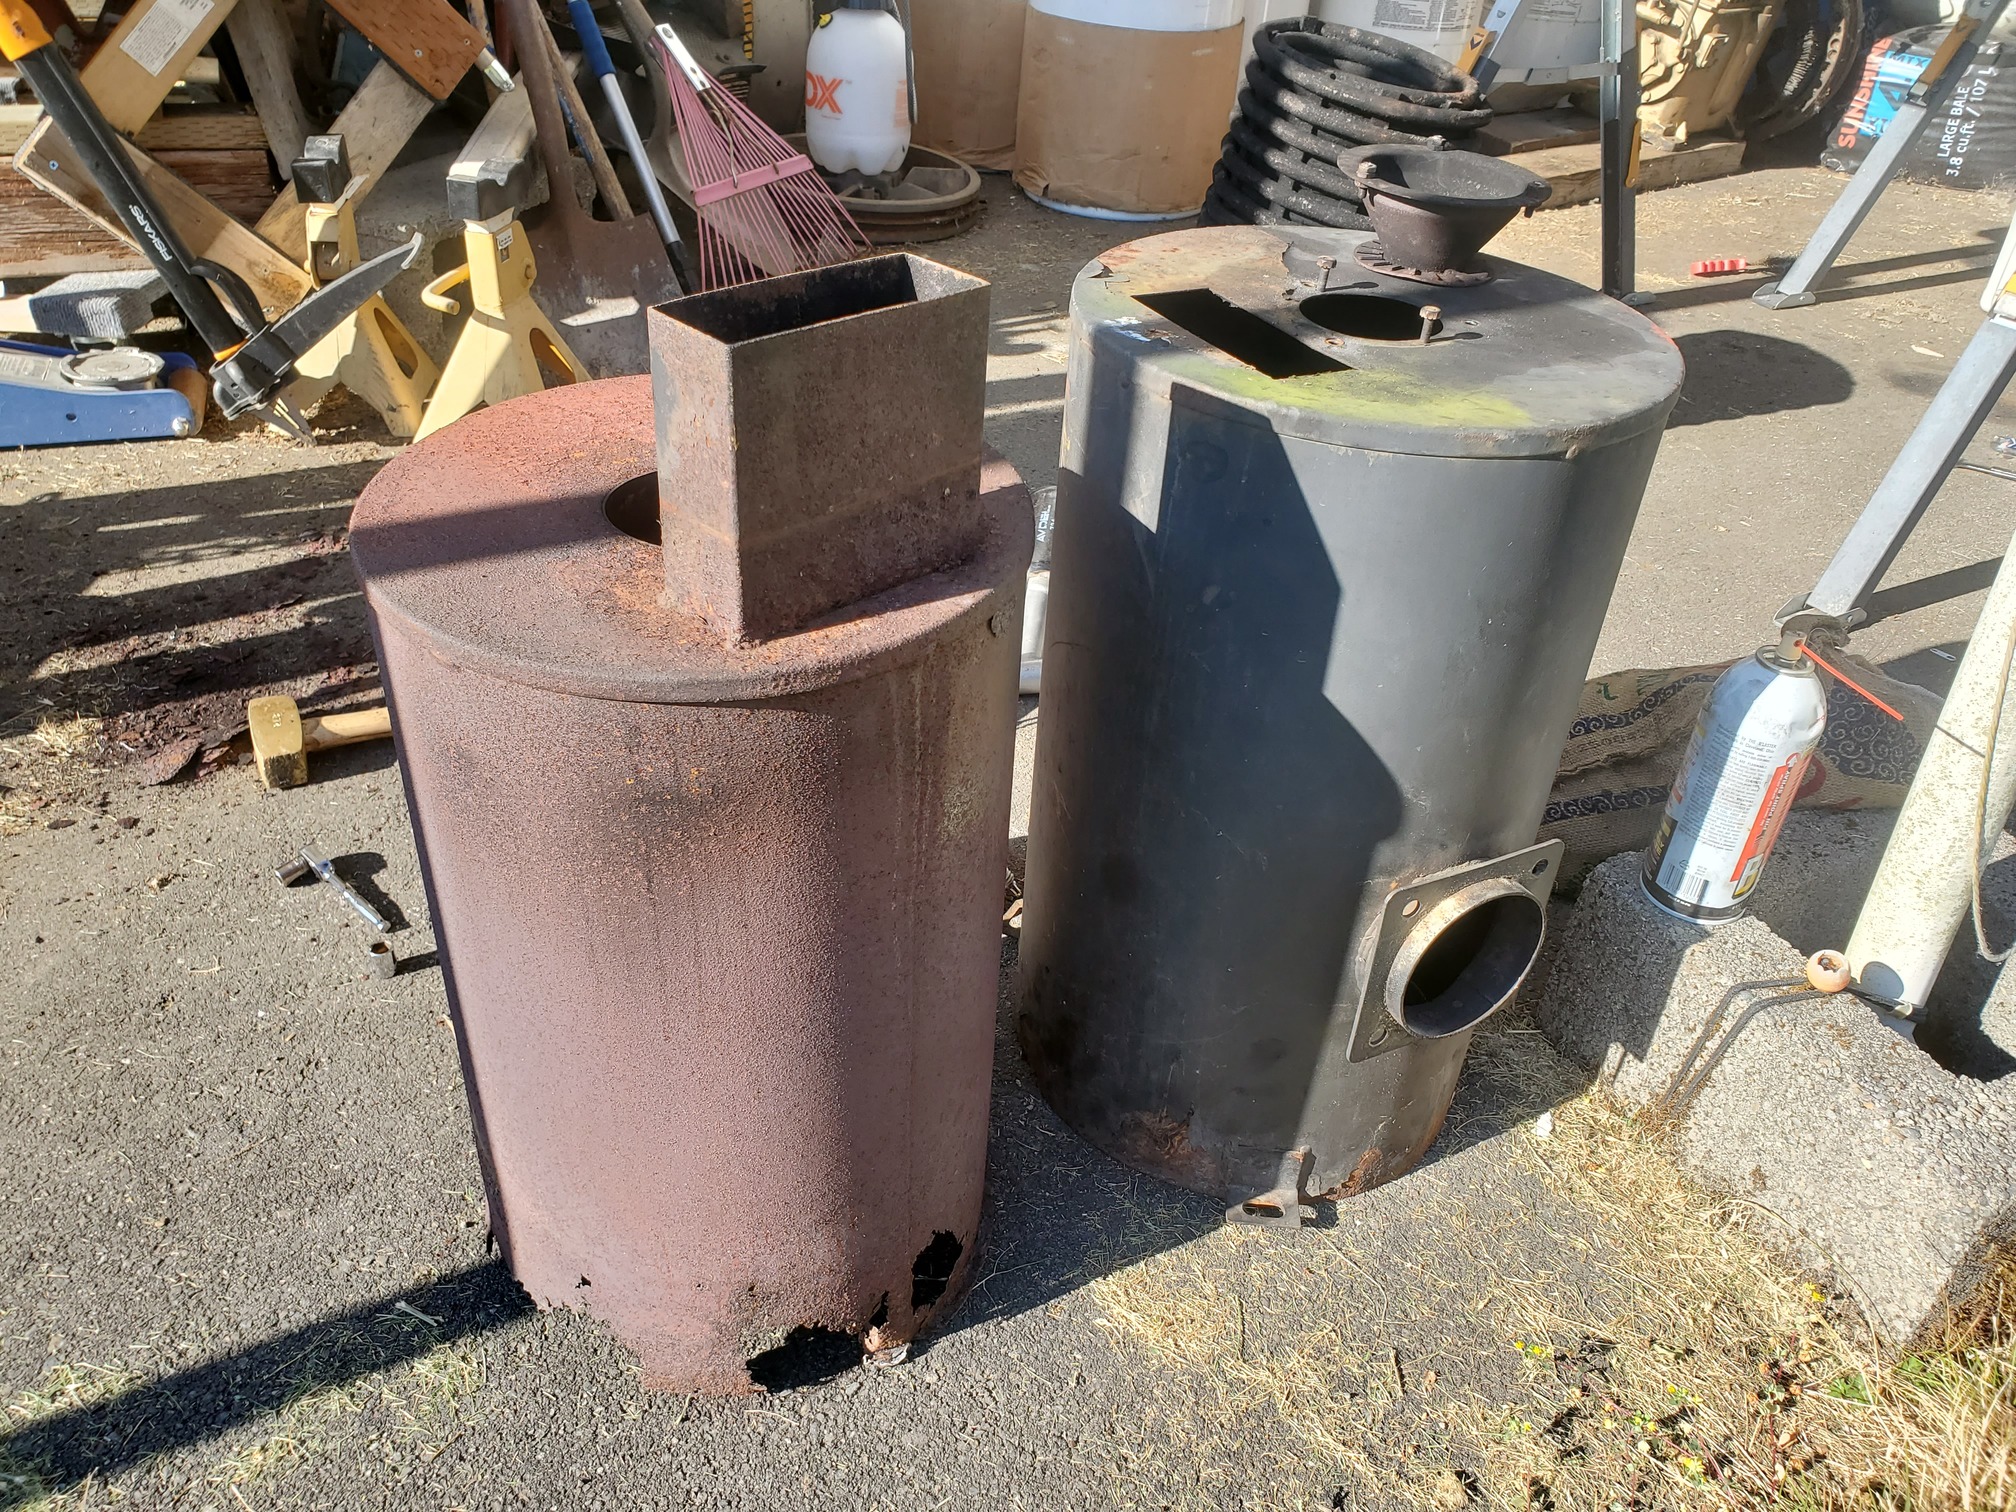
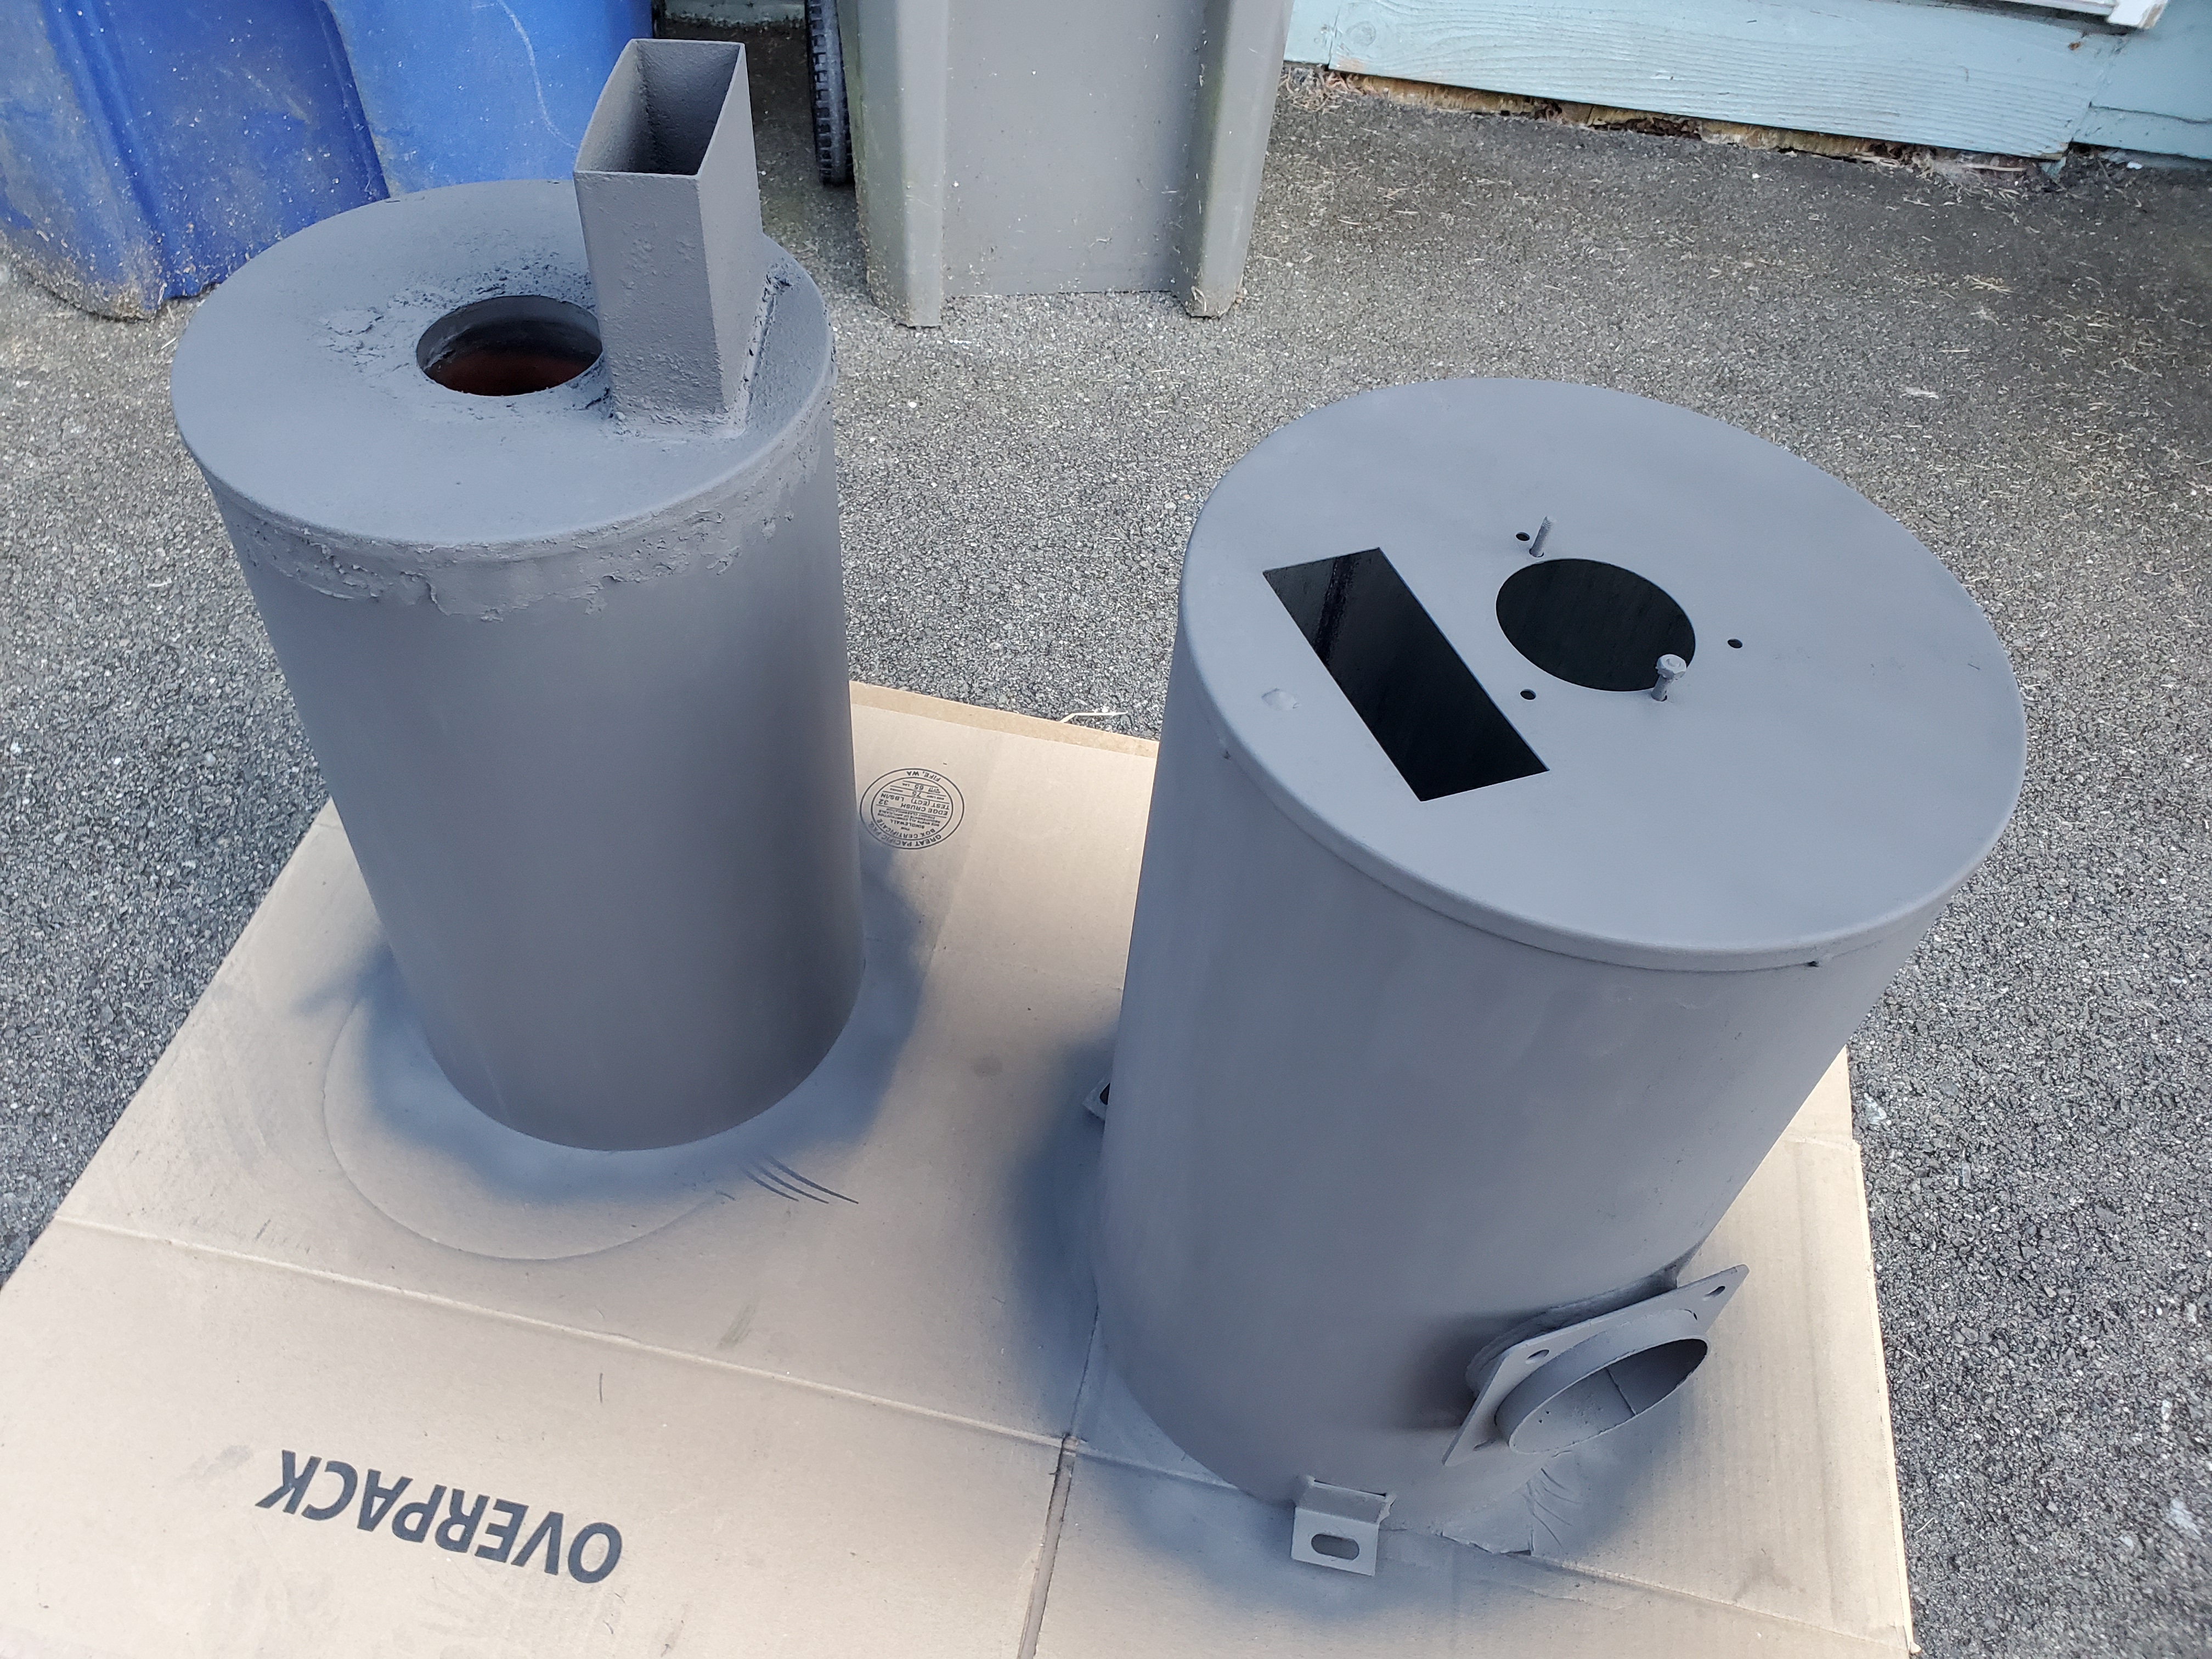
Got the inner and outer burner tank pieces separated.
Cut the top off the inner tank. Hoping to save the top cap and just attach a new body.
2 Likes
Got the outter burner tank wire brushed and treated with phosphoric acid.
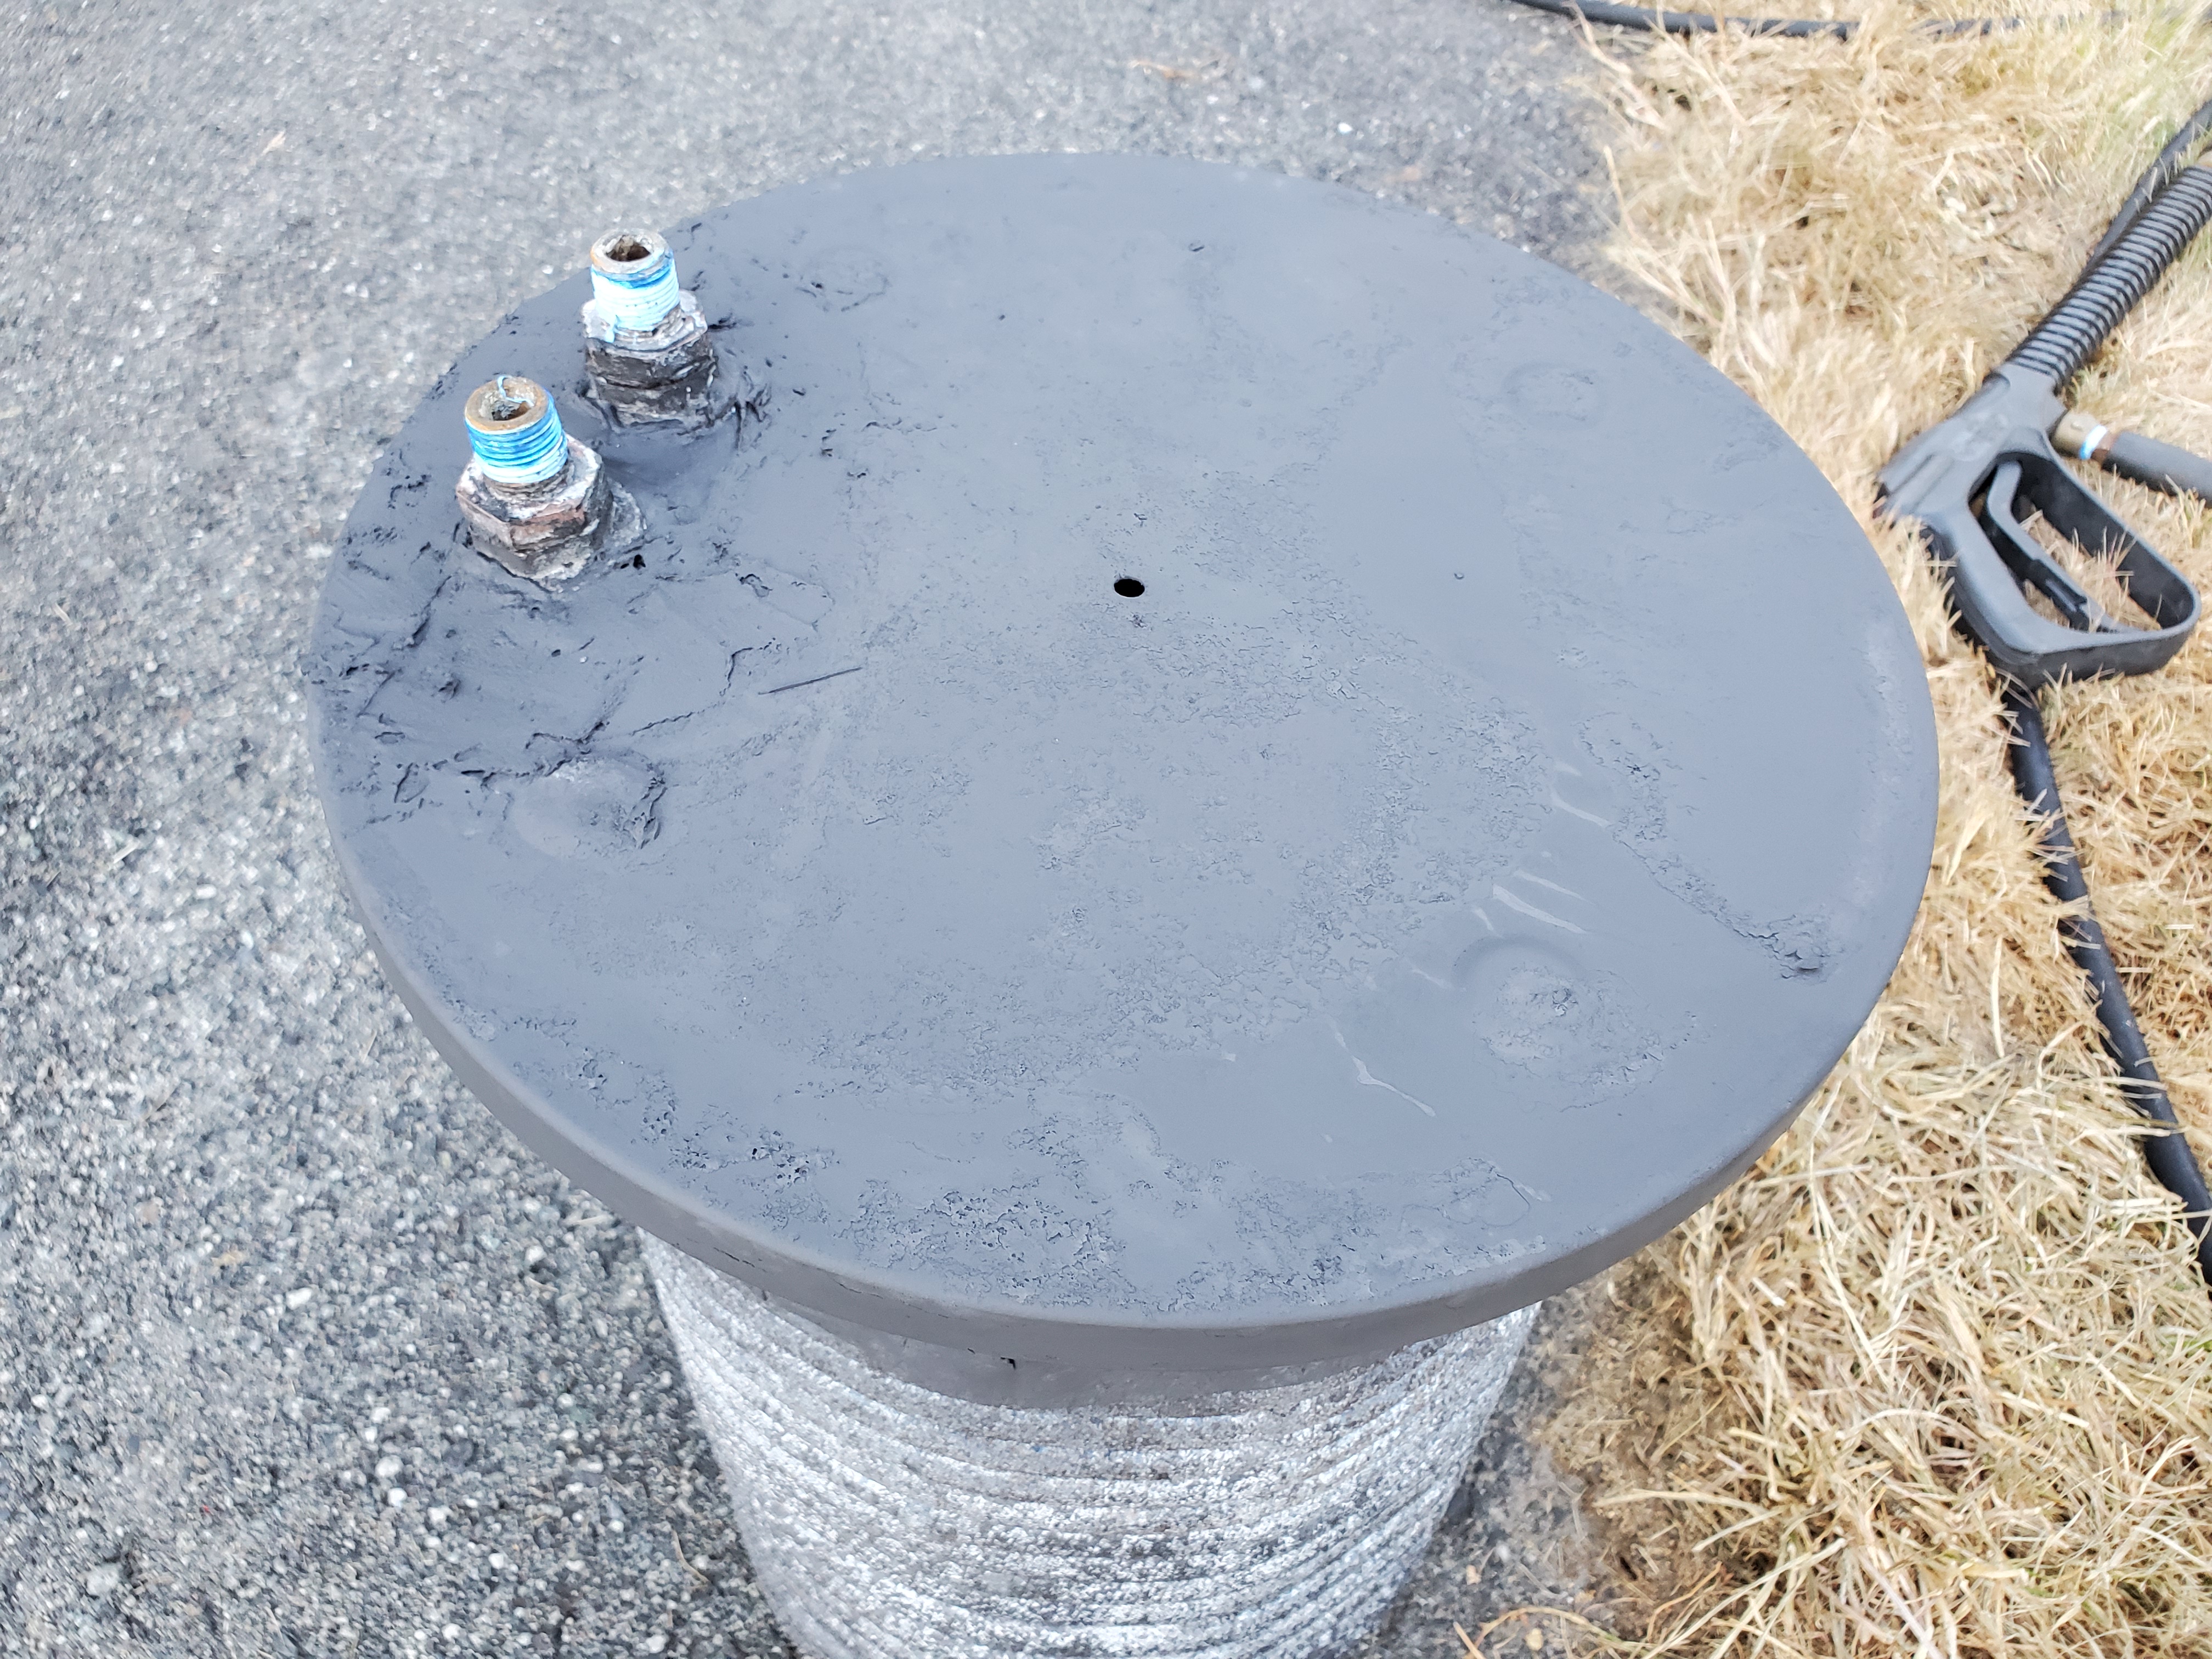
Pressure washed the coil and wire brushed the plate underneath it, also treated these with the phosphoric acid.
Fabricated a new body for the inner tank. I’m using a fireplace gasket cement to seal up all the gaps and seams in the sheet metal, it’s rated to 2000f.
1 Like
Looking good! Did the bottom of yours have any refractory or anything? That old vertical burner I have has about 4" of what I believe is refractory. It might be more to protect whatever is underneath though.
Are the coils in good shape? I would give them a good look over. They look pretty rusted and who knows how long they were overheated.
Yeah there appears to be some sort of insulation under the coil. Looking at the owners manual it does say “flash pan (less brick)” so possibly there is supposed to be some sort of refractory brick in there. Who knows maybe there is brick under that insulation i’m seeing. The flash pan is so rusty i’m afraid to dig too deep or else i’ll be fabricating a new flash pan as well. Maybe I should have called Landa to see what the whole burner tank would cost to replace, but I thought it best to just see if I could get it working before I threw too much money at it.
I should probably have pressure tested the coil right off the bat, but I’ve looked it over really well and don’t see any gaping holes in it, so hopefully it holds up.
I went ahead and rigged up my CAT 310 Pump to the coil, didn’t see any leaks, so i think the coil is good to go for a few more rounds. I painted the burner tanks with BBQ paint. Also patched up the rust holes in the flash pan and painted it as well.
2 Likes
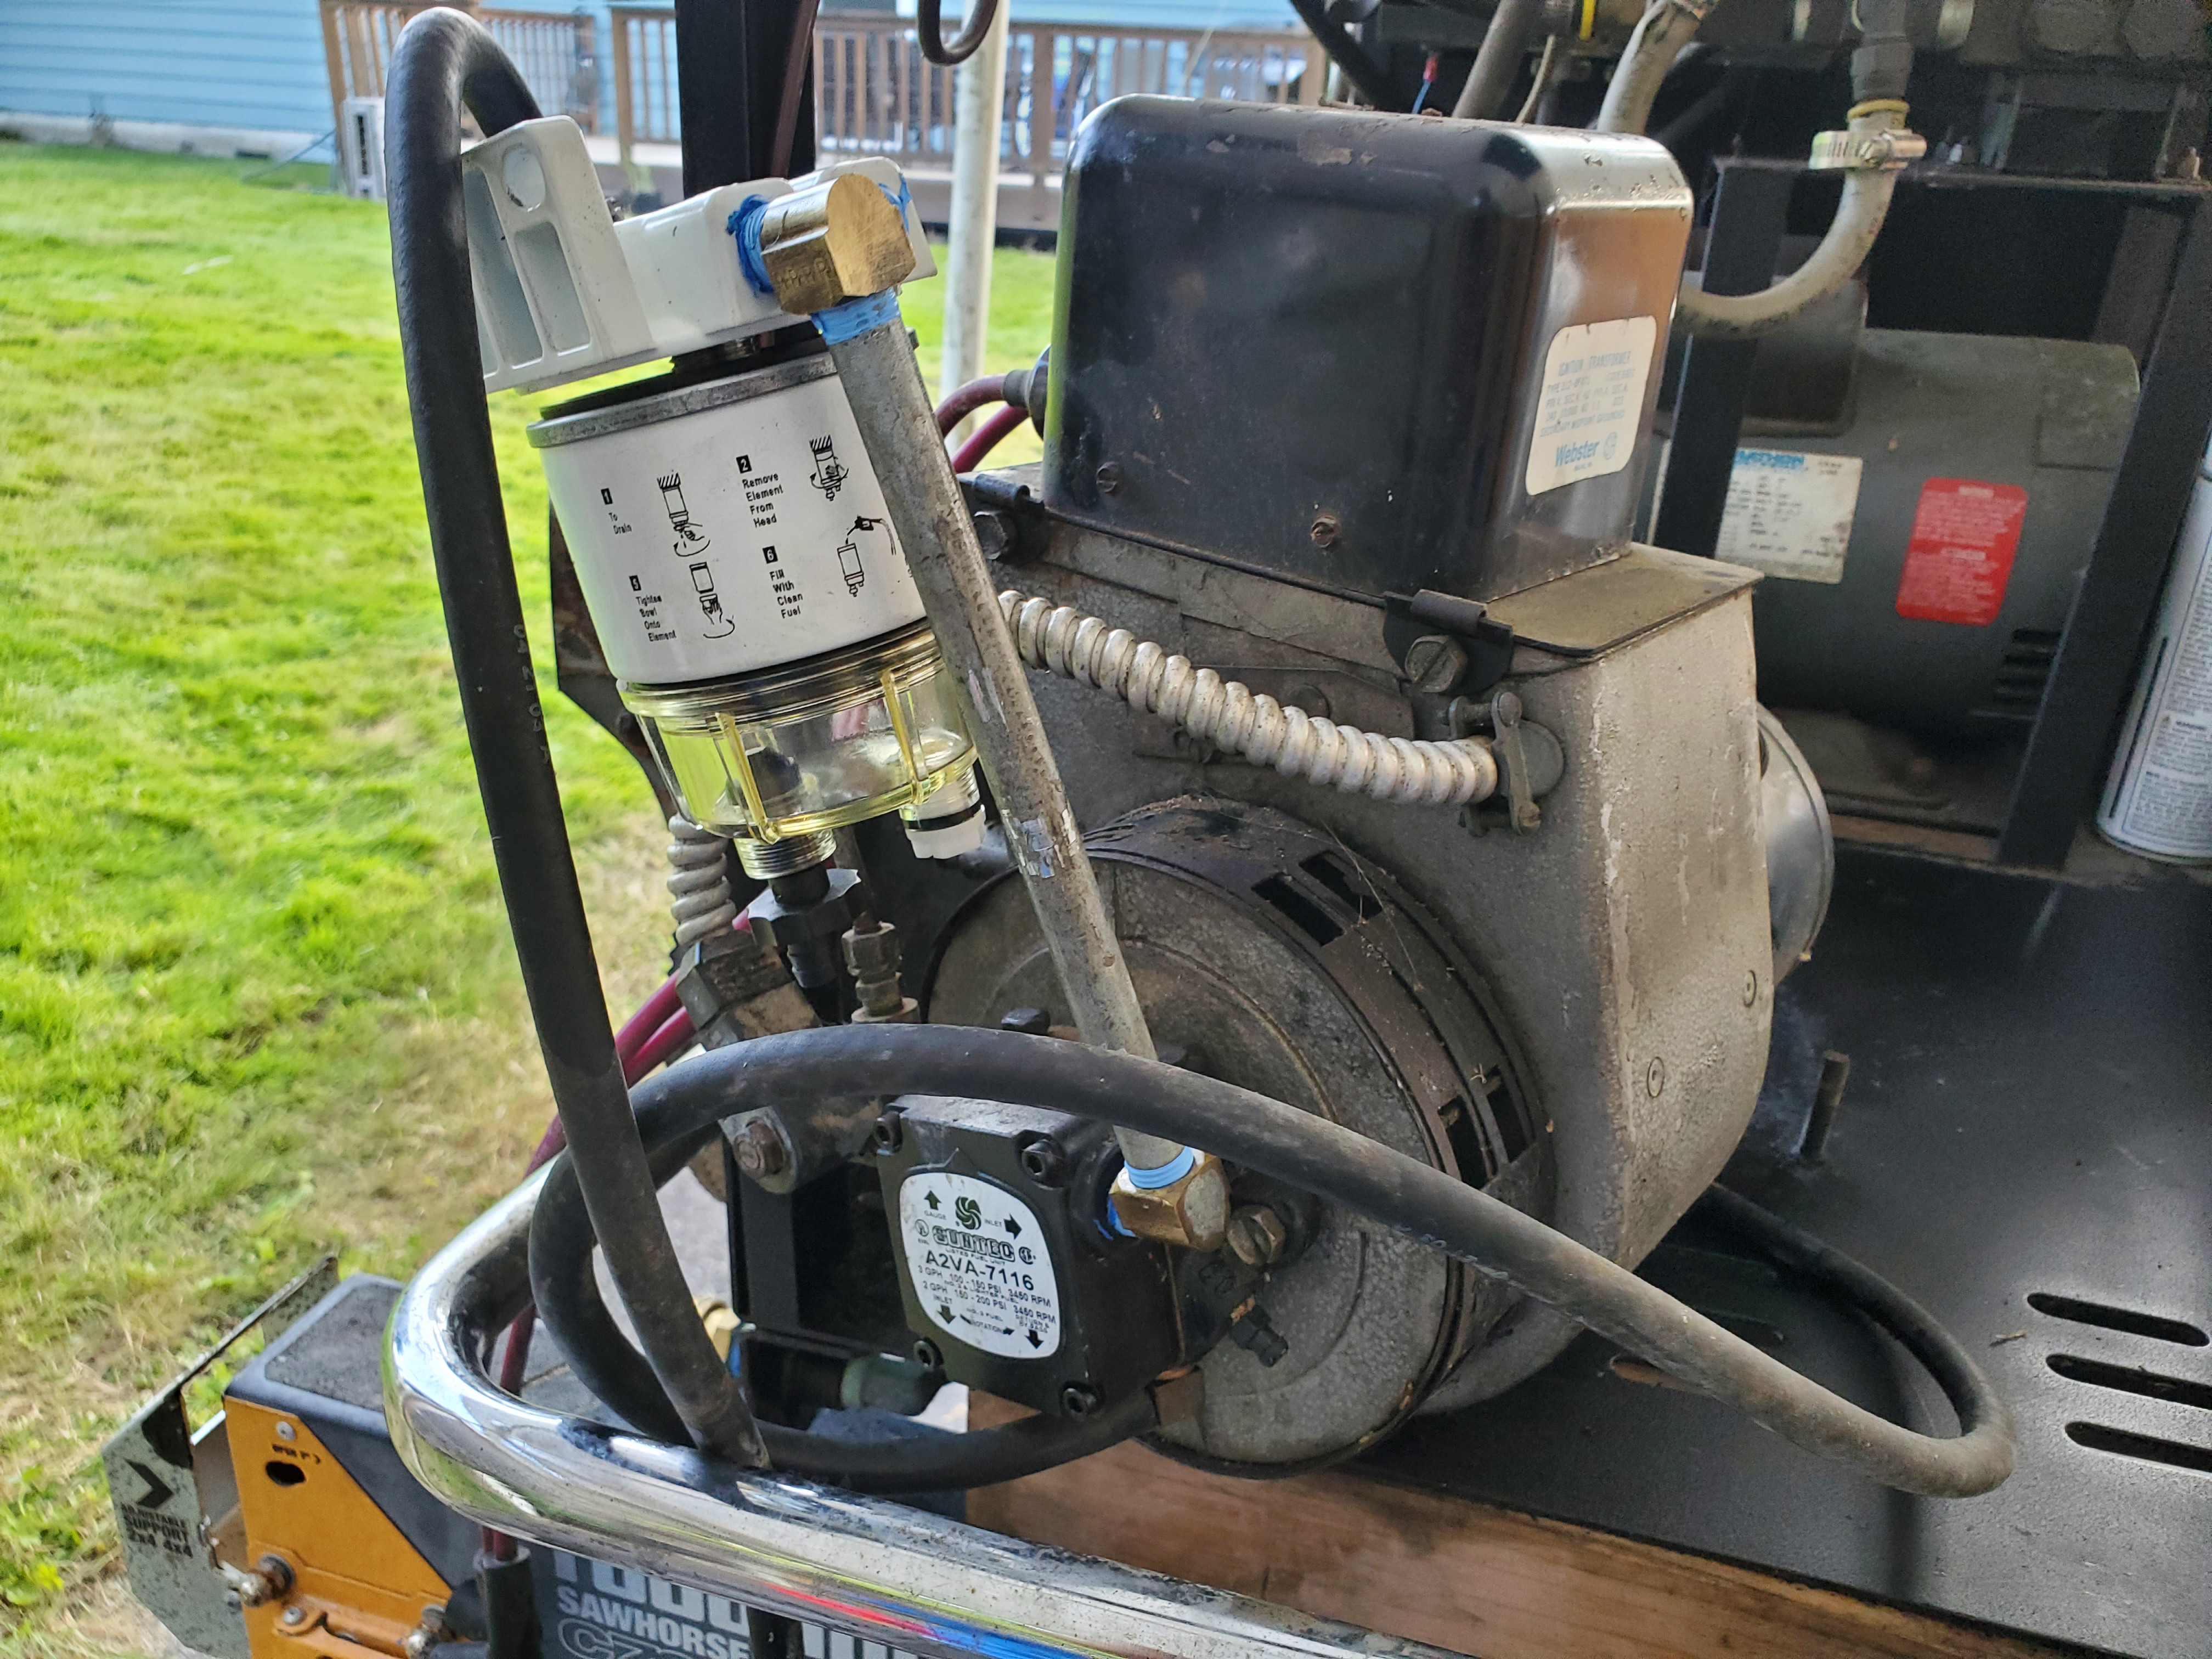
New fuel filter installed.
Replaced screen in the pump. Here’s the old one.
Cleaned up the burner gun assembly and set the electrode gap. Oddly the manual only gives one dimension for the electrodes, 3/16" gap between them, no nozzle offset dimensions.
Also added 10 drops of 3-in-1 oil to the bearing sleeves on the blower motor. The label says to do that every 3 years and I’m gonna guess no one has ever lubed it.
2 Likes
Question for the experts out there… what’s the purpose of having the little float tank built into a unit such as this? I’m thinking of bypassing it and running the garden hose right into the pump, because the float tank is damaged and well, i just don’t see the point of it anyways.
That old machine I have had a float tank too. I’m not sure the point of it either. Maybe to be able to see that you have enough water supply? I took it out too. Be sure to get a good filter to install right before the pump.
Something like this.
https://pressuretek.com/3-4-clear-bowl-water-filter/
1 Like
Ok thanks. On this tank it’s not even possible to see the level inside. It would make sense if it had a float switch to shut the pump off in the event the water level dropped, but it does not.
On those filters, would you reccomend them even on a permanent installation that is plumbed into city water? I suppose the city could do work on the water mains and introduce contaminates into them…
You’d probably be okay without a filter but it’s a cheaper investment than a pump rebuild kit if your luck is anything like mine…lol. If I was in your shoes the day after I got it up and going the city would be doing water main work and somehow accidentally drop 5 pounds of pea gravel into the pipe.
Here’s a cheaper option and you don’t have to order at least $35 worth of product like at that pressure wash store. You can just browse Amazon to find one that works best. The one I linked below uses regular garden hose threads.
https://www.amazon.com/dp/B07XGGVSN9/ref=sspa_dk_detail_2?psc=1&pd_rd_i=B07XGGVSN9&pd_rd_w=5uY1s&pf_rd_p=48d372c1-f7e1-4b8b-9d02-4bd86f5158c5&pd_rd_wg=dWSHx&pf_rd_r=1YRKGXEQ342JE0GKDPSE&pd_rd_r=ac059f1c-ef23-44c8-8b2d-d95c3bd10006&spLa=ZW5jcnlwdGVkUXVhbGlmaWVyPUFCNDRRRUNTSTlaT1EmZW5jcnlwdGVkSWQ9QTA2NjgwNzIzNDc5VzA5V1ZCSTM5JmVuY3J5cHRlZEFkSWQ9QTAxMDkxMDlaWEpBM0dKTTIzNjAmd2lkZ2V0TmFtZT1zcF9kZXRhaWwmYWN0aW9uPWNsaWNrUmVkaXJlY3QmZG9Ob3RMb2dDbGljaz10cnVl
Yeah good call, it’s cheap insurance. I’ve heard those little screens in the garden hose fittings are less than adequate. I’ll go ahead and pick one up.
We’re on the home stretch now! Got the burner all put back together. Just need to fill the tank & filter, then prime the pump. New nozzle won’t be here till Monday but I’ll give the old one a shot in the meantime.
Also bypassed the float tank today.
Tomorrow, I’ll put some water to it and chase down any leaks from the garden hose pressure. I’ll also change the pump oil just for good measure.
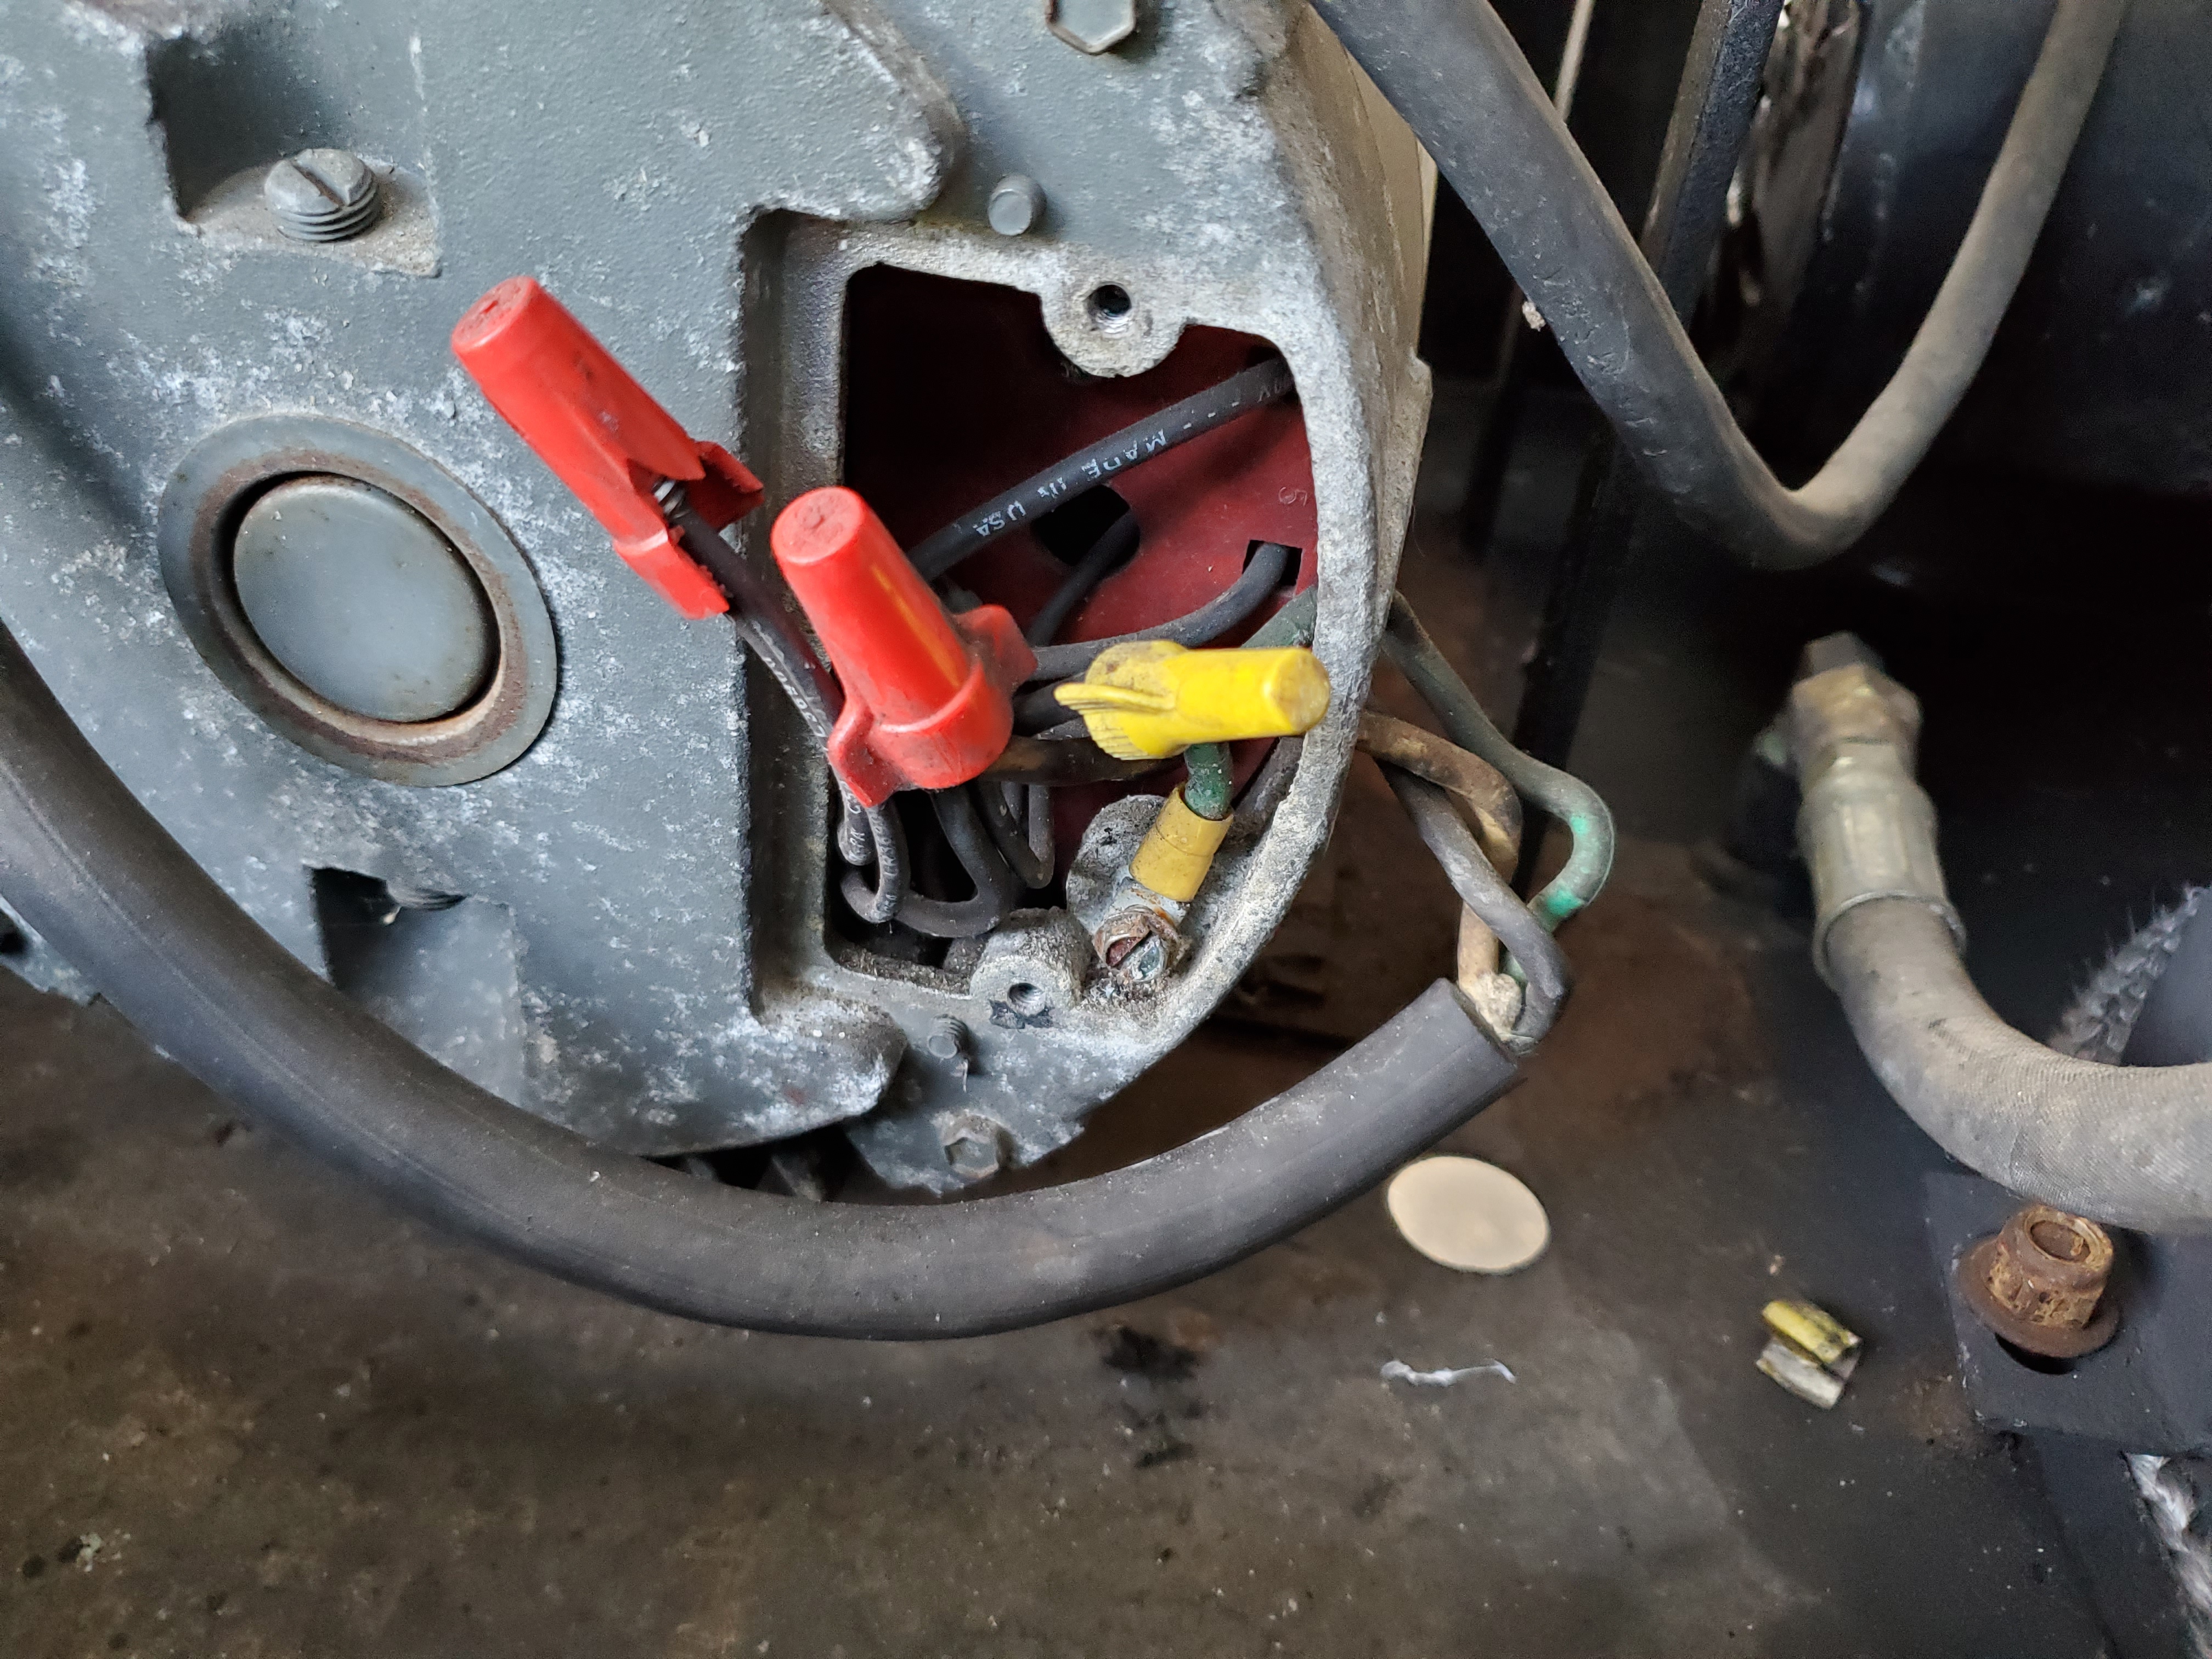
Before I can put power to it I need to tidy up the wiring on the motor, it’s missing the strain relief clamp and has a damaged wire nut.
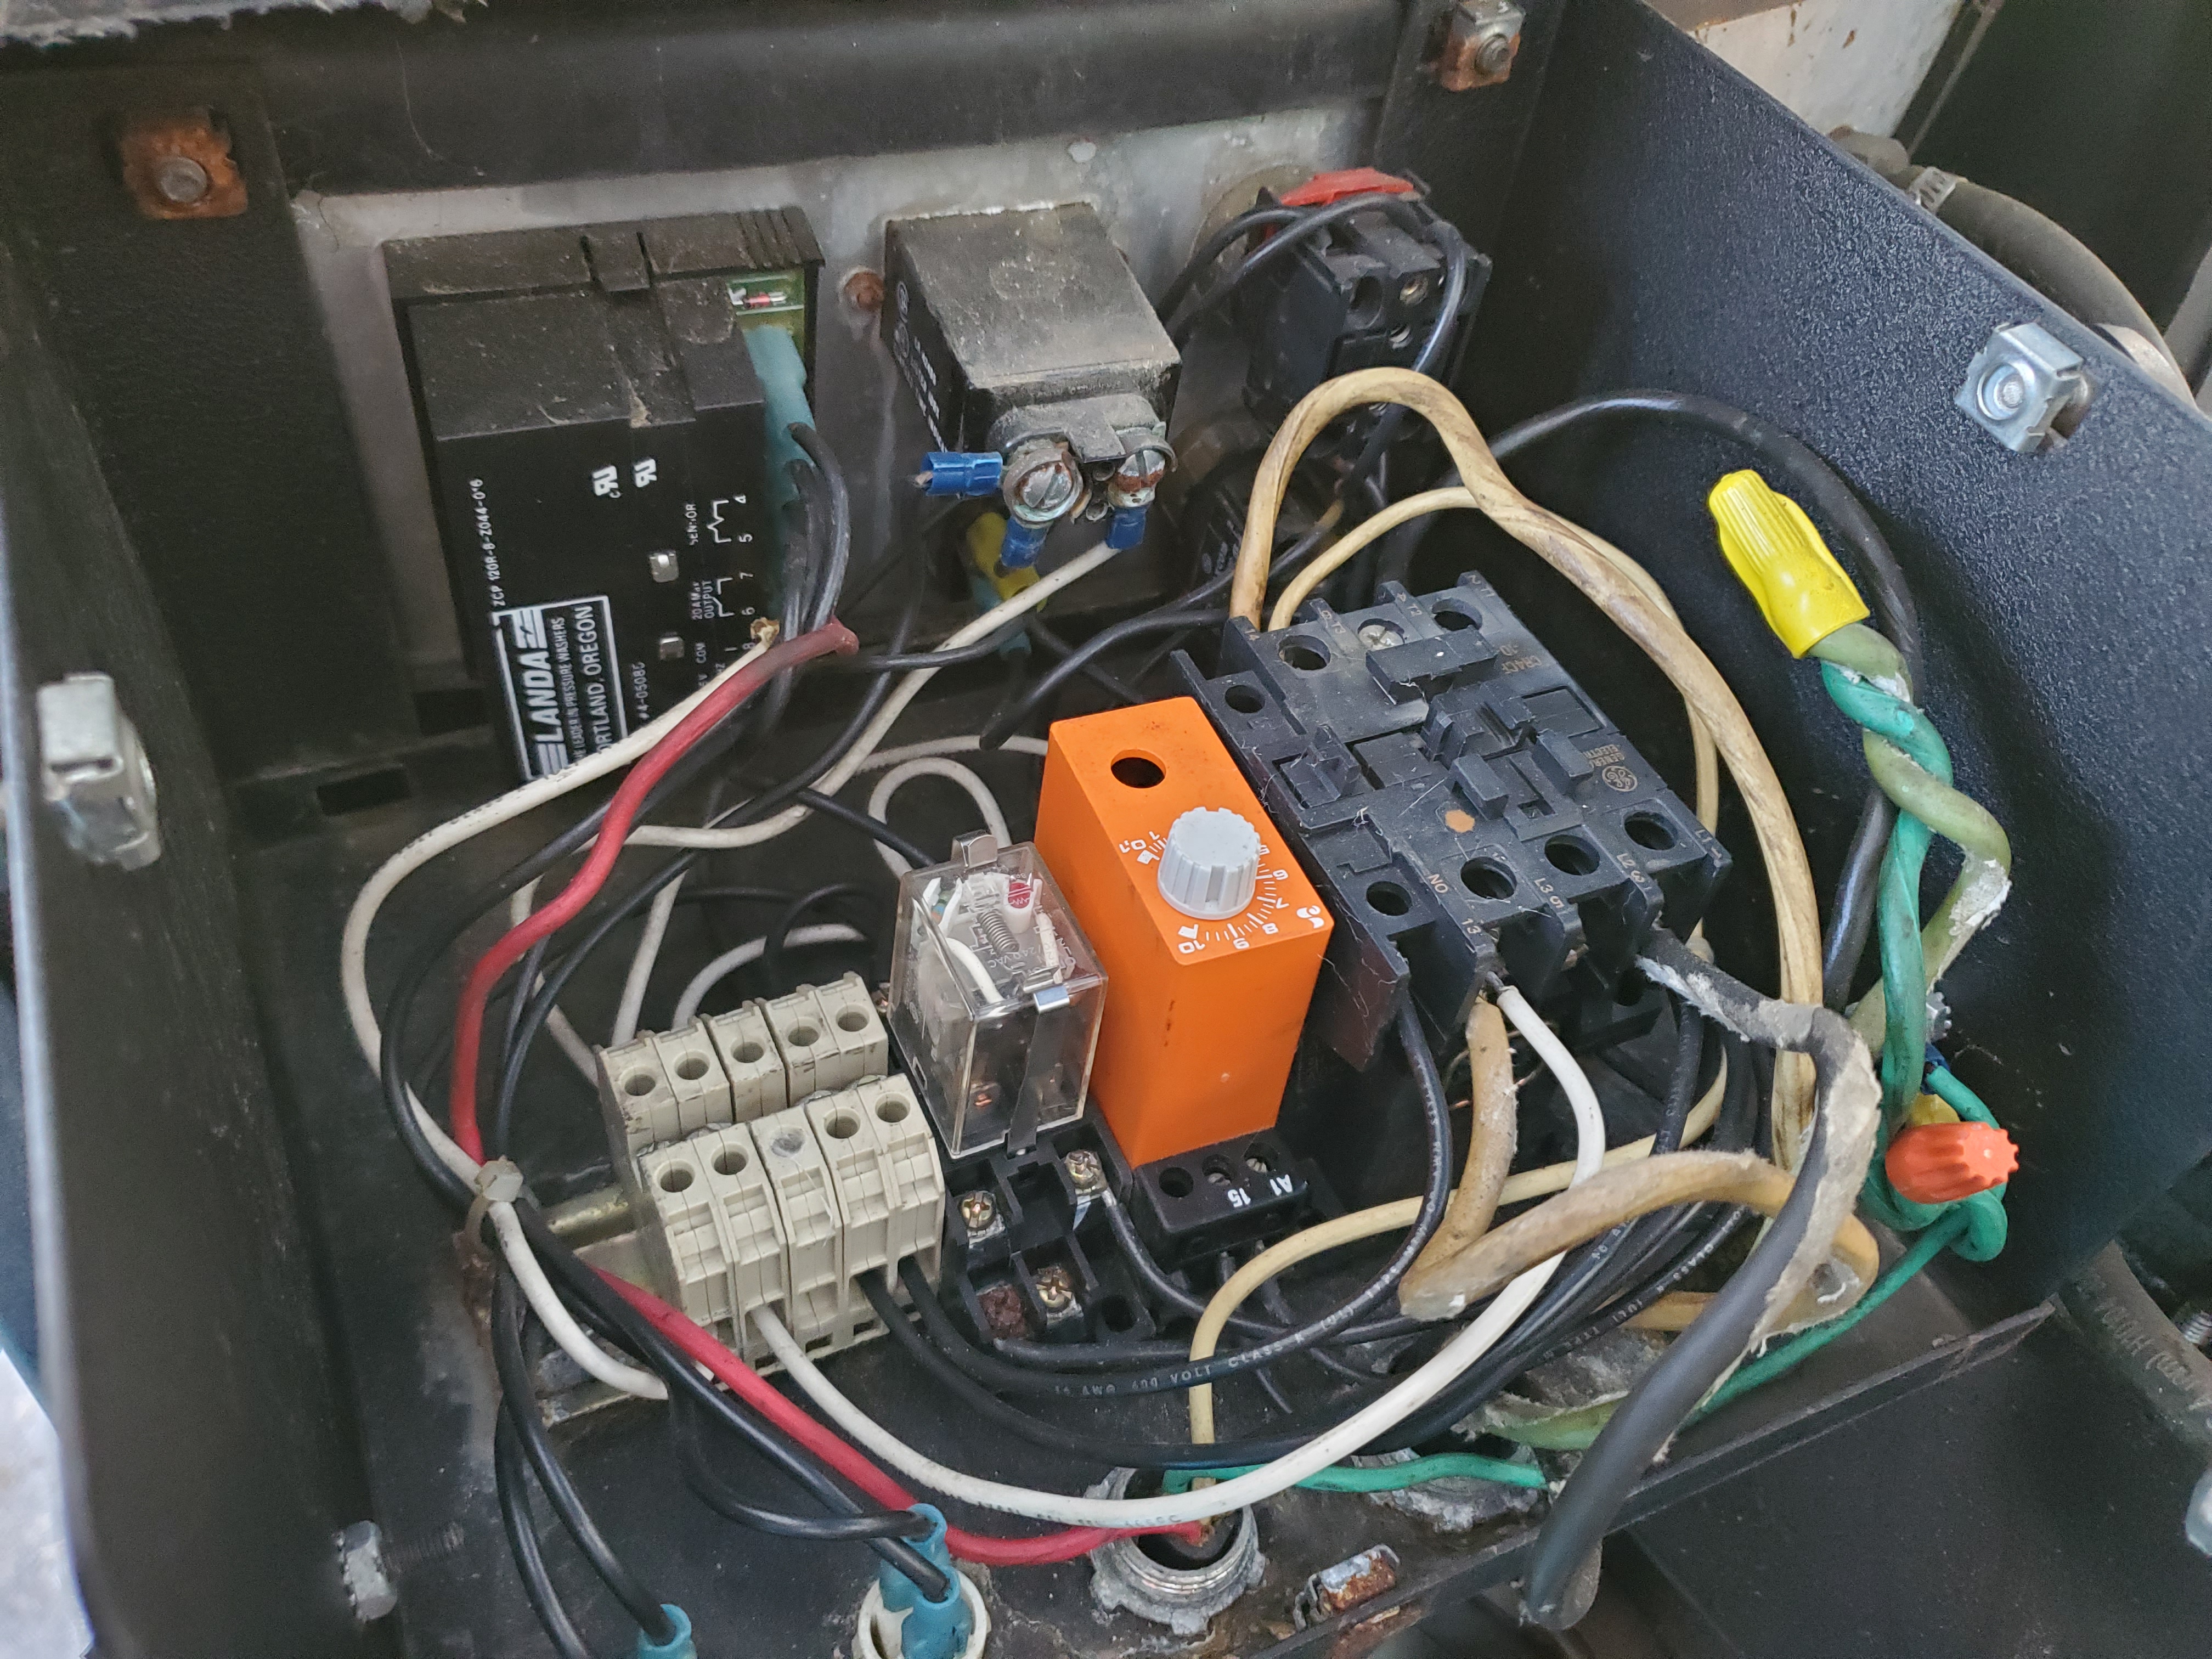
Then I get to figure out how to bypass the thermostat, luckily I’m good with electronics so even though it looks intimidating, it shouldn’t be a problem. I called Landa today and got the new p/n for the thermister, they couldn’t sell me one direct and referred me to my local distributor, who then quoted me something like $320, which I told them is ludicrous. So I’ll be looking for an aftermarket thermostat to retrofit into the control system.
1 Like
Awesome job. The flow sensitive unloader took me by surprise.
Is that an unusual setup to have the flow sensor hooked right up to the unloader like that? I’ve never actually worked on a hot water machine before, so this is all new to me. I did a full rebuild on a Cat 310 last year, that’s my only pressure washer wrenching experience.
I believe that’s your pressure switch plumbed into the unloader. Mine and any I’ve ever seen are plumbed directly into the pump. Unloaders normally fail sooner than pumps and it just adds to the time it would take to replace the unloader. It will still work as designed with your setup.
Edit: Obviously I was wrong and that is a flow sensor as you said. I looked at some pics of electric units and that appears to be standard practice to mount to unloader.